Backing up your Homelab with Veeam

While RAID, ZFS, and other storage technologies do an excellent job of providing redundancy in the case of a drive failure, it is important to remember that redundancy is not a replacement for backups. Instead, it is more of a means to maintain uptime. Because of this, it is important to find a reliable method of backing up your data.
When looking for a backup solution for my lab, I found many different options but ended up deciding to go with Veeam, a feature rich application that makes backing up your lab a breeze. Veeam is able to backup just about anything you can think of, whether it be a Windows PC, a Linux machine, or even a vSphere environment, with all of the VMs tied to it. Better yet, Veeam has a free tier, which will let you try it out and backup up to 10 machines!
In today's article, I'm going to show you not only how to install Veeam, but also how to configure it to backup your ESXi VMs tied to a vSphere instance.
Prerequisites
While the vast majority of my lab is running Linux, Veeam is one of the few applications I'm forced to run on Windows. That's right – while it can backup just about anything, client wise, the actual server only runs on Windows at this time. For that, you will need to have a (preferably dedicated) Windows machine to install the application on.
For my setup, I'm using an old Dell PC, stationed offsite but connected via Wireguard VPN, and tied to a USB hard drive that stores my backups. No, this is not the most flashy backup server but I had the hardware on hand, it sips power, and gets the job done with ease.
Installation
Step One:
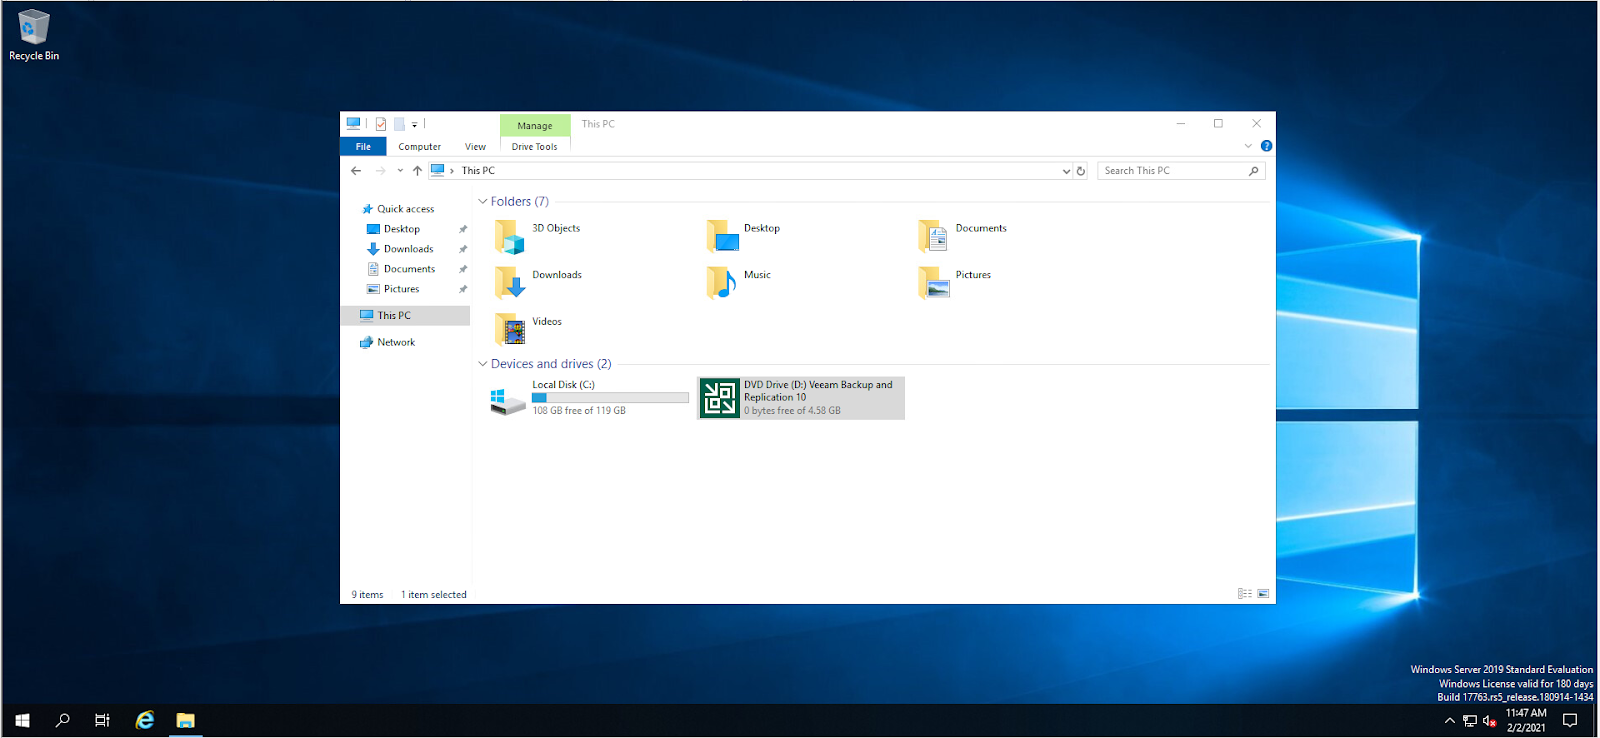
To start, visit Veeam's Community Edition site here, where you'll find the installer you need to get up and running. Unlike the traditional .exe installers that you may be used to, this will need to be mounted as an image
Step Two:
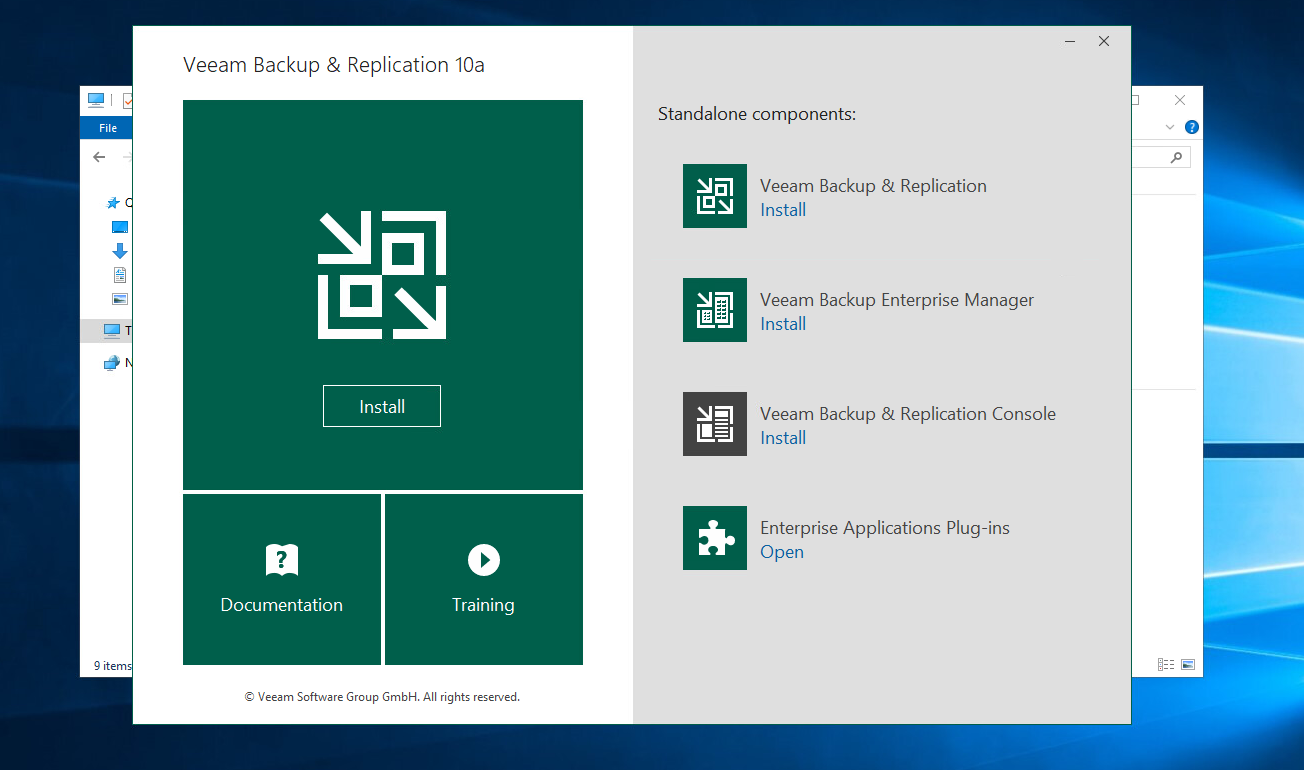
After opening the installer, you will be presented with the following screen. For our purposes, simply click the main "Install" button on the left-hand side to initiate the installation process of Veeam Backup & Replication.
Step Three:
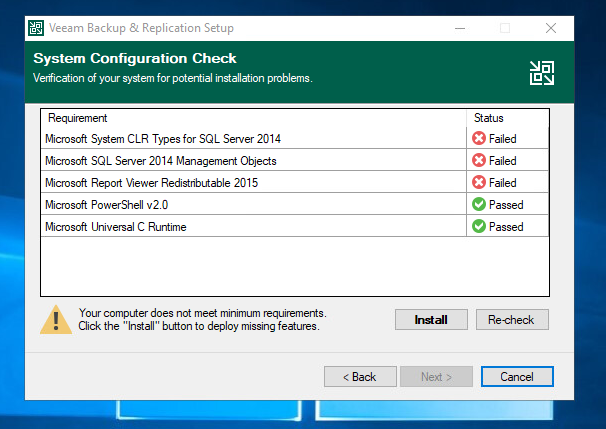
After agreeing to the EULA, you may be presented with a message similar to the one displayed above. Veeam is letting you know that there are dependancies missing that will need to be installed before the installation process can continue. Simply click "Install" for the installer to handle this for you.
Step Four:
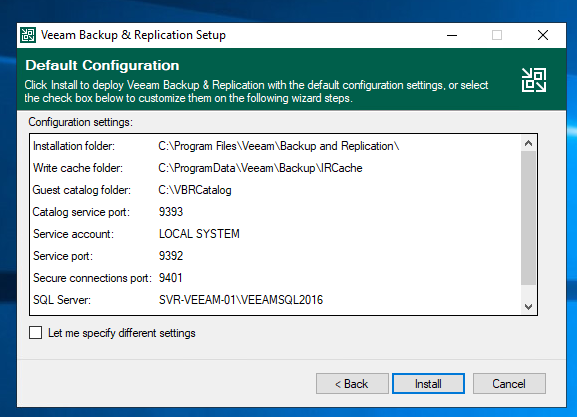
Once the dependancies are installed, Veeam will suggest various settings to be used in the installation process. For my purposes, the defaults worked well.
Step Five:
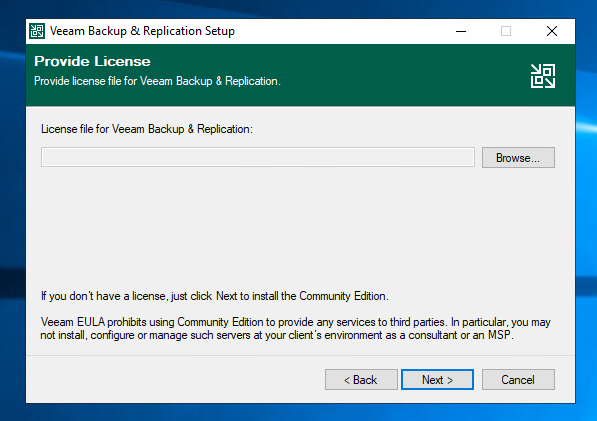
Here you will be prompted to provide a license key. Assuming you're using the free Community Edition, there is no need to provide one and you can proceed by clicking "Next".
Step Six:
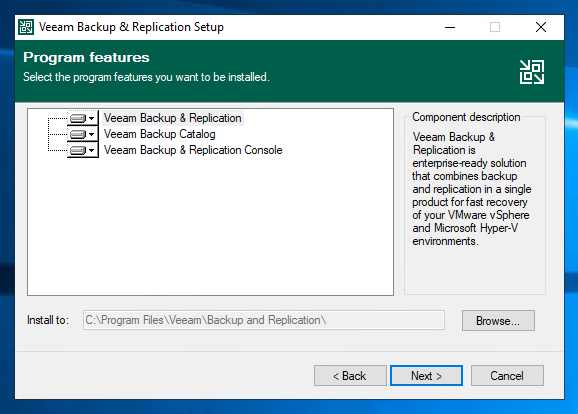
Veeam will offer various program features at this point of the installation process. I left these as the default values and moved to the next step.
Step Seven:
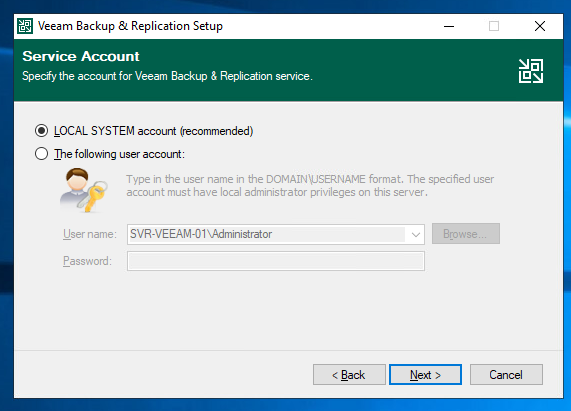
This step will allow you to configure which account Veeam is installed under. As you can see, it is suggested that you use the local system account and that is what I used for my installation.
Step Eight:
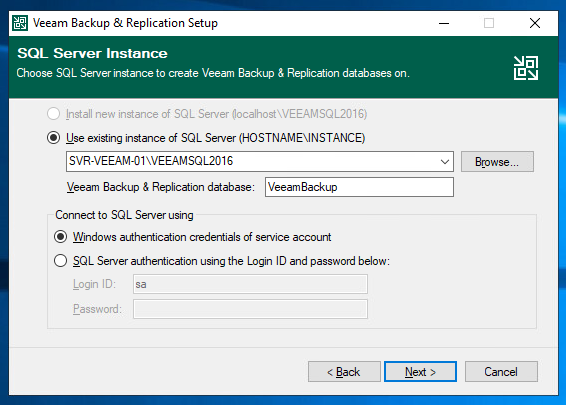
At this point in the installation process, you will be prompted to configure a SQL Server instance to point Veeam towards. Luckily, leaving this as the default values will take care of it for you.
Step Nine:
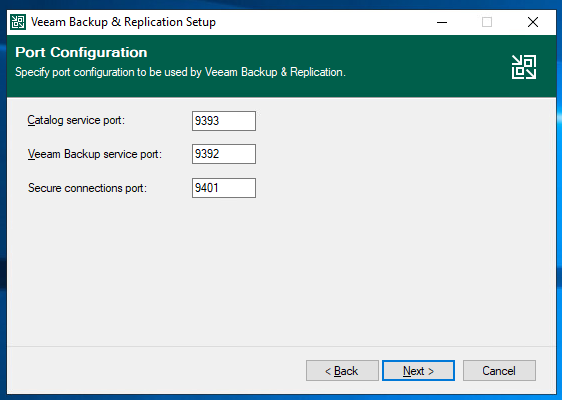
Now you will configure the ports that Veeam operates on. Leave these as the default values.
Step Ten:
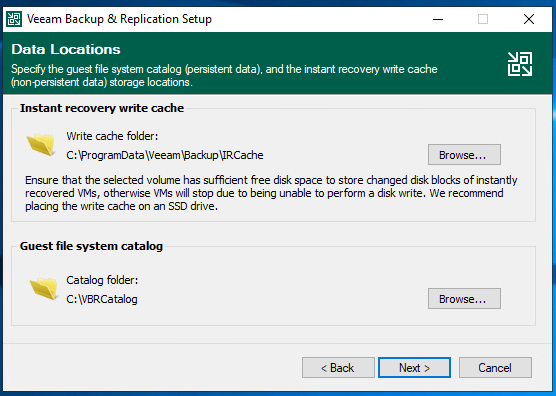
Again, leave these as the default values unless otherwise needed.
Step Eleven:
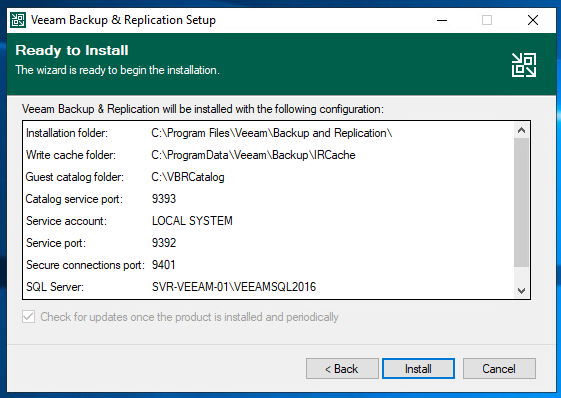
Using the input from the previous steps, you are now ready to finalize the installation process by clicking "Install".
Configuring Veeam
You are now ready to configure Veeam to backup your vCenter/ESXi VMs
Step One:
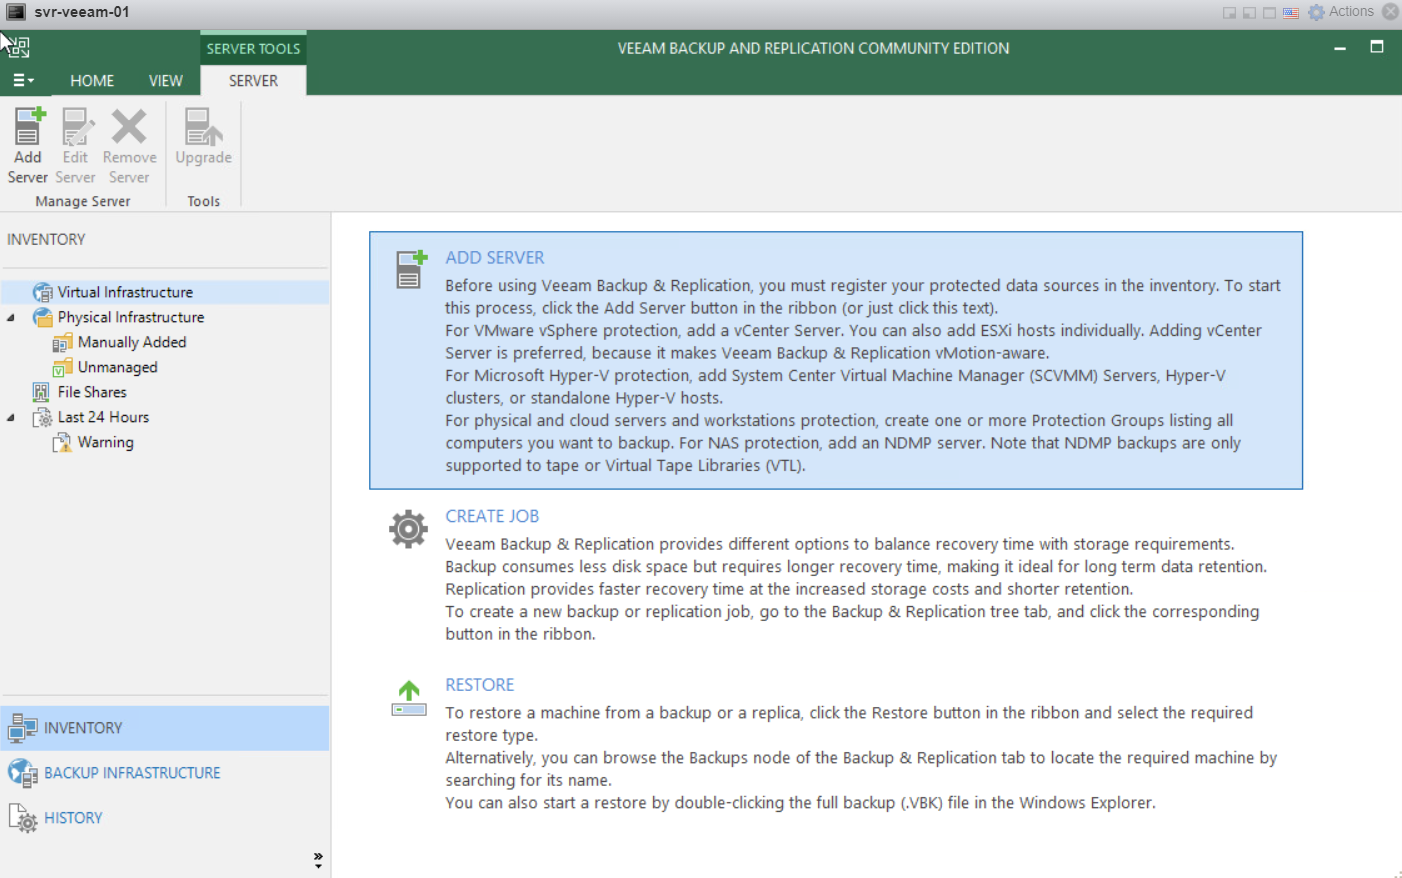
After launching the application, you will be provided a handful of basic configuration tasks that can be done. Let's start with "Add Server".
Step Two:
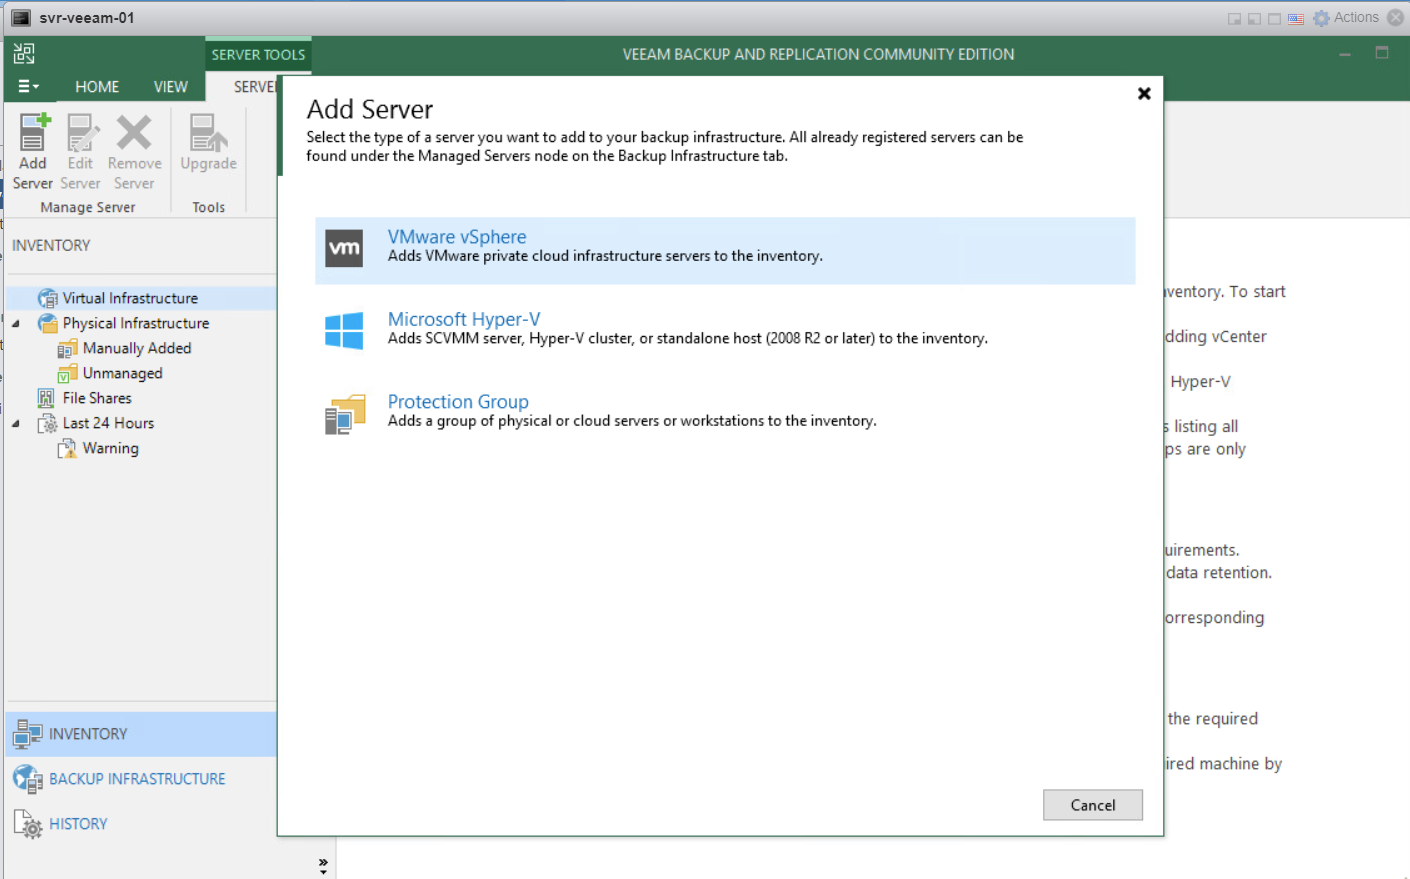
Here you can choose what type of server you'd like to back up. For my lab, I tend to stick with VMWare, so I chose the top option.
Step Three:
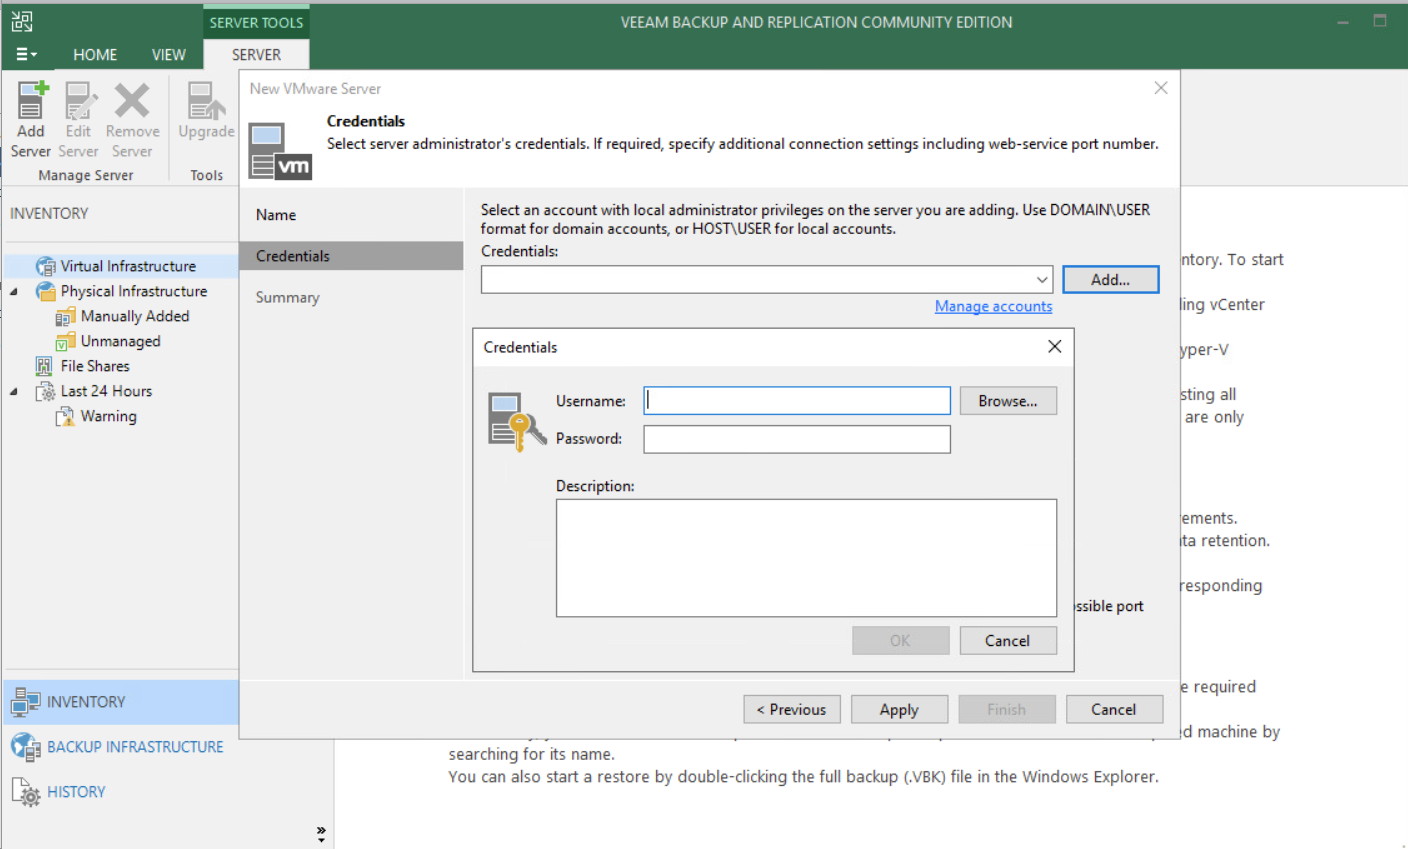
You will now need to provide the credentials to a vCenter administrator account for Veeam to access your vSphere environment.
Step Four:
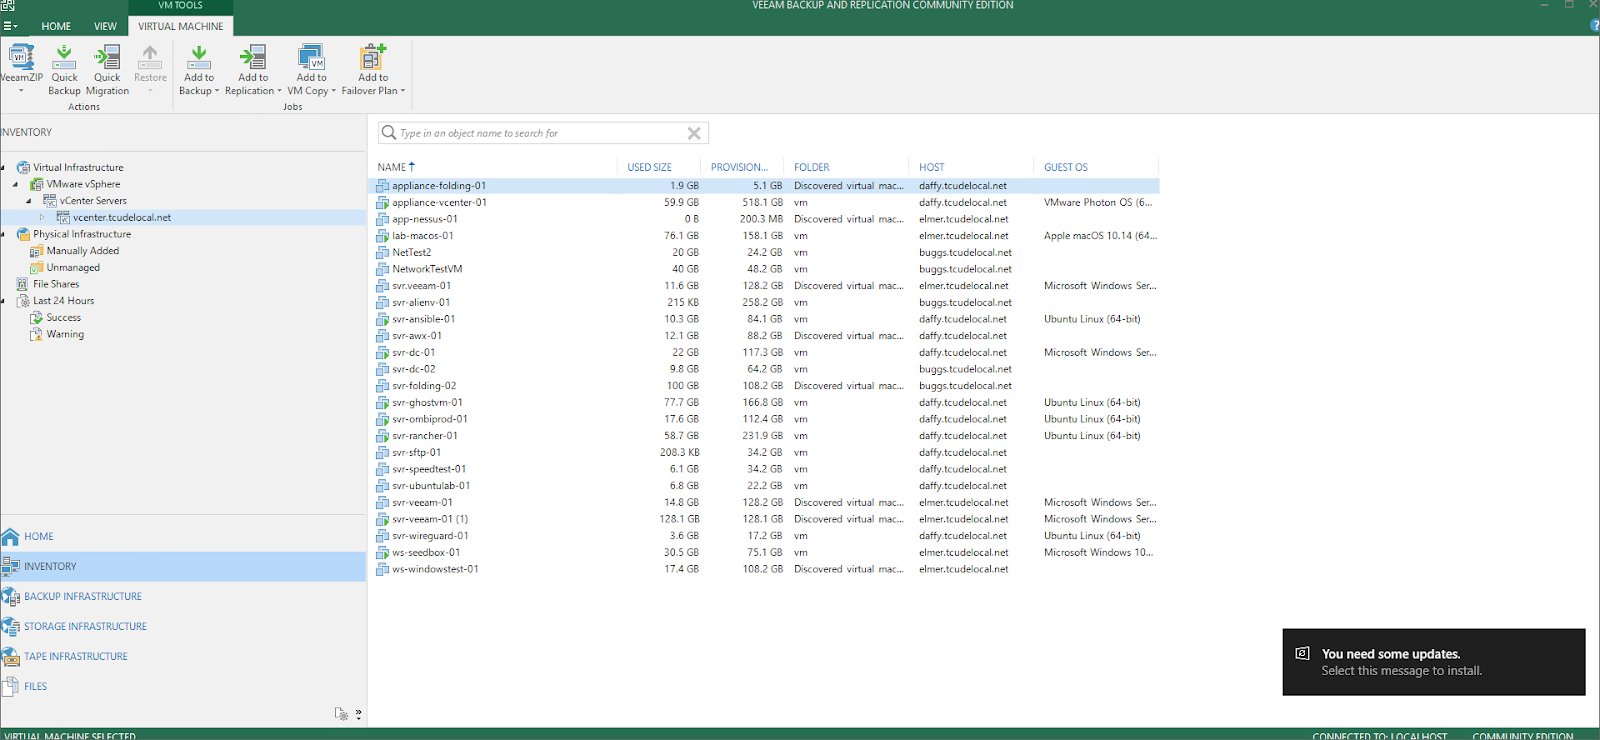
After providing the necessary credentials, you will now be able to see all of your VMs
Creating a Backup
I will now demonstrate how to create your first backup in Veeam. It's worth noting that you'll need to first create a backup repository to point the backup towards.
Step One:
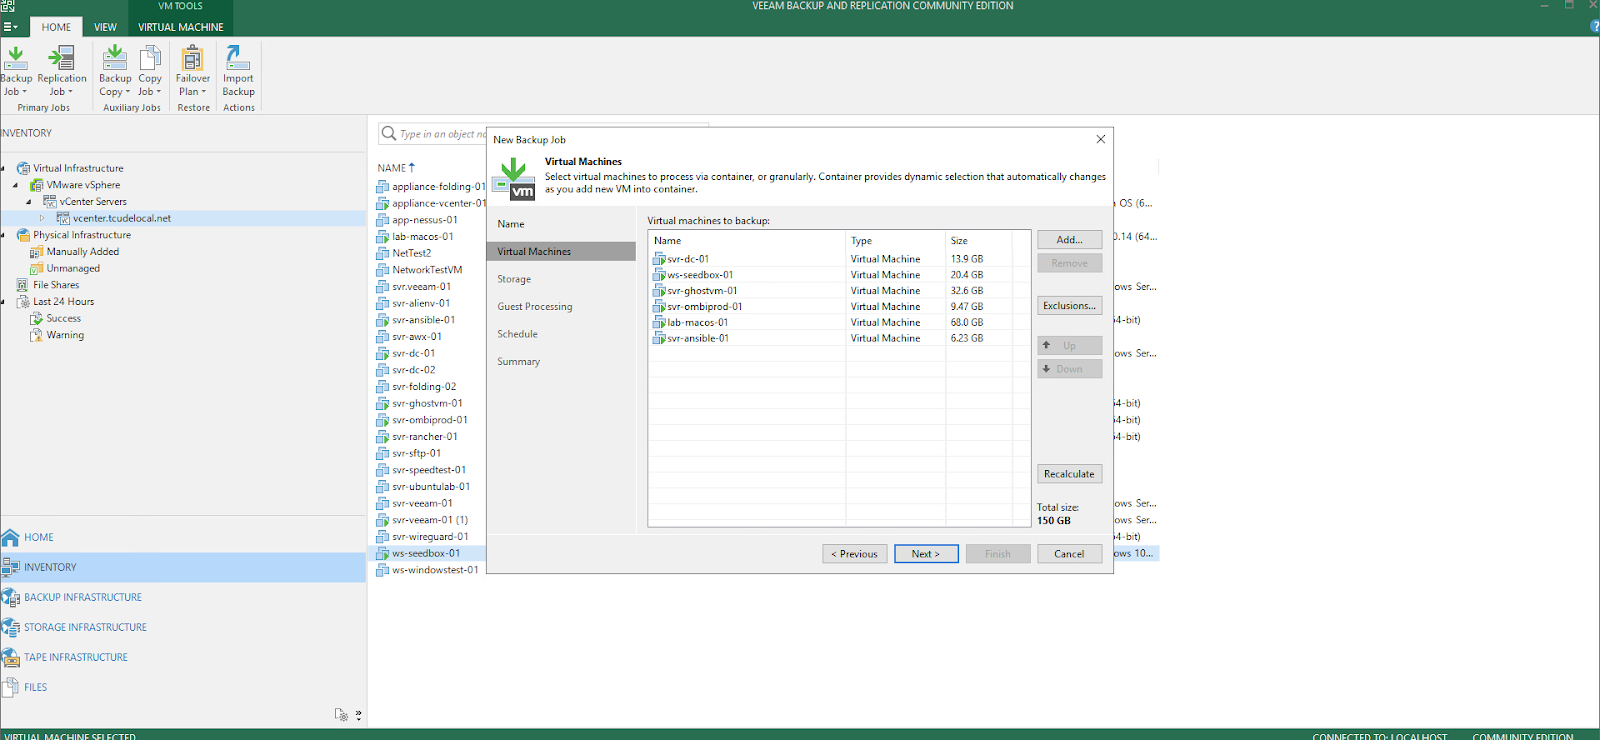
With your vCenter appliance selected, click on the "Backup Job" option in the top left to be greeted with the screen shown above. Initially, you won't see a list of VMs, like you do in the image above, and will need to click "Add". Doing so will provide you with a list of all of your VMs and will allow you to select which ones you'd like to have backed up. Afterward, you should see something more similar to the image above, with your selected VMs shown in a list.
Step Two:

Next, you will need to choose where you want this backup job to be stored. I've chosen my external USB hard drive, which I set up as a backup repository using these steps.
Step Three:
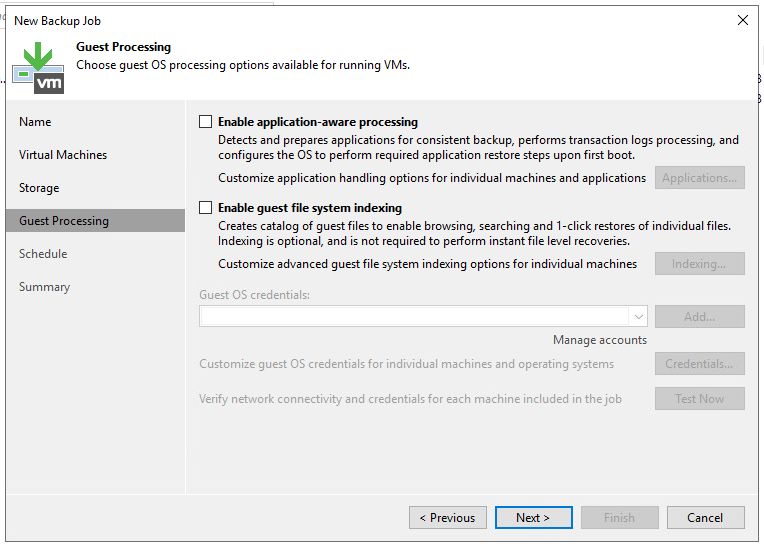
I chose not to use any of the functionality on this step but feel free to if it's beneficial for your setup.
Step Four:
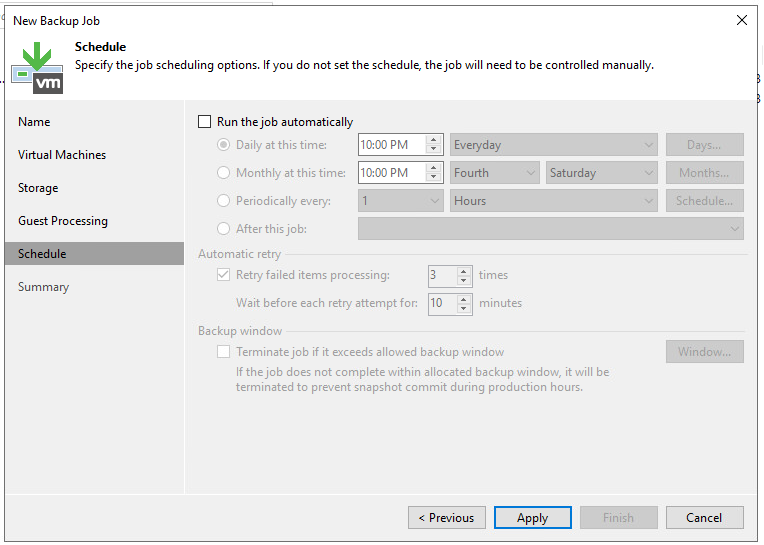
Here you are given the option to schedule your backup to occur automatically at various intervals of your choosing – something I'd encourage you to do. I have mine set to run every few hours. One of the great things about Veeam is that is will only backup the new/changed data each time the backup job runs, rather than the entirety of the VMs. This minimizes what is actually having to be transferred.
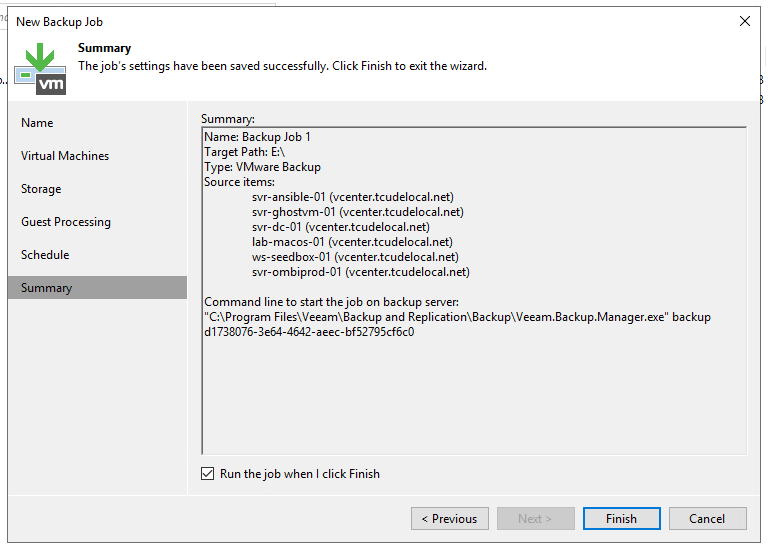
And with that, you have your first backup job created! You now have an extra layer of protection, should something happen to any of your virtual machines.
I've made use of this several times in the few months that I've been using Veeam and, whether it was me accidentally deleting a VM off of my server, or even something as simple as me wanting to rollback changes I made without snapshotting first, Veeam has made the process painless.