Changing LAN Subnet in Unifi


I've been hanging out a bit more at my a friend's house in my free time and have been dealing with a pretty irritating issue for a while now. When tunneling back to my home network while on her network, I've been able to successfully establish a connection with my lab but have been unable to communicate with or SSH into any of my devices. After a bit of digging, I realized this was due to both of our networks being on the same subnet. While Windows 10 devices seem to be smart enough to force all traffic through the tunnel, devices such as my iPad Pro and my friend's MacBook Air would not, resulting in timeout errors on any attempt to connect to my servers.
Now, you might be thinking, it would be very easy to simply change the subnet that my friend's network operates on, and you'd be right in saying that. I felt that this would be more of a short-term fix, though. While it would enable me to establish a tunnel while on her network, there's a good chance I could face the same issue on other home networks in the future, as it's fairly common for them to be on 192.168.1.1/24.
My solution to this issue was to just go ahead and re-subnet my entire network. While this was quite the endeavor, I feel that it'll ultimately be worth it just due to the long term flexibility it will allow.
If you're using Ubiquiti products for your home network and want to re-subnet off the typical home network subnet of 192.168.1.1, follow along in the instructions below!
Prerequisites
Please note that before beginning this process, you must clear out any static IP addresses configured within the Unifi controller. If you don't complete this process, you'll encounter errors later on. This was probably the most time consuming part of this entire process for me but I found it helpful to visit the "Insights" tab in the Unifi dashboard to view all static IPs that I had assigned.
Configuration
To start, we'll visit the settings panel within the Unifi controller and select "Networks", which will then bring you to this page:

Next, select "Edit" on your LAN network, which will bring you to this page:
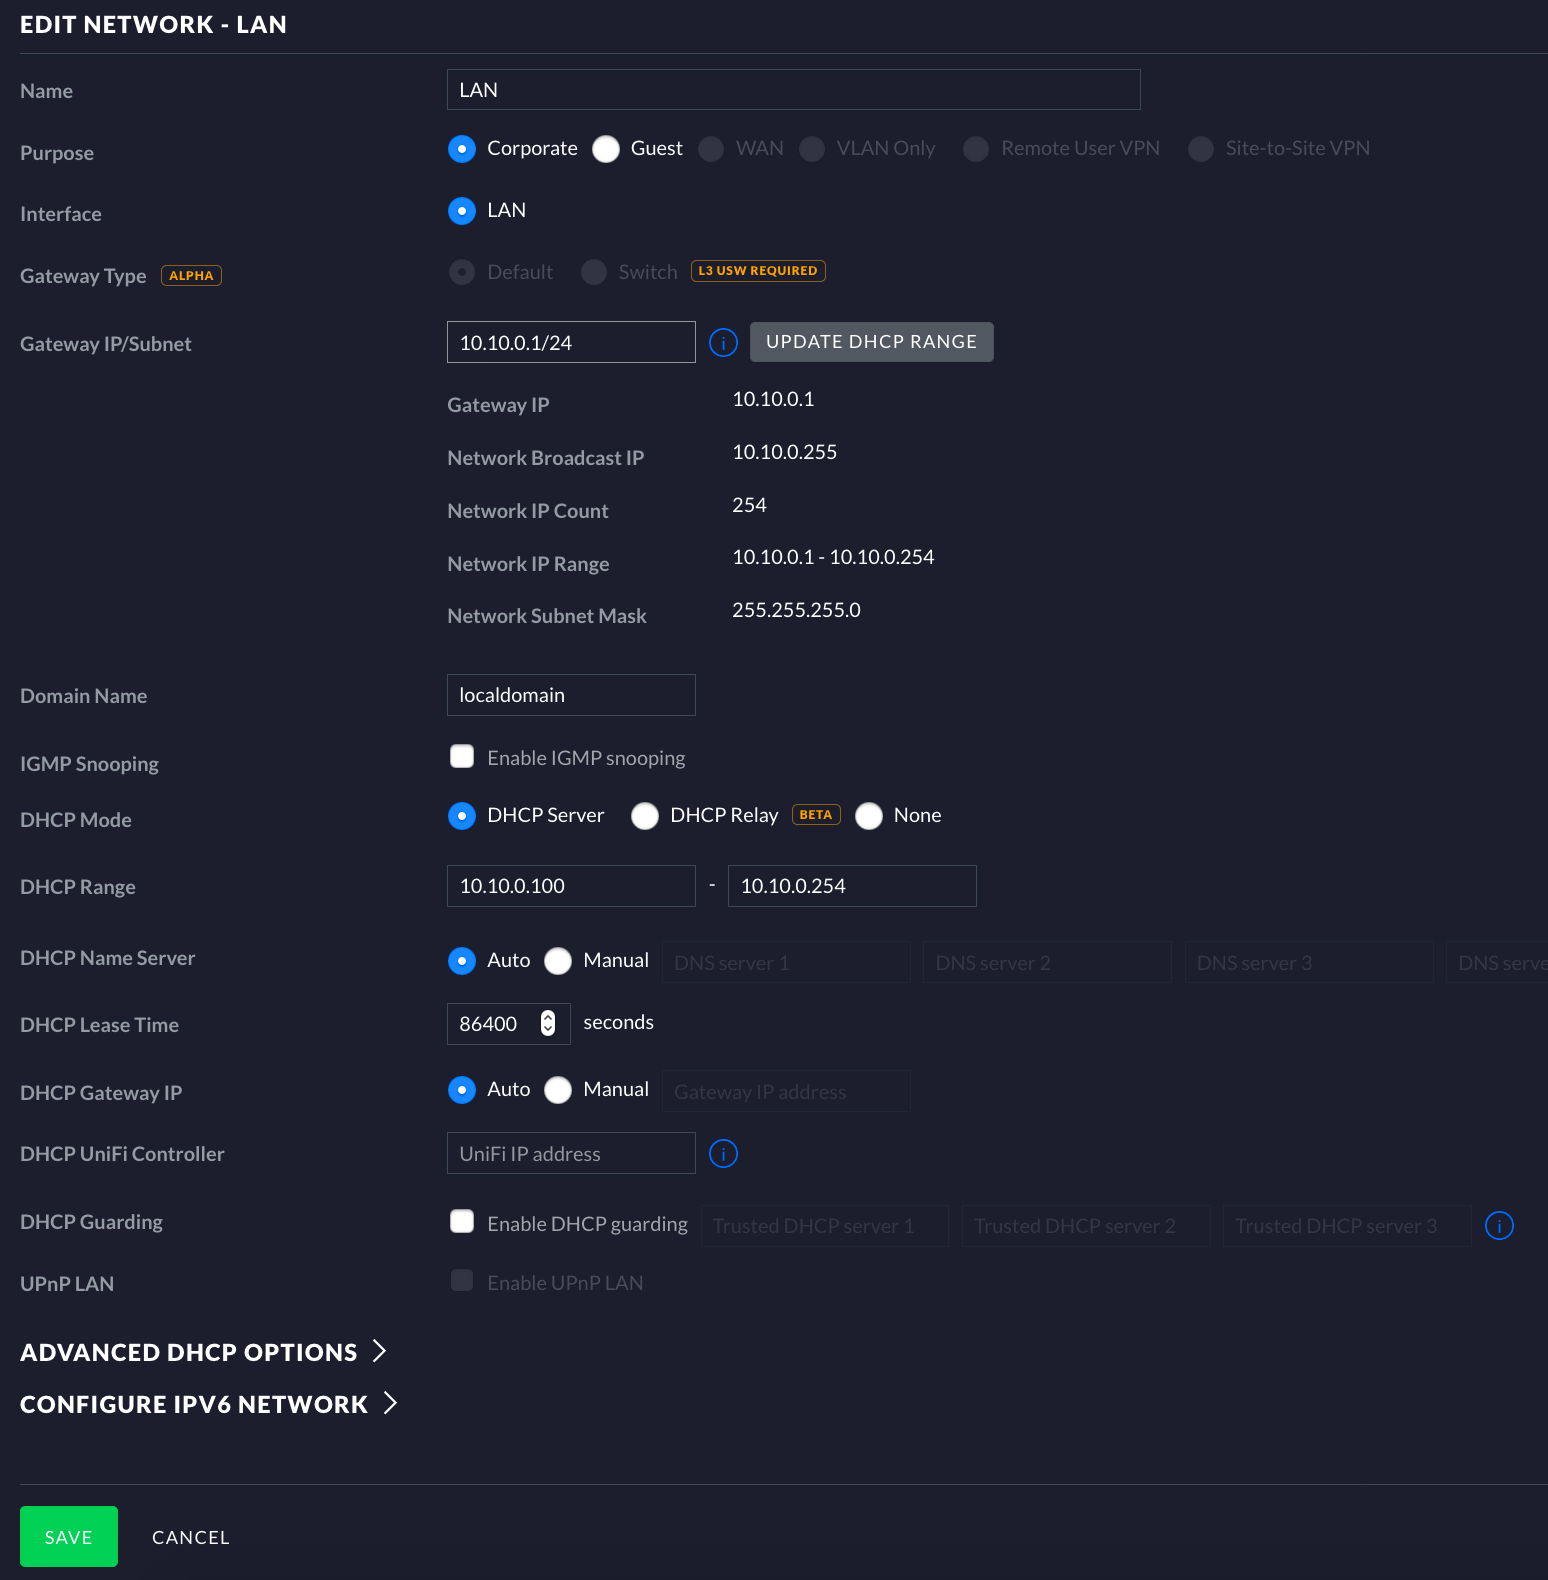
From here, you'll want to populate the "Gateway/Subnet" field with whatever you want your LAN to be. I personally chose 10.10.0.1/24.
After choosing your subnet, you'll now want to specify what you want your DHCP range to be. I personally wanted to keep the bottom 99 of the octet for static IPs so I left everything else for DHCP.
Conclusion
Once these steps are completed, you should now have successfully changed your LAN subnet.