Creating a macOS VM in ESXi

Today's post will cover the simple process of creating a MacOS VM within VMWare ESXi.
As you may or may not know, by default, ESXi will not let you run macOS virtual machines. This has to do with Apple's TOS requiring that macOS VMs only be run on Mac hardware. Fortunately, some very talented people over at InsanelyMac have created an "unlocker" to allow you to run macOS VMs on your ESXi host, regardless of whether it's Apple hardware or not.
Preparation
Before setting up your macOS VM, you will need to ensure that you take care of the following prerequisite tasks:
- Download the unlocker file, which can be found here.
- Download the latest VMWare tools for MacOS, which can be found here.
- Create a bootable MacOS .iso file. You can follow this guide or find a plethora of others online instructing you how to complete this process
- Ensure you have SSH access to your ESXi host
Running the Unlocker
Assuming all prerequisite tasks were completed, you are now able to begin the process of installing your macOS VM.

The first step in doing so is to upload your unlocker file to one of your ESXi hosts datastores, as shown in the image above. As you can see, I've also included the macOS .iso, along with the VMWare tools for macOS.
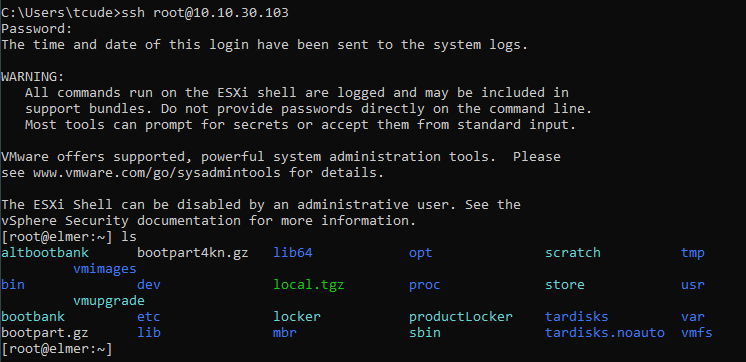
After moving the files to your datastore, you will now need to SSH into your ESXi host, as shown above.
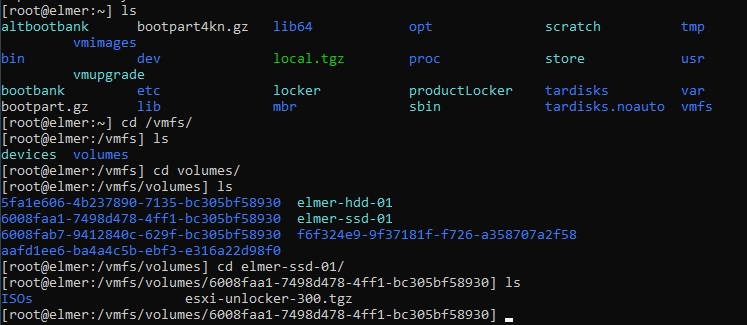
Once SSH'd in, you will need to locate your unlocker file. If you stored it in a datastore, like I suggested, you should be able to find it under /vmfs/volumes/.
After locating your unlocker file you will need to perform the following actions:
- Using
tar xzvf esxi-300.tgz, unpack the unlocker file - Using
chmod +x esxi-install.sh, make the newly unpacked script executable - Finally, run the script with
./esxi-install.sh
After running the script, you should receive confirmation that your unlock was complete and that you will now need to reboot your host.
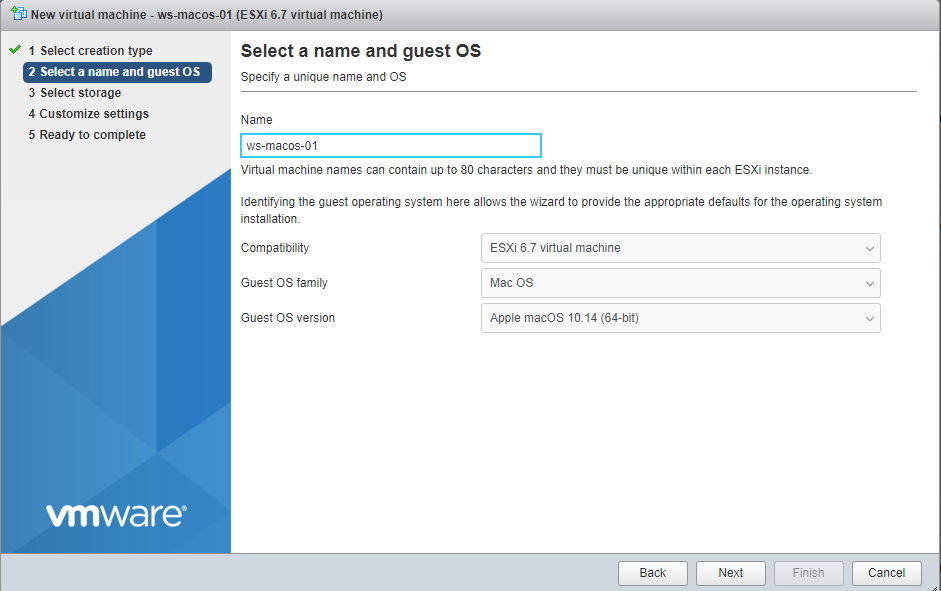
Installing macOS
Now that you've run the unlocker, setting up your VM is as easy as any normal Windows or Linux VM.

You will notice that now, on the "Guest OS family" dropdown menu, you can select "Mac OS". Doing so will allow you to select from many different macOS versions.
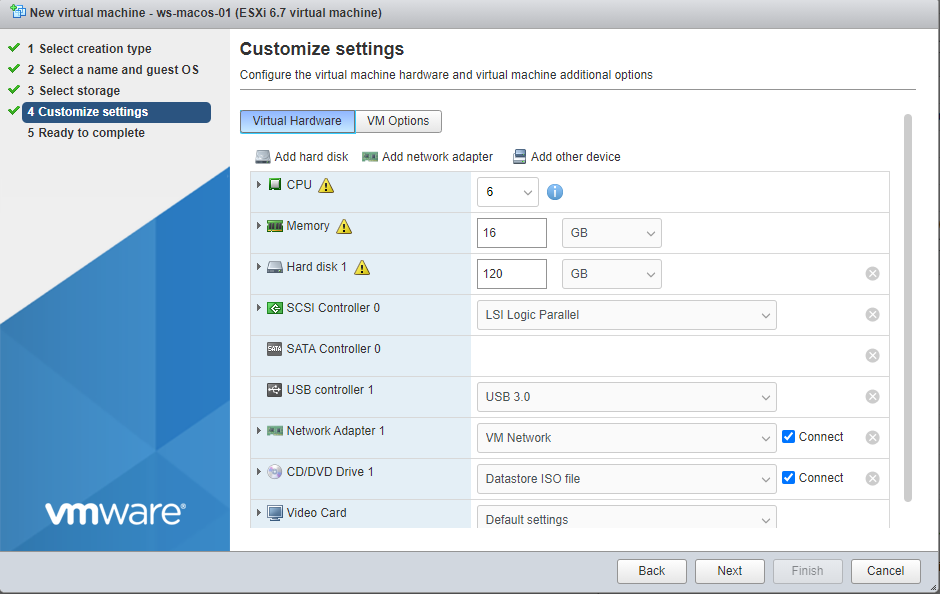
From here, simply choose the specs for your new VM
After booting the VM up for the first time, take advantage of the Disk Utility to format your new virtual disk. You will be looking for the disk of roughly the same size that you set up in the previous menu
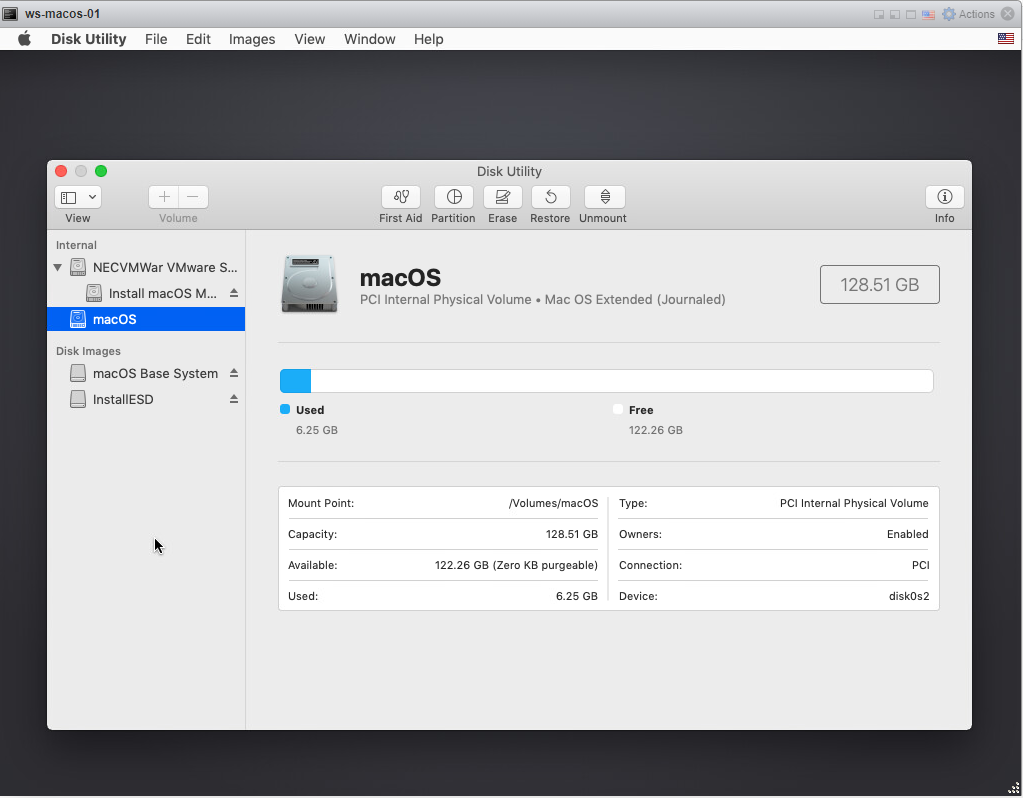
The outcome should look something like this. Do not delete any of the other disks that might show up in this screen.
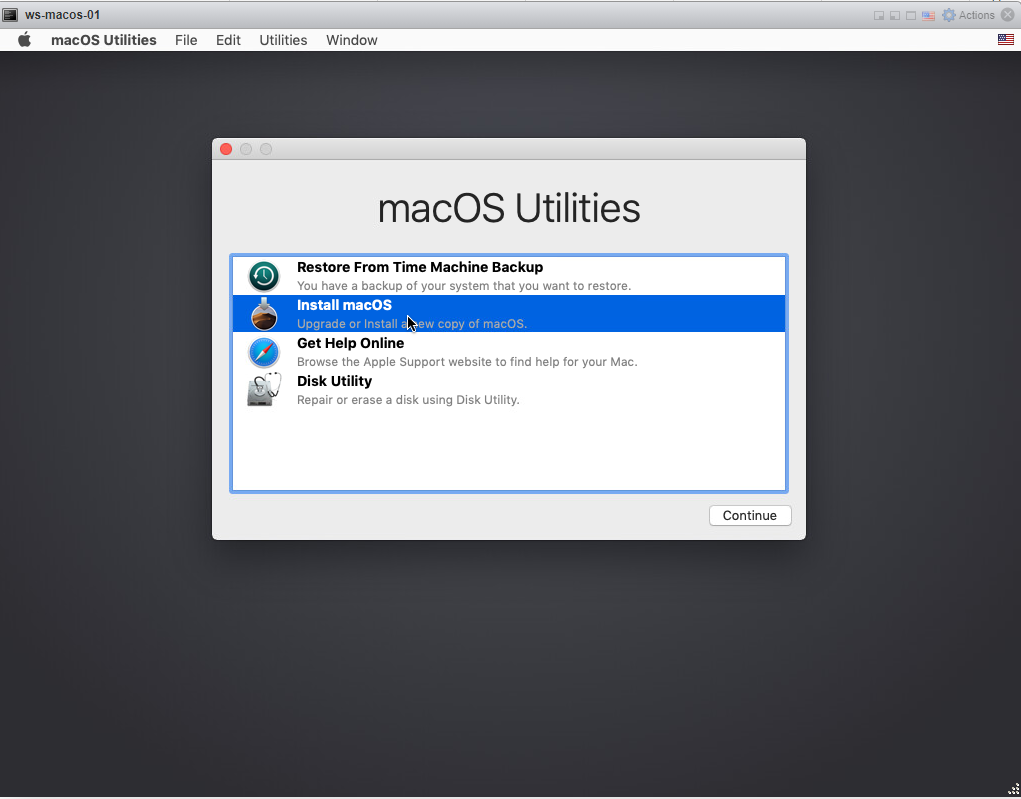
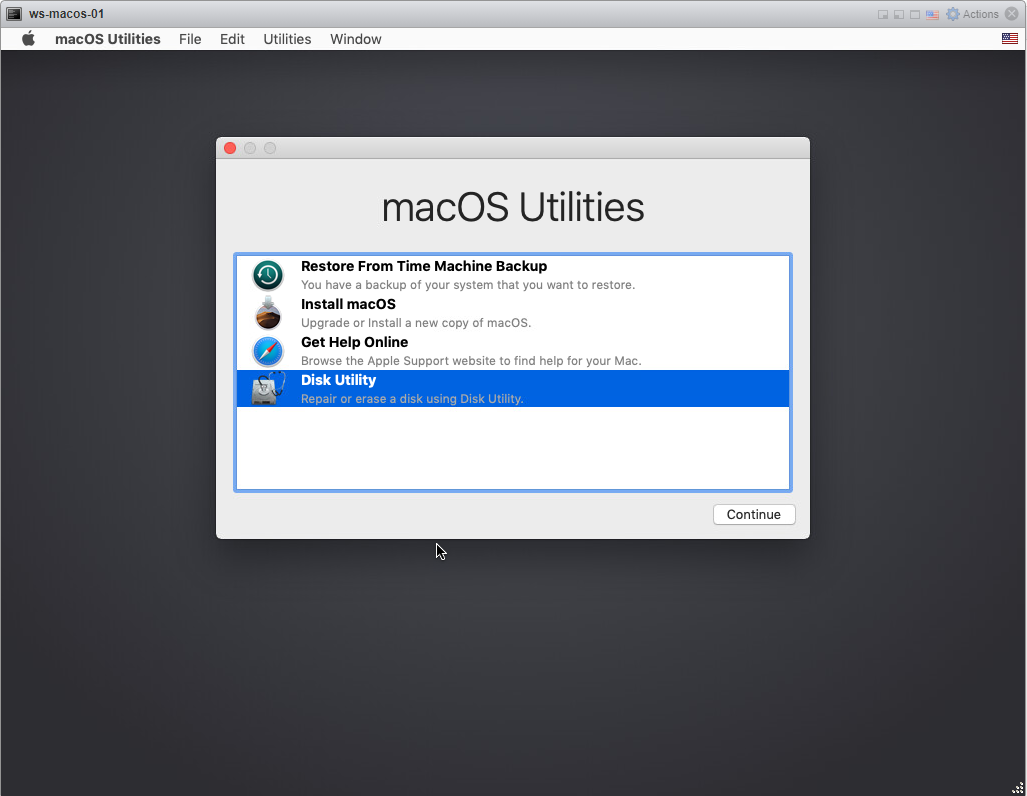
After formatting your disk, you will now want to quit Disk Utility and go back to the main macOS Utilities page and select "Install macOS"
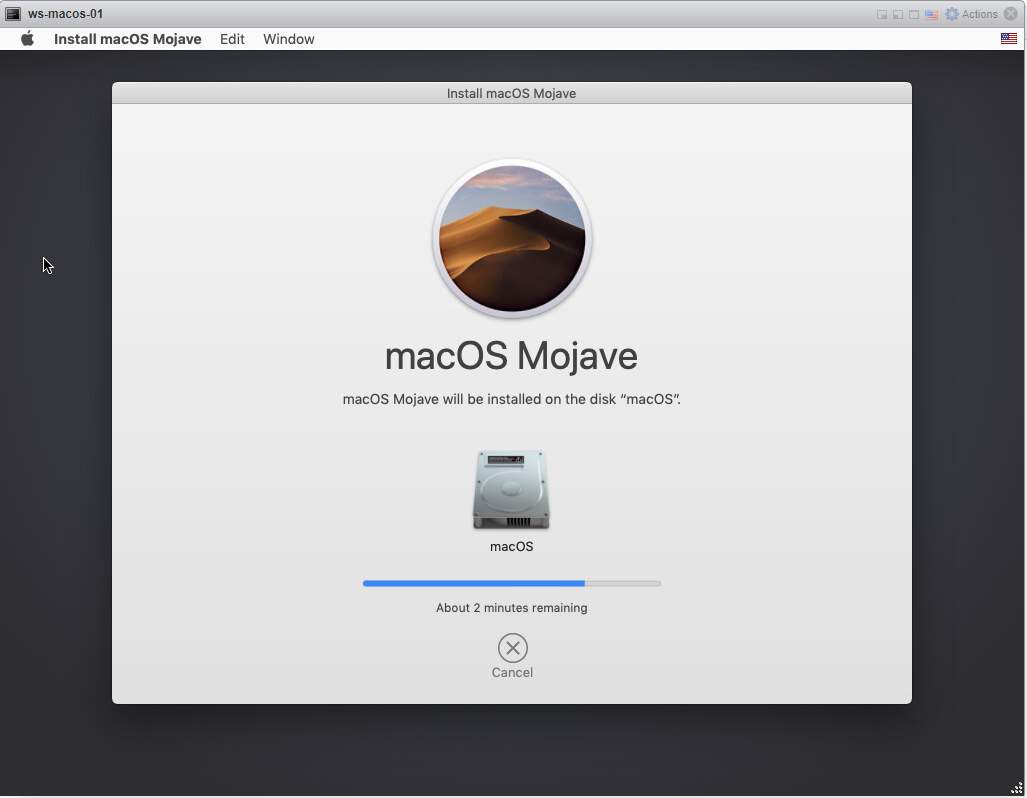
This will complete the remainder of the installation process. Once booted up, you will be prompted to go through the typical macOS setup steps.
Bonus
You may be wondering what sort of neat ways you can use this new VM. Personally, I use it as a sort of VDI setup, where my VM's sole existence in life is to act as an iMessage machine.
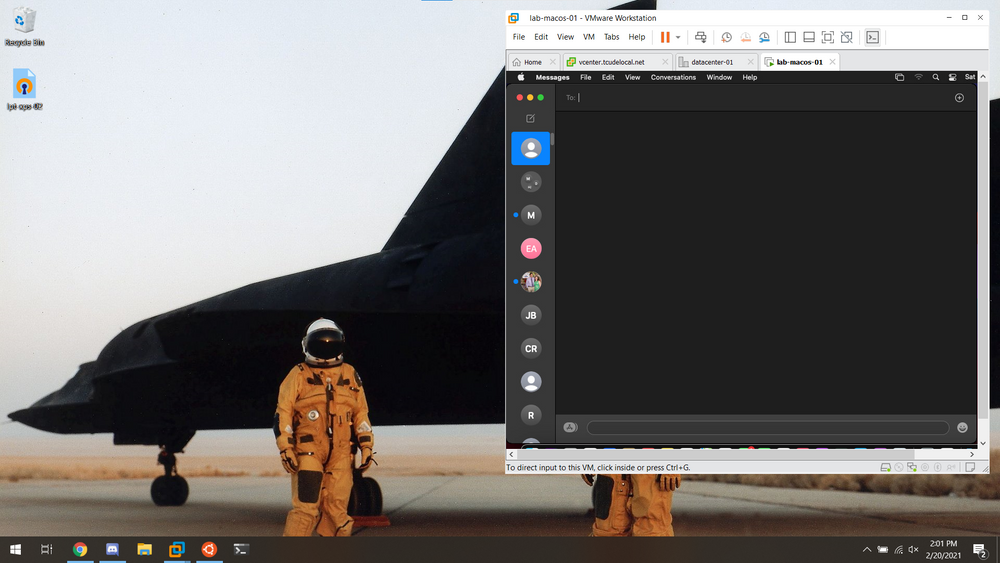
What I mean by this is that, provided I'm connected to my home network, I can open up VMWare Workstation Pro, connect to that VM, and have an iMessage window open on any device that's capable of running VMware Workstation. This is extremely handy to me, as I'd much rather type out iMessages with a physical keyboard than one on a tiny screen.
Is it a super elegant solution for having the ability to use iMessage on operating systems other than macOS? That's up for debate.
Is it functional and does it generally get the job done? Yes.
Overall, I've been using this setup for months and have not encountered any problems with it. The only thing that can sometimes cause annoyance is the fact that there is no hardware acceleration on this VM, meaning any sort of animations are fairly choppy and not all that pleasant. These animations can be reduced in the macOS settings, however.
Other than that, having this VM around has been extremely convenient and I urge you to give it a try for yourself if you're an iMessage user and have some spare room in an ESXi host like me!
I hope you found this guide helpful. If you did, consider adding my site to your RSS reader using the following URL: