Creating a Secondary Domain Controller on an Existing Domain

Over the weekend, I was performing some system maintenance which resulted in the ESXi host that houses my domain controller, svr-dc-01, going offline for an unexpectedly long period of time. This ended up causing frustrations on my end due to many of my devices relying upon my internally hosted DNS.
I had known prior to this incident that running a secondary domain controller is considered best practice but have prioritized other projects on my list, assuming that I could be entirely reliant on the single server in a lab environment for the time being.
That changes now
Setup
This guide will assume that you already have a fresh Windows Server spun up and ready to go. Obviously, it is recommended that you do this on a separate physical host from the one that's running your primary domain controller to achieve redundancy in case of hardware failure.
Provided that this is true, the first step you will want to do use the "Add Roles and Features" tool to give your new server the capabilities necessary to be a domain controller.
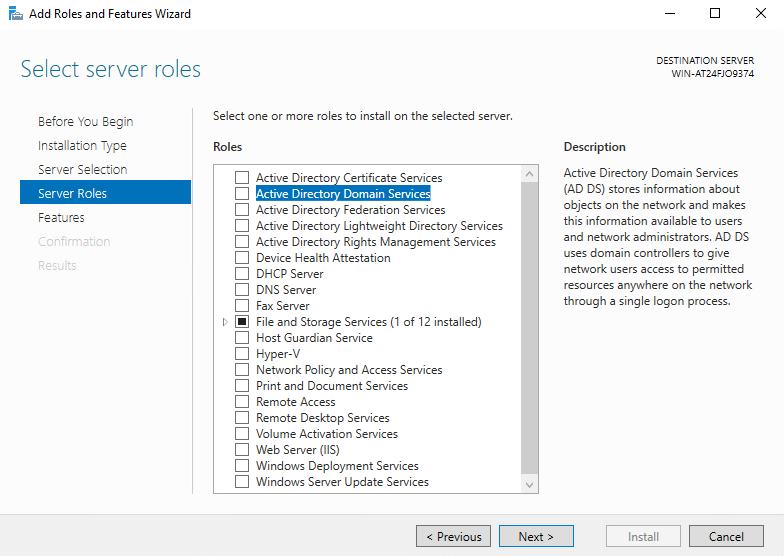
Ensure you select "Active Directory Domain Services" from the roles list
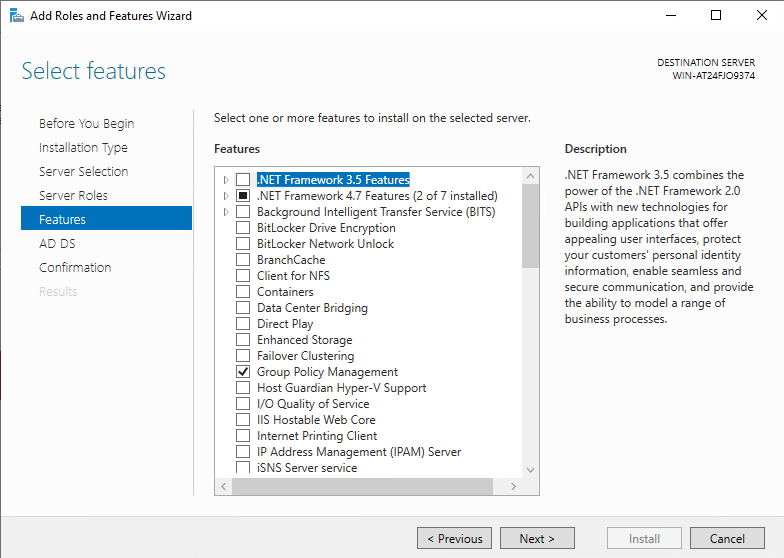
On the features page, simply accept the defaults and click next.
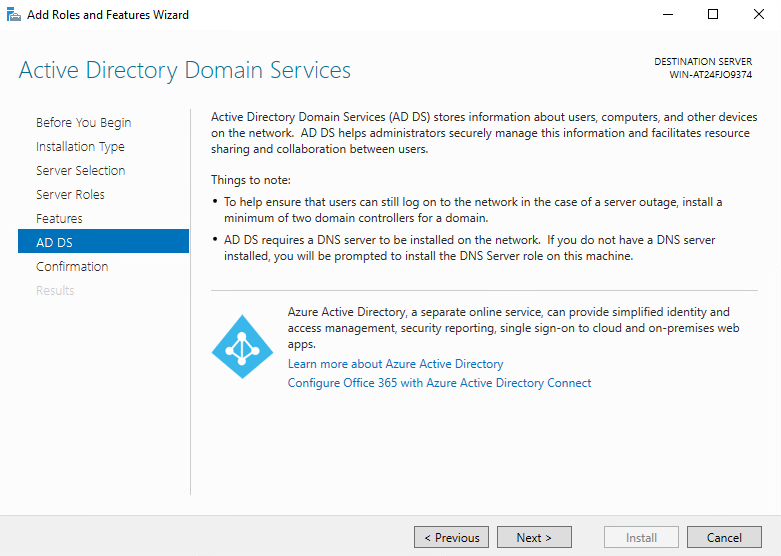
From here, you will see Microsoft's recommendation that a minimum of two domain controllers are running in any given environment, along with a notice about DNS. Click next.
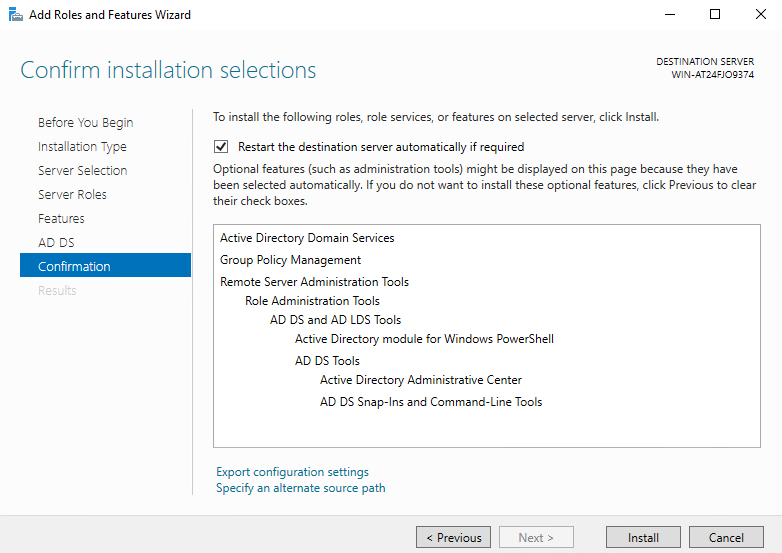
We will now see a summary of the various roles and features that will be added. I have also checked the box to allow my server to restart automatically if required, as there is nothing else running on this VM that could be interrupted.
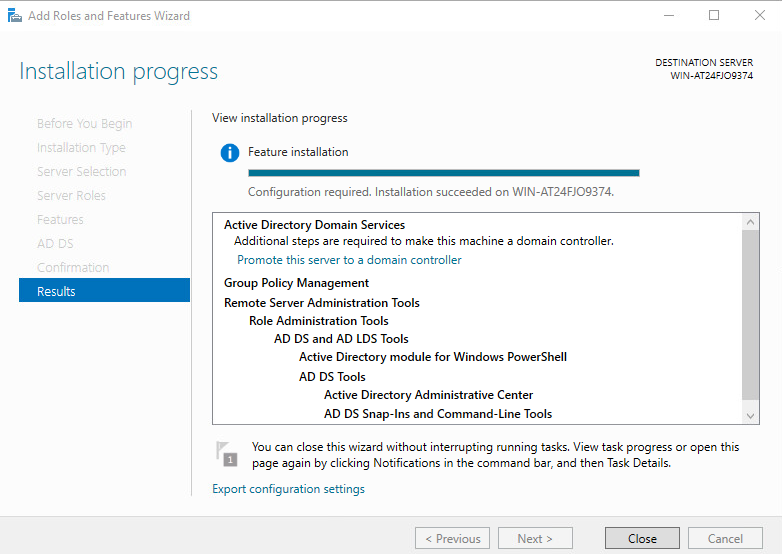
After completion, we will be given the following screen, informing us that the installation was successful. We'll want to hold off on promoting this server to a domain controller for a bit while we do a couple of other steps.
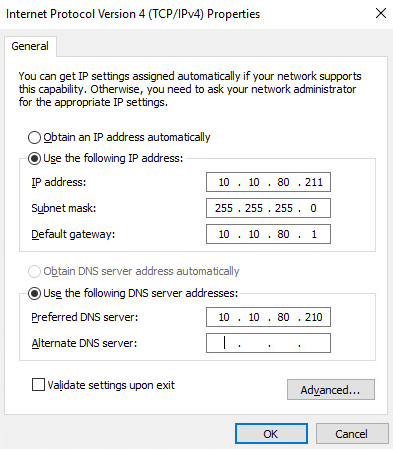
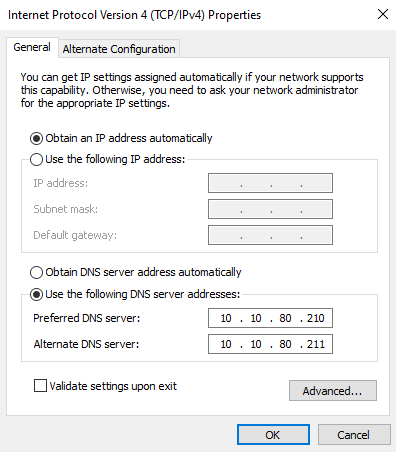
Next, we will want to ensure that our secondary domain controller is set to use the primary domain controller as its preferred DNS server.
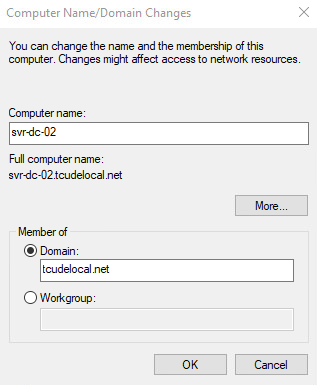
Lastly, before promoting the server to be a domain controller, I would suggest changing the computer's name to something more suitable than the randomly generated one that Windows gives it and adding it to your local domain, now that you've established the primary domain controller as your DNS server.
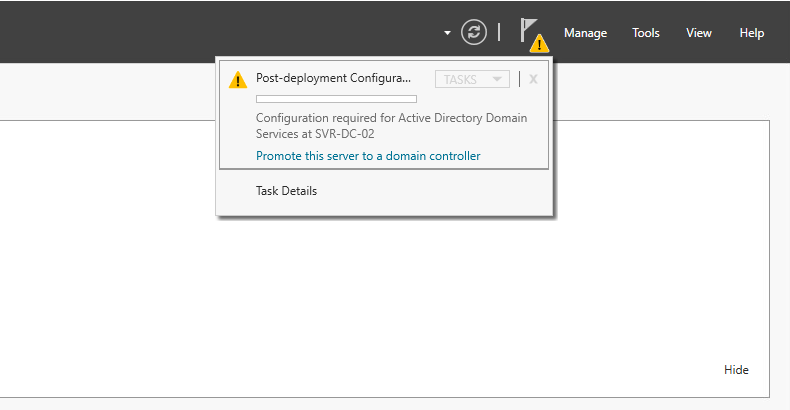
Now that the other steps are complete, it's time to promote the server to domain controller.
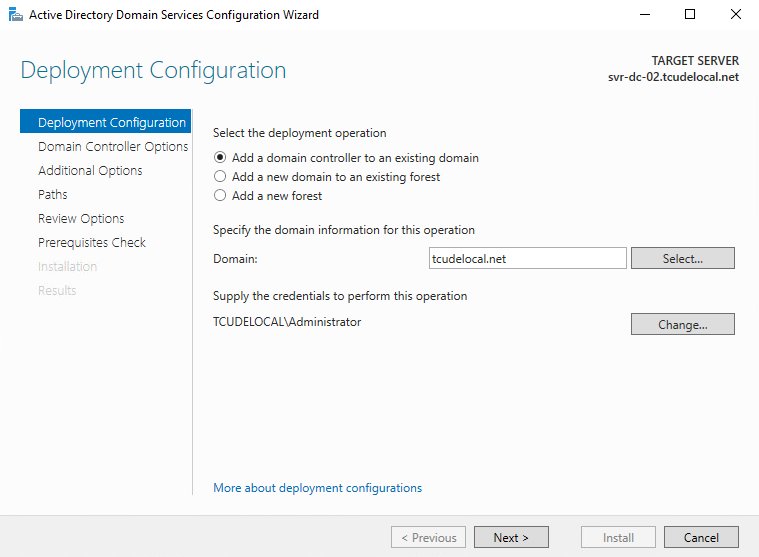
Here we will specify that we want to add the domain controller to an existing domain.
For me, this screen defaulted to using the server's local administrator account to perform this operation so you may need to do that by clicking "Change" and providing a domain administrator's credentials.
It is also important to double check that your domain appears in the corresponding box provided on this page.

Here you will need to specify a DSRM password. Ensure you keep this safely stored somewhere in case you ever encounter a situation in the future that requires the use of it.
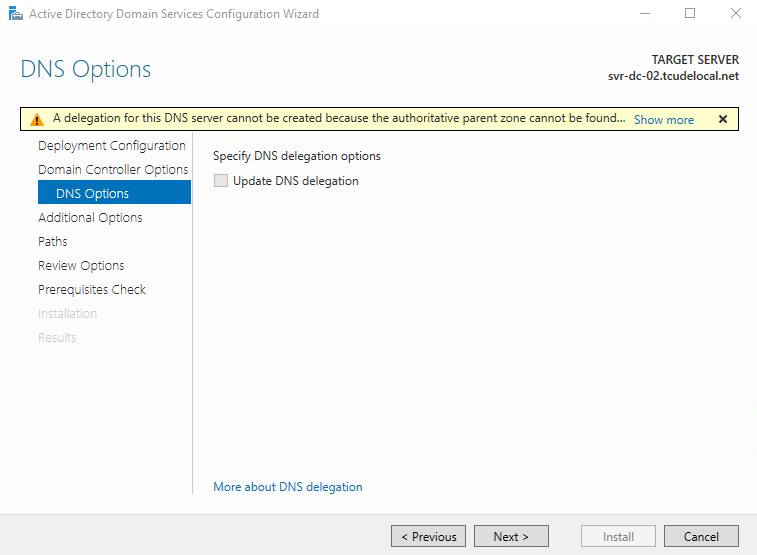
Click "Next".
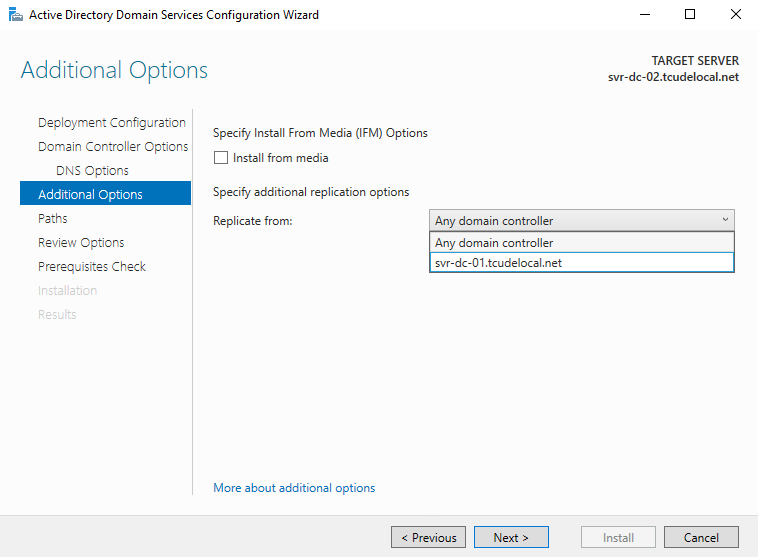
Select the dropdown menu and select your primary domain controller
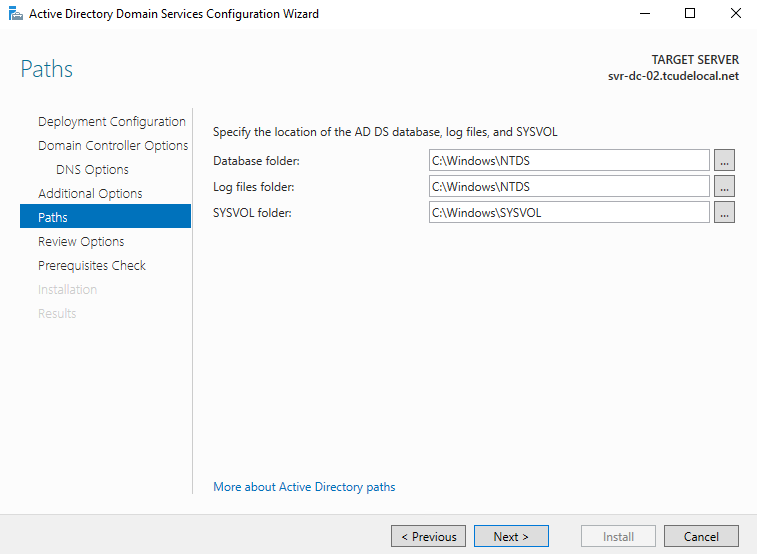
Leave the default values provided and click "Next".
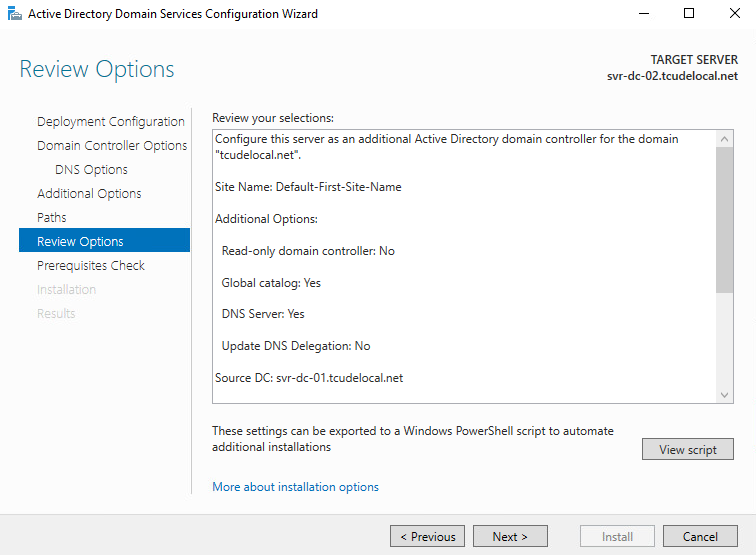
On this screen, you will be shown an overview of the previous steps taken. Review these and ensure they are correct before moving on to the next page, where we will finalize the installation.
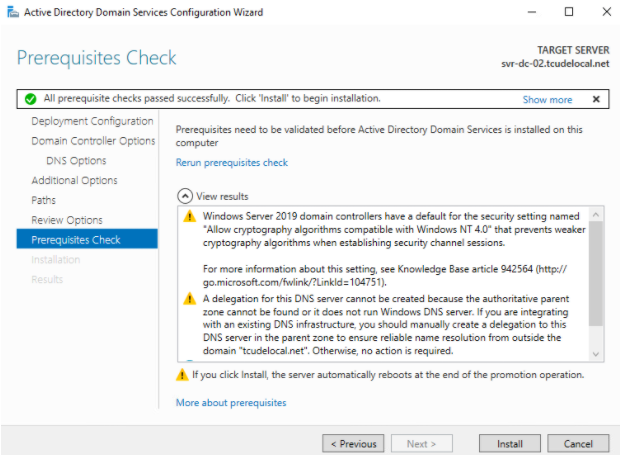
Now that we have finalized our installation selections, it's time to click the "Install" button to proceed with the actual installation. You may notice warnings similar to the ones shown above but they will not impede the installation process.
Conclusion
And with that, you now have an additional domain controller! No longer are you constrained by the limitations of having a single point of failure when it comes to all of the services that domain controllers provide!
To take advantage of this new DC, simply add its IP address as an alternate DNS option on all of your computers/servers.
That's all there is to it. Should you want to populate your environment with additional domain controllers in the future, the process will be essentially the same as the one shown above!