How to Set Up Cloudflare Tunnels on Ubuntu

Over the past couple of years that I've been running this site, I have changed several aspects of my hosting setup with Ghost – the application that runs my blog. One example of this is my migration away from the traditional installation route and embracing the containerized version of the application. In the past couple of weeks, I have made yet another improvement in how I host this website, utilizing Cloudflare Tunnels.
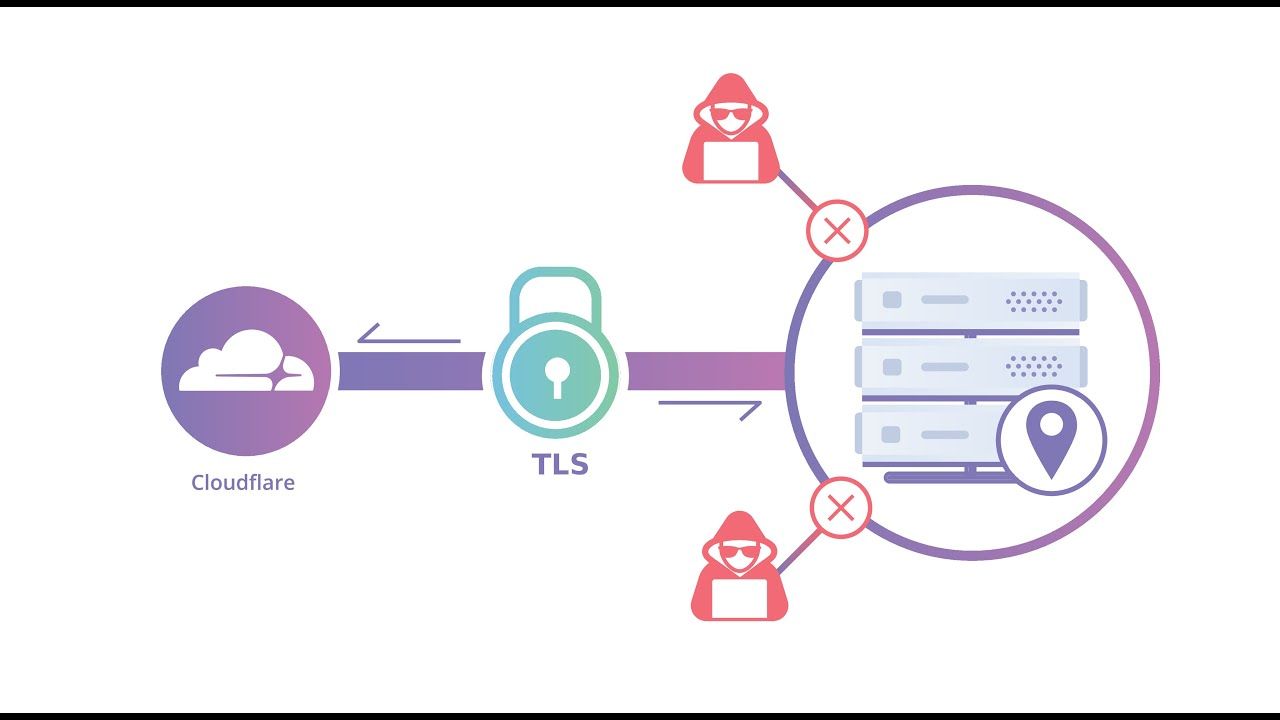
For those that are not familiar with this free service that Cloudflare offers, their tunnels act as exactly what their name implies – a direct tunnel from within your local network to Cloudflare.
My reasoning in switching to Cloudflare tunnels stems from wanting to cut down on potential attack vectors. It has allowed me to not only scrap my externally facing Nginx reverse proxy but also close off port 80 and 443 entirely. Instead, when a user access my website, traffic first goes through Cloudflare, who then serves up content through the tunnel I set up. With my current setup, users are no longer able to directly interact with my setup and are forced to go through Cloudflare as a proxy, as shown in the image at the beginning of this post.
It is worth noting that there are potential concerns in going through with this. Setting up a tunnel puts a great deal of faith in Cloudflare, with them acting as a middle man between everything going in and out of your network. If this is unappealing to you, I encourage you to stick to the traditional route of utilizing a reverse proxy to serve up web content.
On to the setup process...
Setup Process
This guide will assume you are setting up your tunnel on a Ubuntu server. Cloudflare does, however, provide documentation for setting things up on Windows and MacOS, as well. I will link this at the bottom of this post.
Installation
To get started, start by installing the latest version of the cloudflared package:
wget -q https://github.com/cloudflare/cloudflared/releases/latest/download/cloudflared-linux-amd64.deb

dpkg -i cloudflared-linux-amd64.deb
Authentication
Next, you will need to authenticate with Cloudflare and select the domain you'd like to utilize for this tunnel running the following command:
cloudflared tunnel login
Creating a Tunnel
It is now time to create your tunnel using the command:
cloudflared tunnel create name_of_tunnel
The name of your tunnel is entirely up to you but as far as I know, cannot be changed later. Just give it a name you find memorable.
Once created, you will be provided a bit of information, including the UUID of your tunnel. This UUID will be necessary later for further configuration of your tunnel.
After creating your tunnel, you are able to list all active tunnels with the command: cloudflared tunnel list. This will provide not only the name of your tunnel but the UUID as well.
Initial Configuration
It is now time to do some configuration so that you can get traffic flowing through your tunnel. To start, navigate to your cloudflared directory. For me, it is located in /etc/cloudflared. Within this directory, you must create a new file named config.yml. Using the text editor of your choice, populate this file with the following contents.
tunnel: <your_tunnels_uuid>
credentials-file: /path/to/credentials/<UUID>.jsonRouting Traffic
Now that you have your basic configuration file created, you must add ingress parameters to tell Cloudflare what internal services you want to serve up through your tunnel. To do so, modify your config.yml file again:
tunnel: <your_tunnels_uuid>
credentials-file: /path/to/credentials/<UUID>.json

ingress:
  - hostname: tcude.net
    service: http://10.10.10.123:1234
    hostname: subdomain.tcude.net
    service: http:/10.10.10.123:8888
  - service: http_status:404
To break this down a bit more, the ingress block allows to then go on to specify a hostname, the site you want to be utilized for your service. Below that is the service line, where I have provided the internal IP and port that my services run on.
Lastly, you must specify the service: http_status:404 in order for the tunnel to function properly.
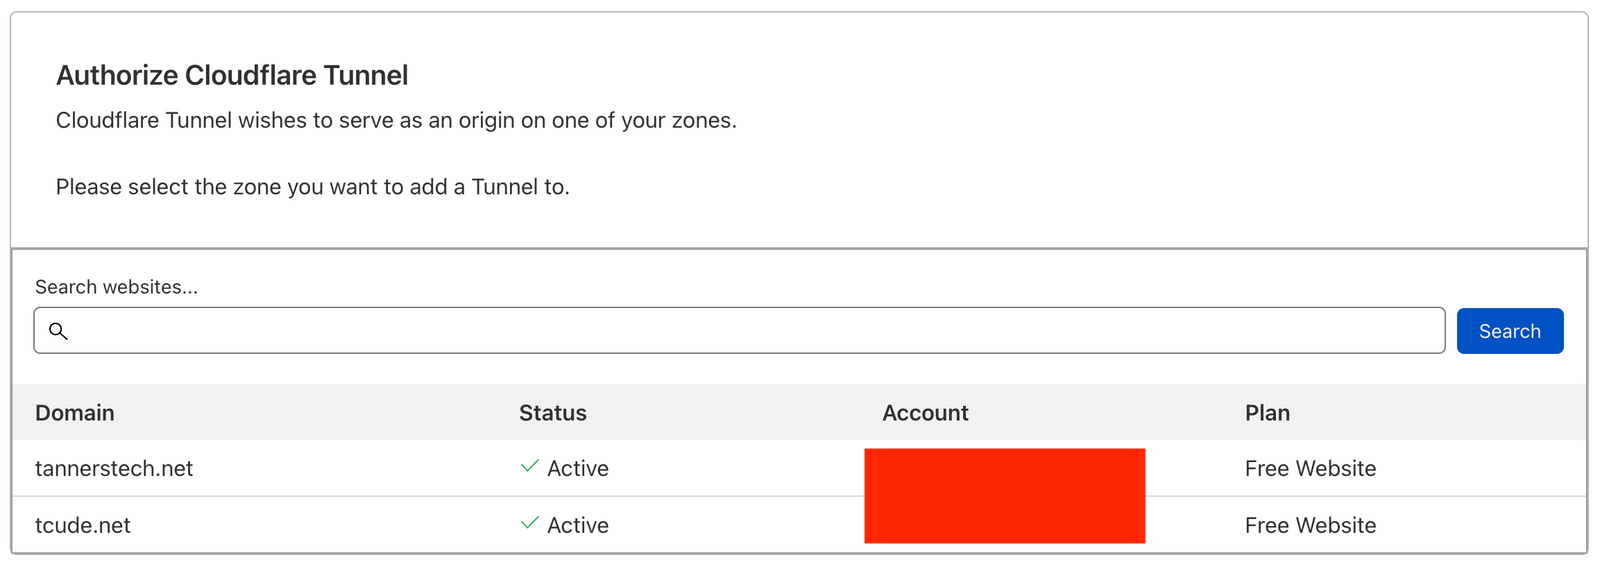
Creating DNS Records
While you may be familiar with creating DNS records of various types through the Cloudflare dashboard, this guide is going to continue going down the path of utilizing the command line. Personally, I find it easier to use the CLI for setting up tunnels.
To create a DNS record for your hostname/service listed in the previous step, use the command:
cloudflared tunnel route dns <UUID or NAME of tunnel> <hostname>For example, if you wanted to create a DNS record for tcude.net, you would run:
cloudflared tunnel route dns <UUID or NAME of tunnel> tcude.netIt is worth noting that this change will be reflected in the DNS section of the Cloudflare dashboard.
Starting the Tunnel
Now that your configuration is completed, it is time to test out the tunnel using the following command:
cloudflared tunnel run <UUID or NAME of tunnel>cloudflared will now spit out info as it sets up your tunnel, eventually letting you know that your tunnel is successfully up and running. At this point, you might notice that if you were to simply ctrl + c at this point, your tunnel will close out and connectivity to your site/service will disconnect. To counter this, you will need to have cloudflared run as a systemd service.
Running cloudflared as a Service
To have cloudflared run automatically as a service, you can run the following command:
cloudflared --config /path/to/config.yml service installWith that, you can now manage cloudflared as a systemd service and have it run automatically!
Conclusion
In this guide, I have covered Cloudflare Tunnels, why I think they are a valuable asset to someone hosting a site or service from their homelab, and the configuration that goes into getting a tunnel up and running.
I have now been utilizing these tunnels for the last couple of weeks and have had no issues with them. Being able to close off a couple of additional ports is a huge win to me.
I hope you found this guide helpful. If you did, consider adding my site to your RSS reader using the following URL: