Creating IoT VLANs in Unifi Devices

Introduction
With the abundance of IoT devices becoming more popular than ever, one might question whether they really want these devices to have free reign on their local area network. That's the mentality I have on the whole situation, anyway, so I began looking into what I could do to enable restrictions on some of these devices. This is when I realized that VLANs would be a great way to keep things a bit more secure.
What are VLANs?
For those who are unaware, VLANs (virtual LANs) are sub networks that allow you to group devices on separate local area networks. While this might not look exciting at first glance, it's a very powerful tool from a security perspective. For our purposes, we will be creating an IoT VLAN that allows our IoT devices to communicate with the open internet but not with the rest of our non-IoT devices on our LAN.
Creating the VLAN
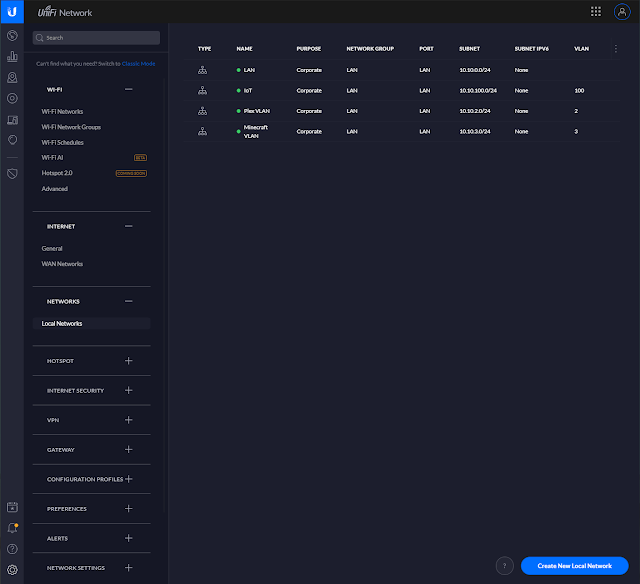
To start, you'll need to access the new settings panel in your Unifi controller and select the "Local Networks" tab listed under "Networks". You will then click "Create New Local Network"
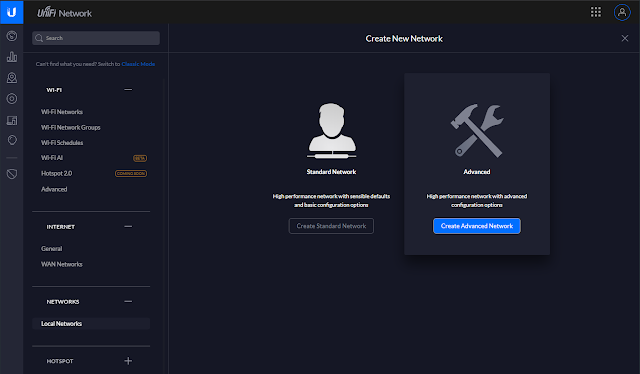
After having done so, you should be prompted to choose between creating a "Standard Network" or "Advanced" network. For our purposes, we will be selecting the "Advanced" option.
Once selected, you will be taken to the page below:
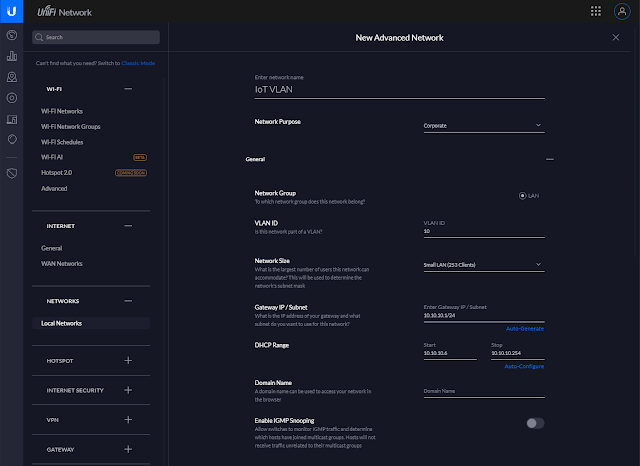
From here, we'll do the actual configuration of the VLAN. To start, we'll need to name our VLAN. I chose to name mine "IoT VLAN" but you're free to choose whatever you want!
Next, we'll need to set a VLAN ID to one that has not already been taken. I chose VLAN 10.
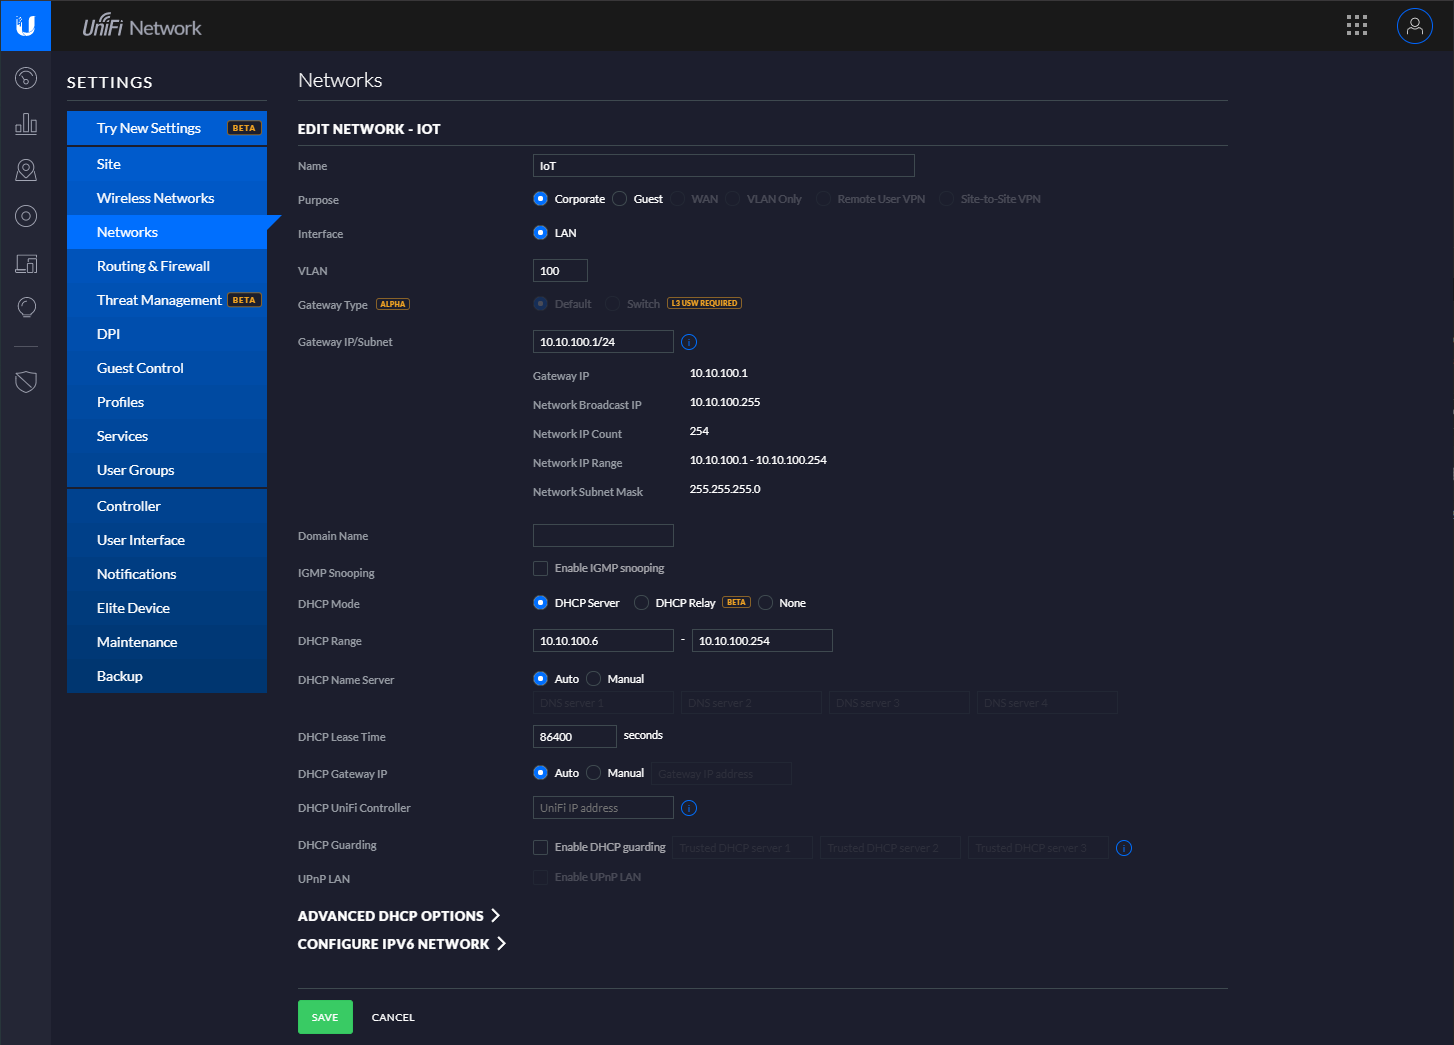
Moving on to the "Gateway IP/Subnet" setting, I choose to coordinate my VLAN IDs with my VLAN subnets out of pure convenience. For my IP schema, the third octet contains my VLAN ID. Because of this, you can see for my Gateway IP, I have selected 10.10.10.1/24, with the bolded number being the same as my VLAN ID.
Once these steps are completed, you'll wan't to make sure you continue scrolling down and save your new network. After having done so, congrats! You have just created your first VLAN. Now let's look at securing it!
Securing the VLAN
While it's great that we've created our VLAN, it's still not in a secure state for IoT devices. Any devices connected to this VLAN will still be able to talk with other devices on your network. Let's take a look at how we can lock that down with just two firewall rules.
First, we'll revisit the settings panel within the Unifi controller. Personally, I find the classic settings to be more intuitive for creating firewall rules. We will want to start by creating a LAN IN firewall rule.
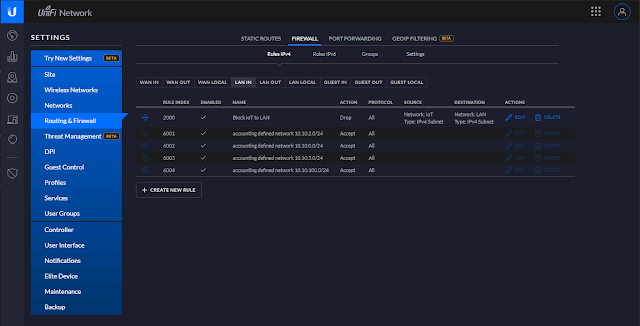
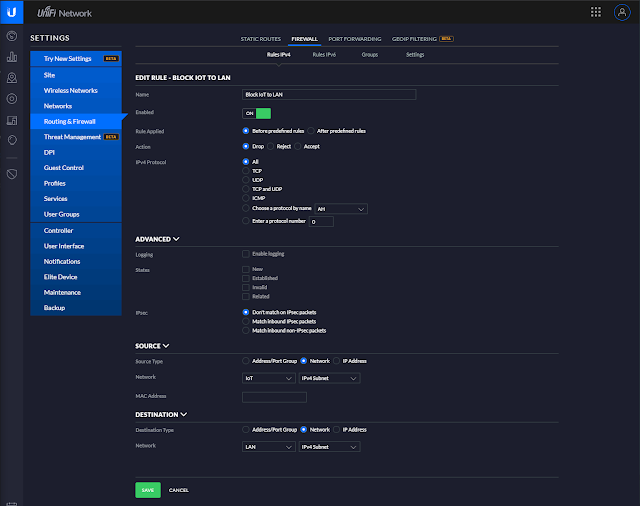
Next, name our firewall rule "Block IoT to LAN" and configure it with the following settings:

Looking at this screenshot, we have set it up to drop all traffic coming from the IoT VLAN that's attempting to communicate with our LAN.
Our last step will consist of us creating a LAN LOCAL firewall rule. This will prevent IoT devices from hitting our gateway.
It's a very similar process from the step before. Simply configure this rule as it's depicted above.
After having done all of this, congrats! You've successfully created firewall rules to lock down your new IoT VLAN. Let's take a look at how you can now implement it on your network.
Applying the VLAN
To use the VLAN with a specific port on your switch, simply visit the devices tab in the Unifi controller and select a port. Within the individual port settings, you'll these settings:
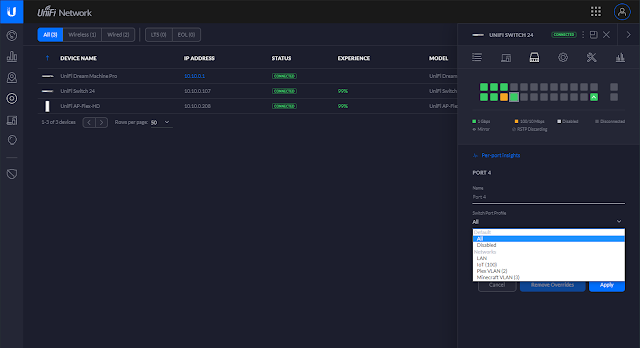
Within the "Switch Port Profile", you're able to select from a list of all of your networks. Simply select your IoT network from the list and click "Apply" to save.
That's all! Congrats on creating your new IoT VLAN!