How to install Heimdall


I've recently discovered a pretty neat tool called Heimdall. If you're like me, you probably have quite a bit of services running. At this point, it can start to become a bit cumbersome managing the locations of all of these services. I've tried using bookmarks within Chrome but feels clunky and gets messy pretty quickly.
Heimdall gets rid of these problems by letting you host a page that displays and, in some cases, monitors all of your services. Today's guide will cover how to set up Heimdall in our recently created Rancher cluster. If you haven't already done that, you can check out the post covering how to do so here.
Prerequisites
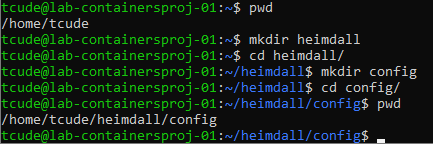
Before getting started, please ensure you have a directory created for Heimdall. I created mine under ~/tcude/heimdall/config using the following commands:
Getting Started
To start, let's take a look at Heimdall and the documentation provided over at linuxserver.io. Here, we can see the command that is normally required to run Heimdall as a docker container.
docker create \
	--name=heimdall \
	-e PUID=1000 \
	-e PGID=1000 \
	-e TZ=Europe/London \
	-p 80:80 \
	-p 443:443 \
	-v </path/to/appdata/config>:/config \
	--restart unless-stopped \
	linuxserver/heimdall
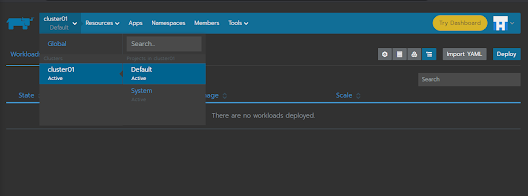
For our purposes, though, we'll be setting this up from within Rancher, instead of running it directly as a docker container. To do so, navigate to the default namespace of our cluster and click "Deploy" to deploy a new workload.
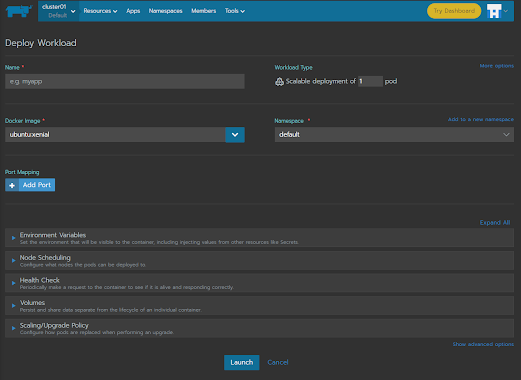
You should now be taken to a page that looks like the one shown above. From here, we're going to "translate" over the docker command shown earlier, to something that Rancher can use.
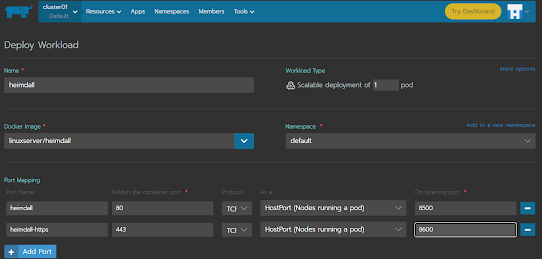
To start, we'll give our workload a name, specify the docker image (which from earlier we know to be "linuxserver/heimdall") and lastly, we'll set up port mapping. I'd suggest following my setup but you're welcome to tweak it a bit to your liking. I chose to use ports 8500 and 8600, rather than 80 and 443, to keep them open for other projects.
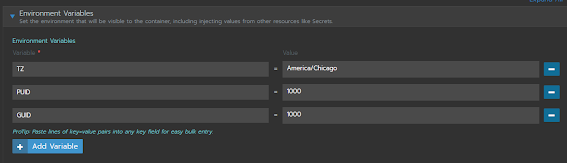
Next, we'll need to create our environment variables. We can reference back to the original docker command to see what's required. To start, we'll need to specify our time zone with the "TZ" variable. Simply populate the value field with your applicable time zone after that.
We'll also need to specify our PUID and GUID. We can find these pretty easily by running the following commands

Yours may be slightly different than mine but it should be the same process. Obviously substitute my username for your own.
We'll now go ahead and add a volume. This will utilize the config directory that we recreated at the beginning of the guide.
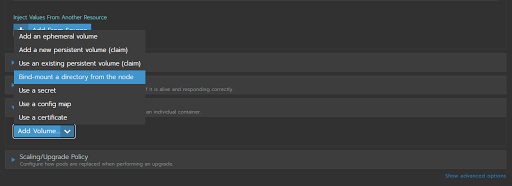
To start, we'll want to add a volume and select from one of the options at this point. For my purposes, I'm wanting to mount a directory directly from the node.
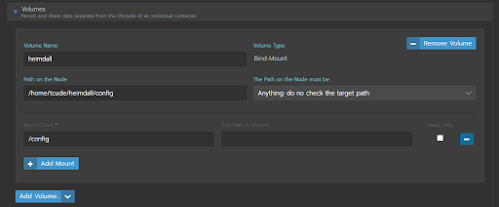
From here, give your volume a name and supply the path to the /config directory we had created earlier. We'll also use /config as the mount point
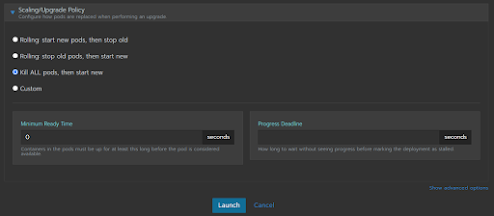
Lastly, we'll need to configure a scaling/upgrade policy. I'm using the option shown in the image above.
Once done, you're now able to click "Launch".
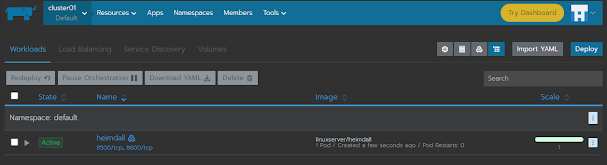
We'll now be taken back to our workloads page, where it should now show Heimdall as an active workload. If it doesn't show "active" right away, don't worry. It may take a minute or two but it should get there.
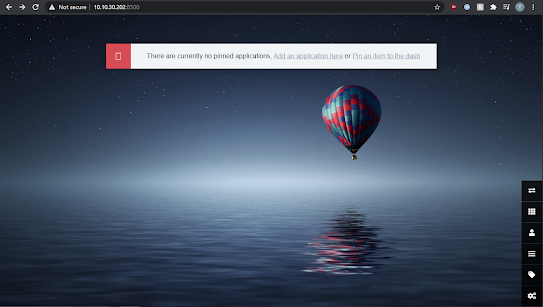
After navigating to the site in your web browser, you will be presented with this screen since we obviously haven't configured any pinned applications yet. Fortunately, Heimdall makes this process extremely easy. Simply click on "Add an Application Here".
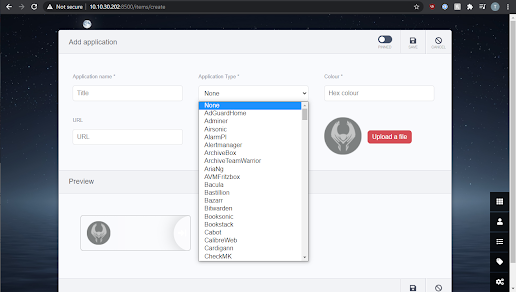
From here, you'll be presented with a long list of supported services and applications. The process gets pretty easy from here. Simply find an application you'd like to set up on the dashboard and supply relevant information, like the URL and title you'd like to use for it.
You can also keep the "Application Type" set to "None" and simply use it as a easily accessible link to your application located on your Heimdall dashboard.
Conclusion:
That's about it! You've now set up Heimdall in your recently created cluster housed in Rancher. Feel free to ask any questions you might have in the comments area below.