How to patch ESXi

Intro:
In the past, I've covered many different topics pertaining to vSphere and other VMWare products but I recently realized that I haven't ever covered how to patch an ESXi server. Patching ESXi, just like any other system, is important to fix bugs and security vulnerabilities as they are discovered. In today's post, I'll be covering step by step how to patch your ESXi server. While this process is able to be done through vCenter, I will be demonstrating how to do it from within ESXi, itself.
Prerequisites:
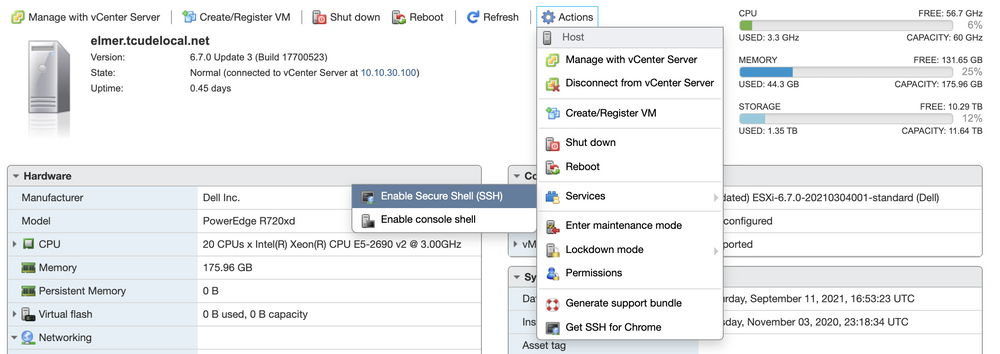
Before starting the update process, you will need to ensure you have SSH enabled for your ESXi node. To do so, you'll simply need to log in to your server and enable it with the setting shown in the image below:
Step One:
To start, you will need to ensure you know the version of ESXi you are currently running.
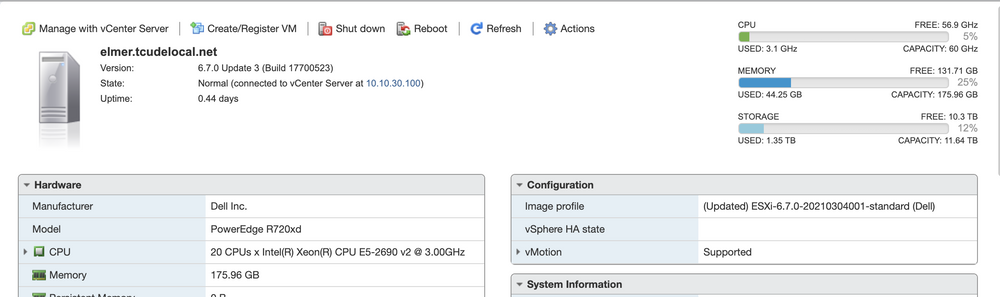
This can be found on the Host overview page. Here we can see that my R720xd is running ESXi 6.7U3.
Step Two:
Now that you've double checked the version of ESXi that you're running, it's time to find the update package for your server. There are a couple of ways of doing this, including going to VMWare's site and digging around for the right file, but I have found a solution that seems to work a bit more efficiently.
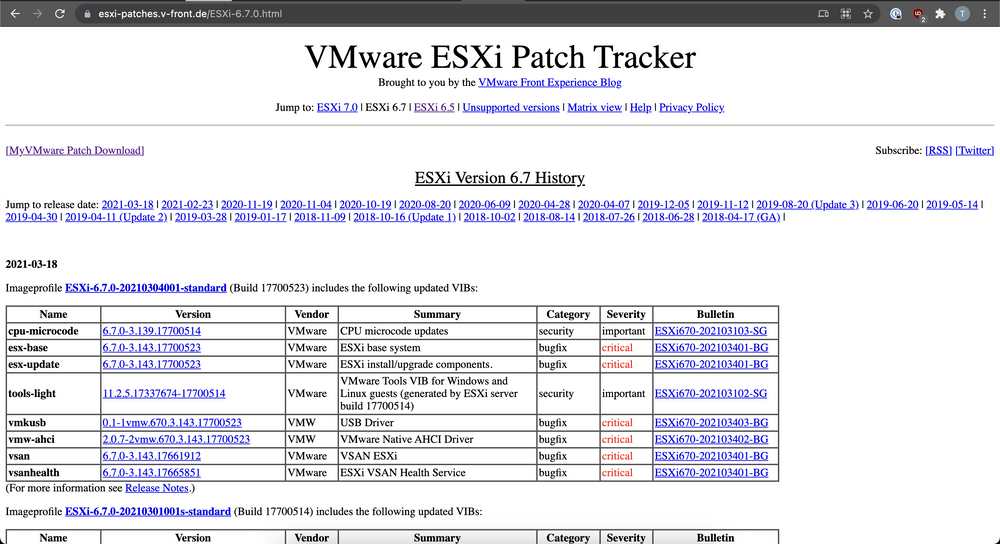
Visiting this site, you're able to find a handy list of commands to run that will download the exact package that your server needs. The commands pull updates *directly* from VMware, not any sort of middle man. I've found going this route is less work that digging around on VMWare's site to find exactly what I'm looking for.
Since I want the latest package, I will click on the ESXi-6.7.0-20210304001-standard update.
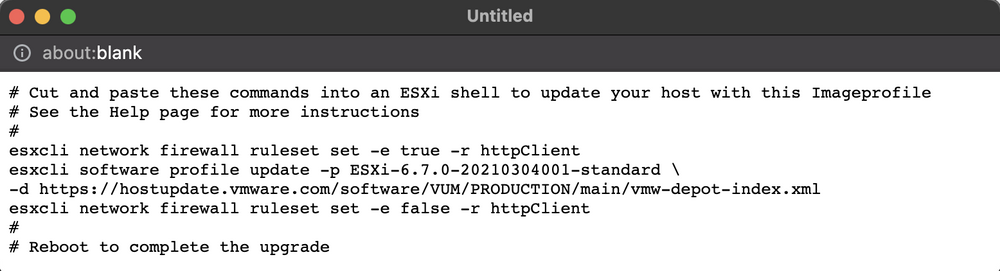
Step Three:

Once selected, a window will pop up similar to the one displayed above. The uncommented lines (the lines that do not start with a #) will need to be copied and pasted into your SSH session on your ESXi host in a later step.
Step Four:
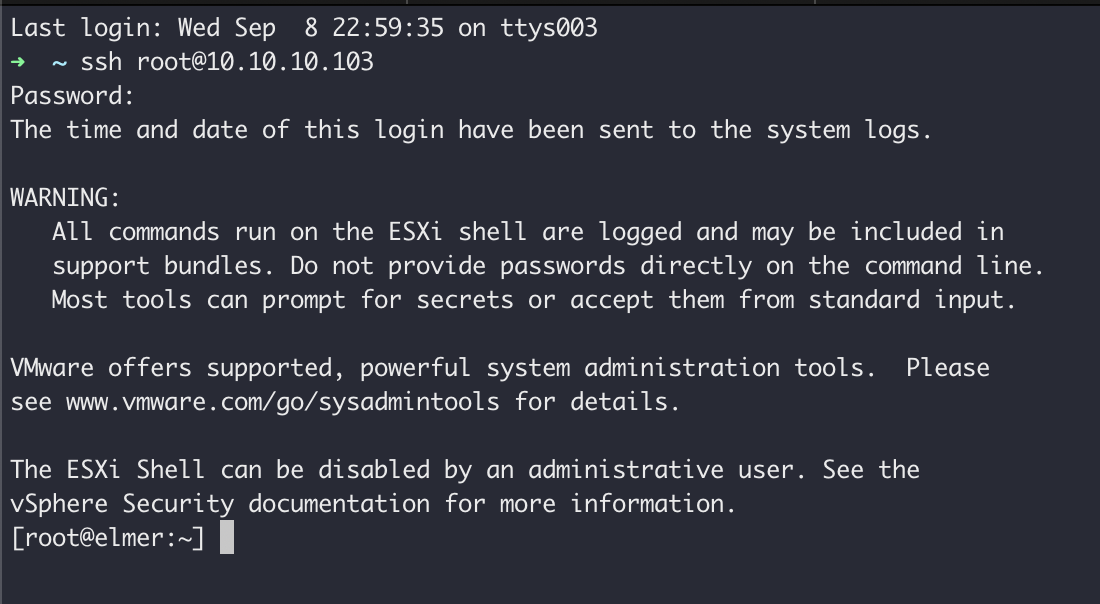
It's now time to establish an SSH session with your ESXi server. If you're on Mac or Linux, this is as simple as running the command ssh <username>@<ip_of_esxi>. Your username and password will be the same that you normally log in to ESXi with.
If you're a Windows user, I encourage you to using something like WSL2, but something more traditional, like PuTTY will also work. You will use the same credentials as described above.
Step Five:
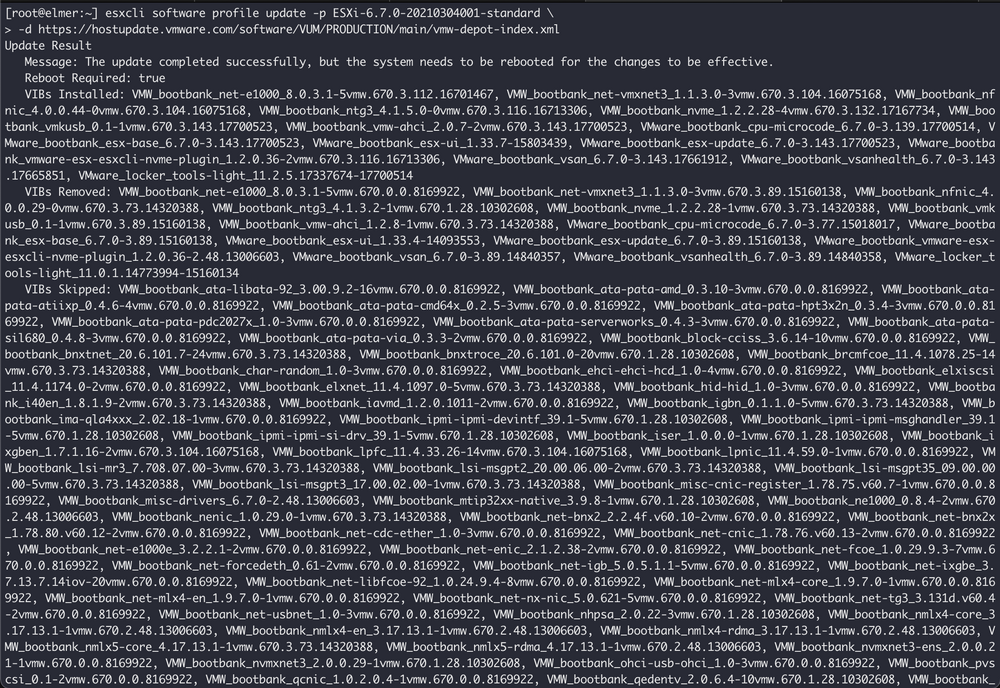
Now that you have an SSH session established, it's time to run the commands we were provided earlier.
You could copy and paste all of these at once or run them one at a time. It can take several minutes for the process to complete.
Sidenote:
When I first attempted to update my server, I ended up running into the following issue:
[root@elmer:~] esxcli software profile update -p ESXi-6.7.0-20210304001-standard \
> -d https://hostupdate.vmware.com/software/VUM/PRODUCTION/main/vmw-depot-index.xml
 [InstallationError]
 [Errno 28] No space left on device
       vibs = VMware_locker_tools-light_11.2.5.17337674-17700514
 Please refer to the log file for more details.
It appears that I was being limited by the size of the USB that I had ESXi booting off of.
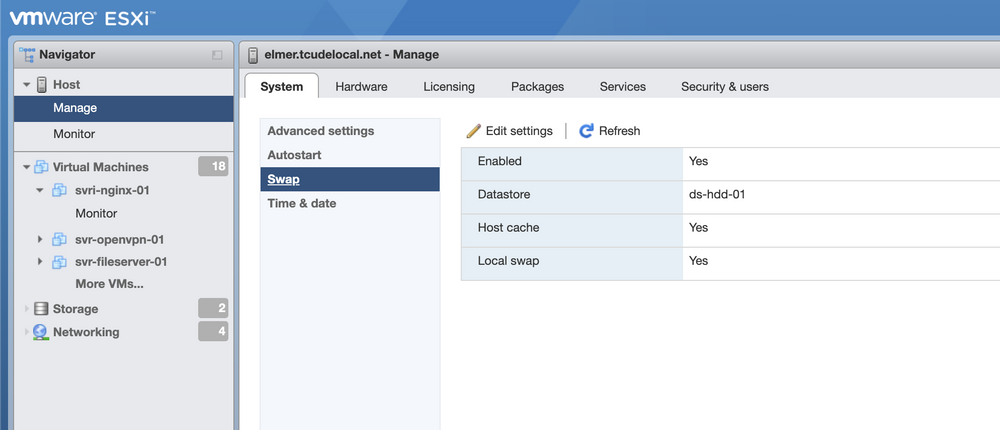
Thankfully, after doing some digging around online, I found that this is any easy fix. Simply visit your ESXi dashboard > Manage > Swap, and configure your swap to use a datastore of your choosing
Conclusion:
After running all of the commands provided and rebooting the server, your ESXi instance should now be updated and running the latest patches, provided directly from VMware.
I hope you found this guide helpful. If you did, consider adding my site to your RSS reader using the following URL: