Installing the Veeam Agent for Linux

A while back, I showed you how to back up your VMWare virtual machines with Veeam. While the vast majority of my lab operates within VMWare's vSphere, I do have one bare metal Linux installation – my Plex server.
For those who are unfamiliar with the term "bare metal", it really just comes down to any operating system installed directly onto a computer or server, rather than living within a hypervisor, like VirtualBox or VMWare's ESXi.
While I've been able to keep all of my virtual machines safely backed up, until now, I've had no backup solution for my single bare metal linux installation. Not the most ideal situation, I know. Fortunately, Veeam offers the Veeam Agent for Linux, which allows you to easily back up your machine to your Veeam Backup and Replication Console.
Getting Started
First, you will need to download the installation package, found here. Simply download the respective package for the distro you are running. For the purposes of this guide, I will be showing you how to install the agent on a Debian based system.
Once downloaded, navigate to the package and install it with the following command:
sudo dpkg -i ./veeam-release* && sudo apt update
Now that Veeam's repository has been added, you will need to run one more command to finish the installation process:
sudo apt install veeamConfiguration
Once installed, simply run the command veeam or, if required, sudo veeam. You will then be prompted to accept the Veeam EULA.
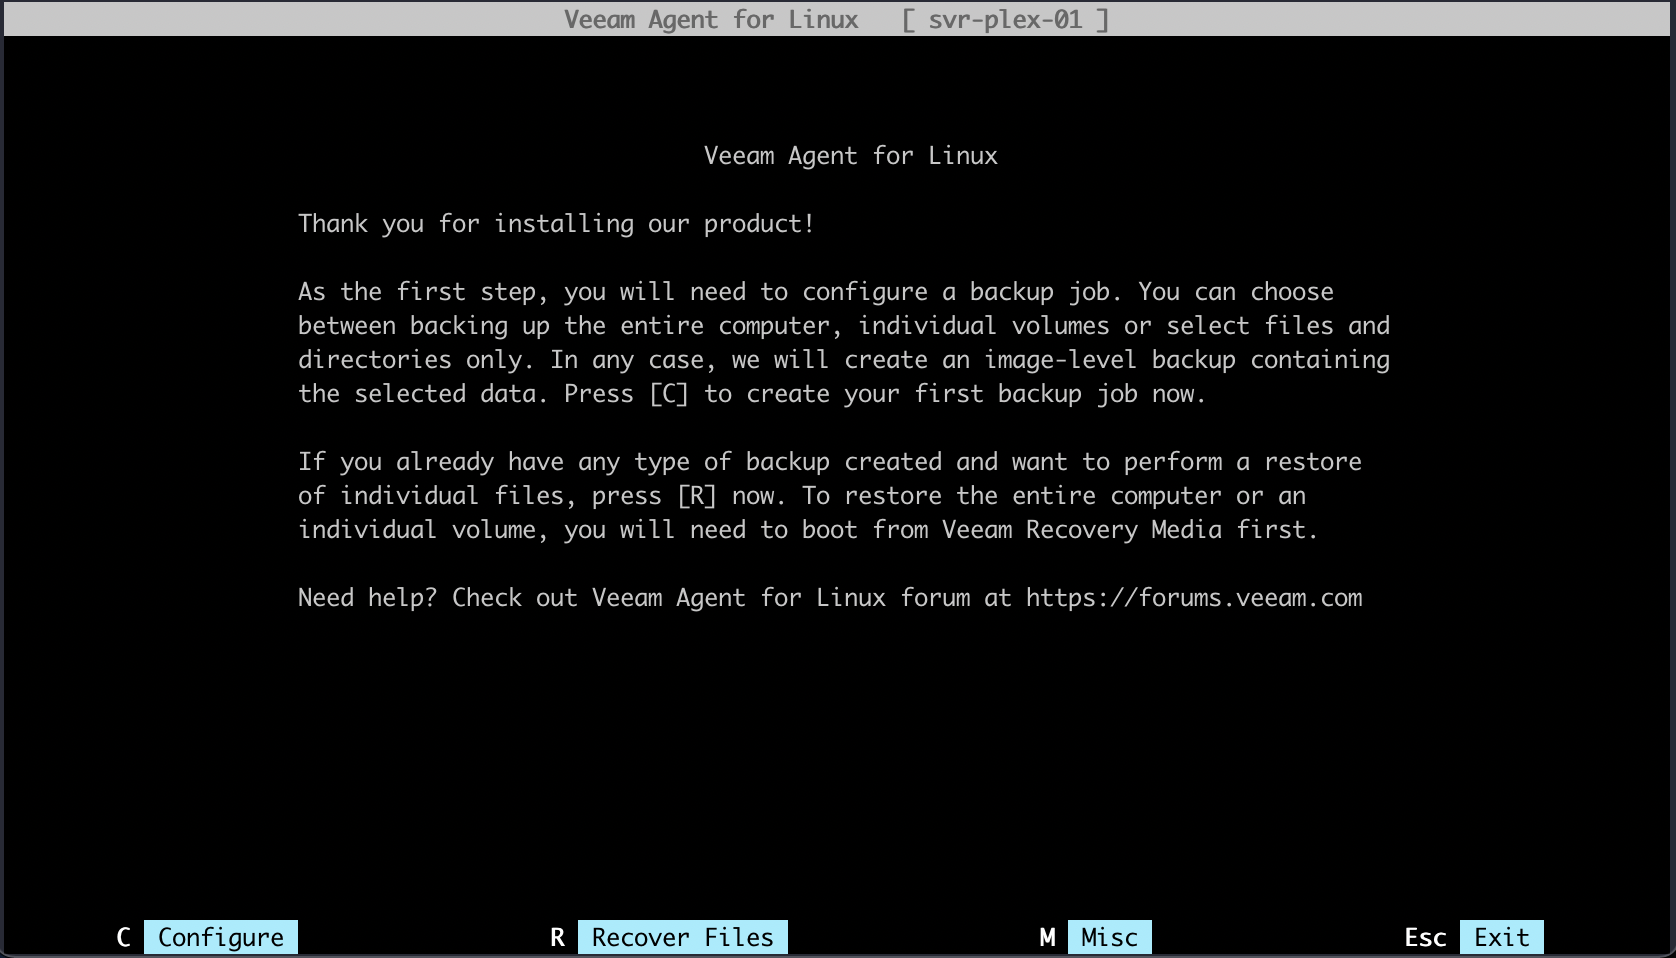
After accepting the EULA, you will be presented with a TUI similar to the one shown above. To begin the configuration, simply press the C key on your keyboard.
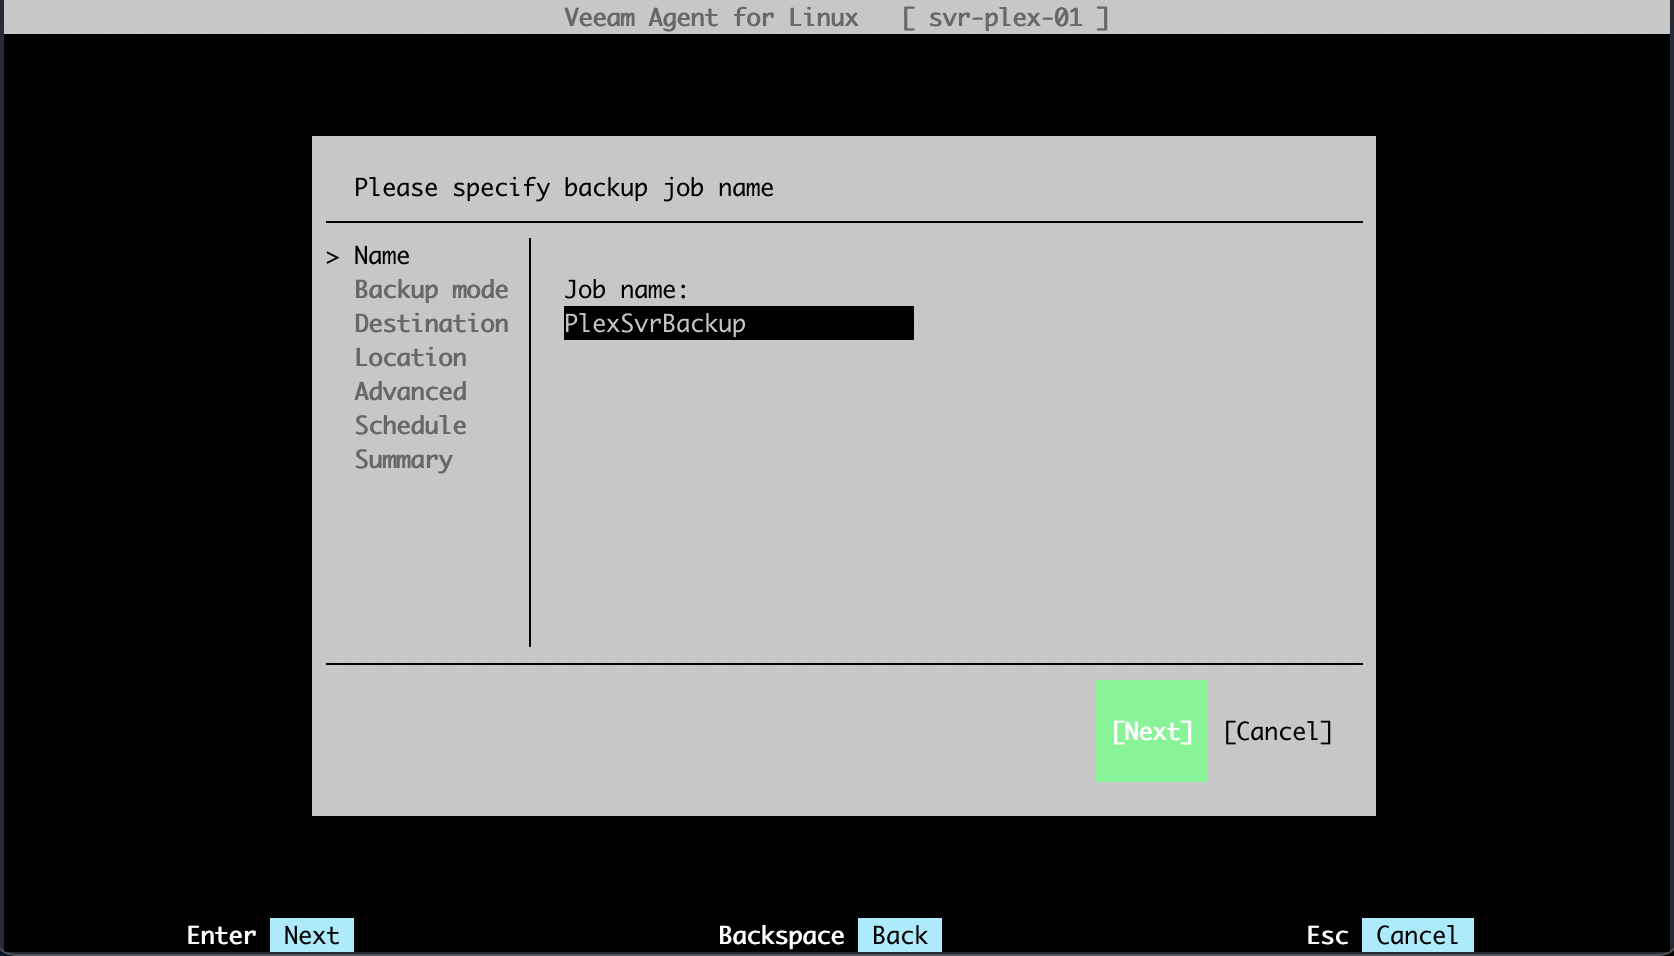
Provide a name for the backup of this device.
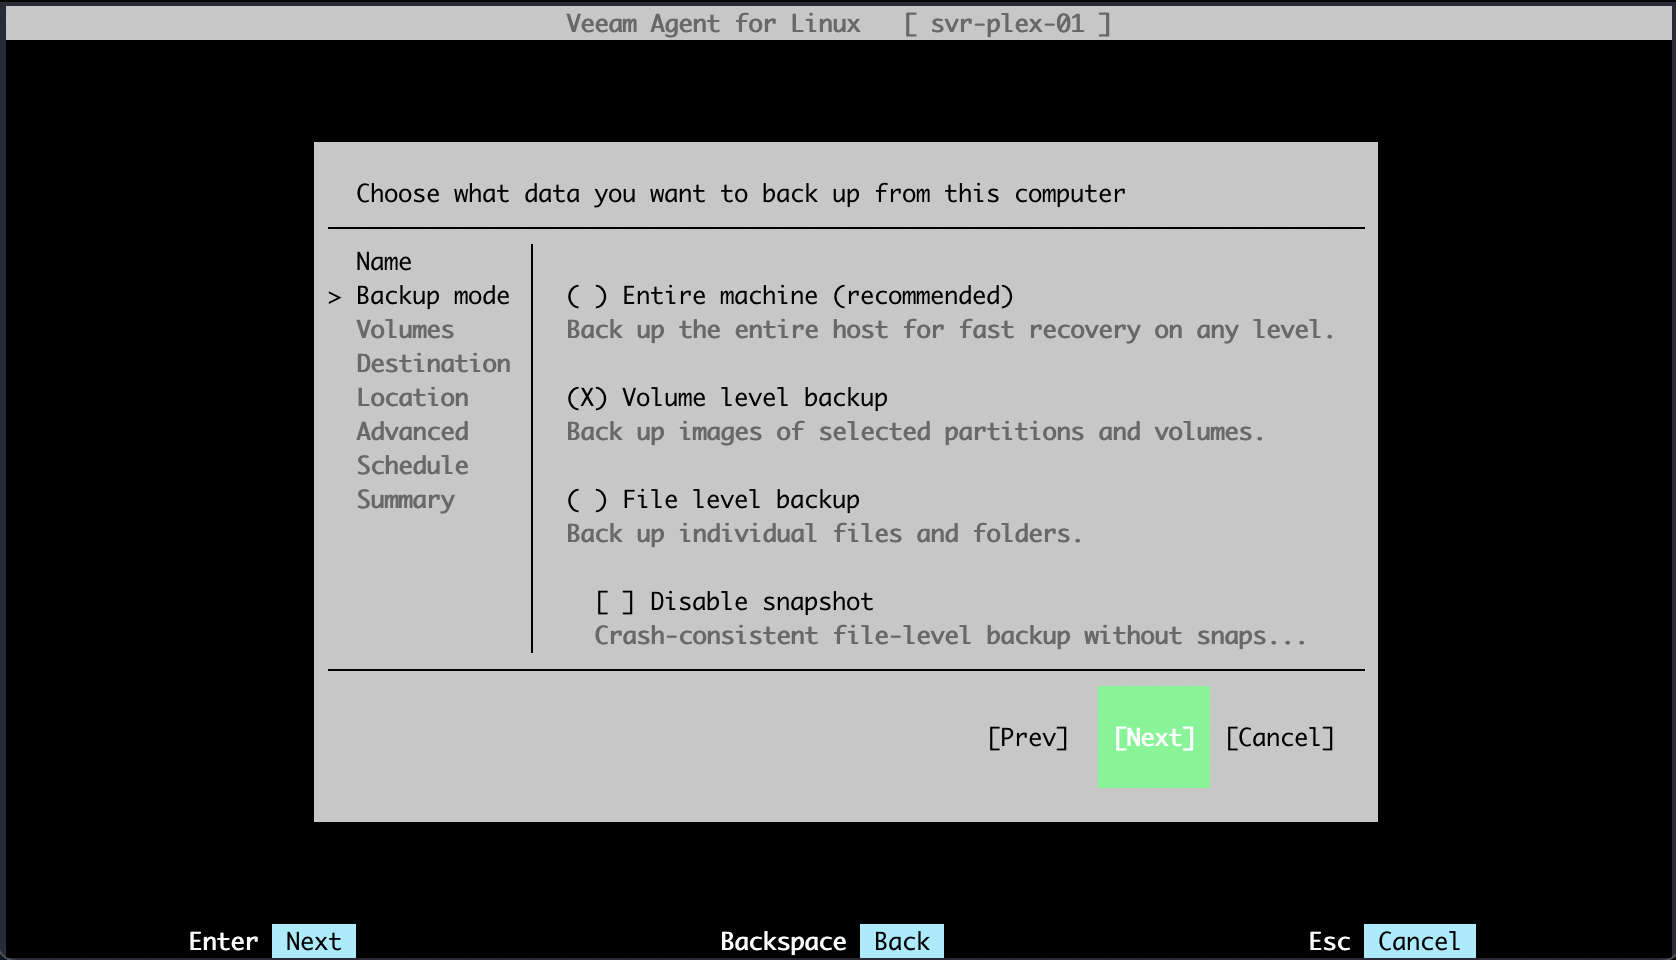
You are now able to select the type of backup you'd like to perform. For my purposes, I only wanted to back up the drive that my operating system was installed, so I chose the option shown above.
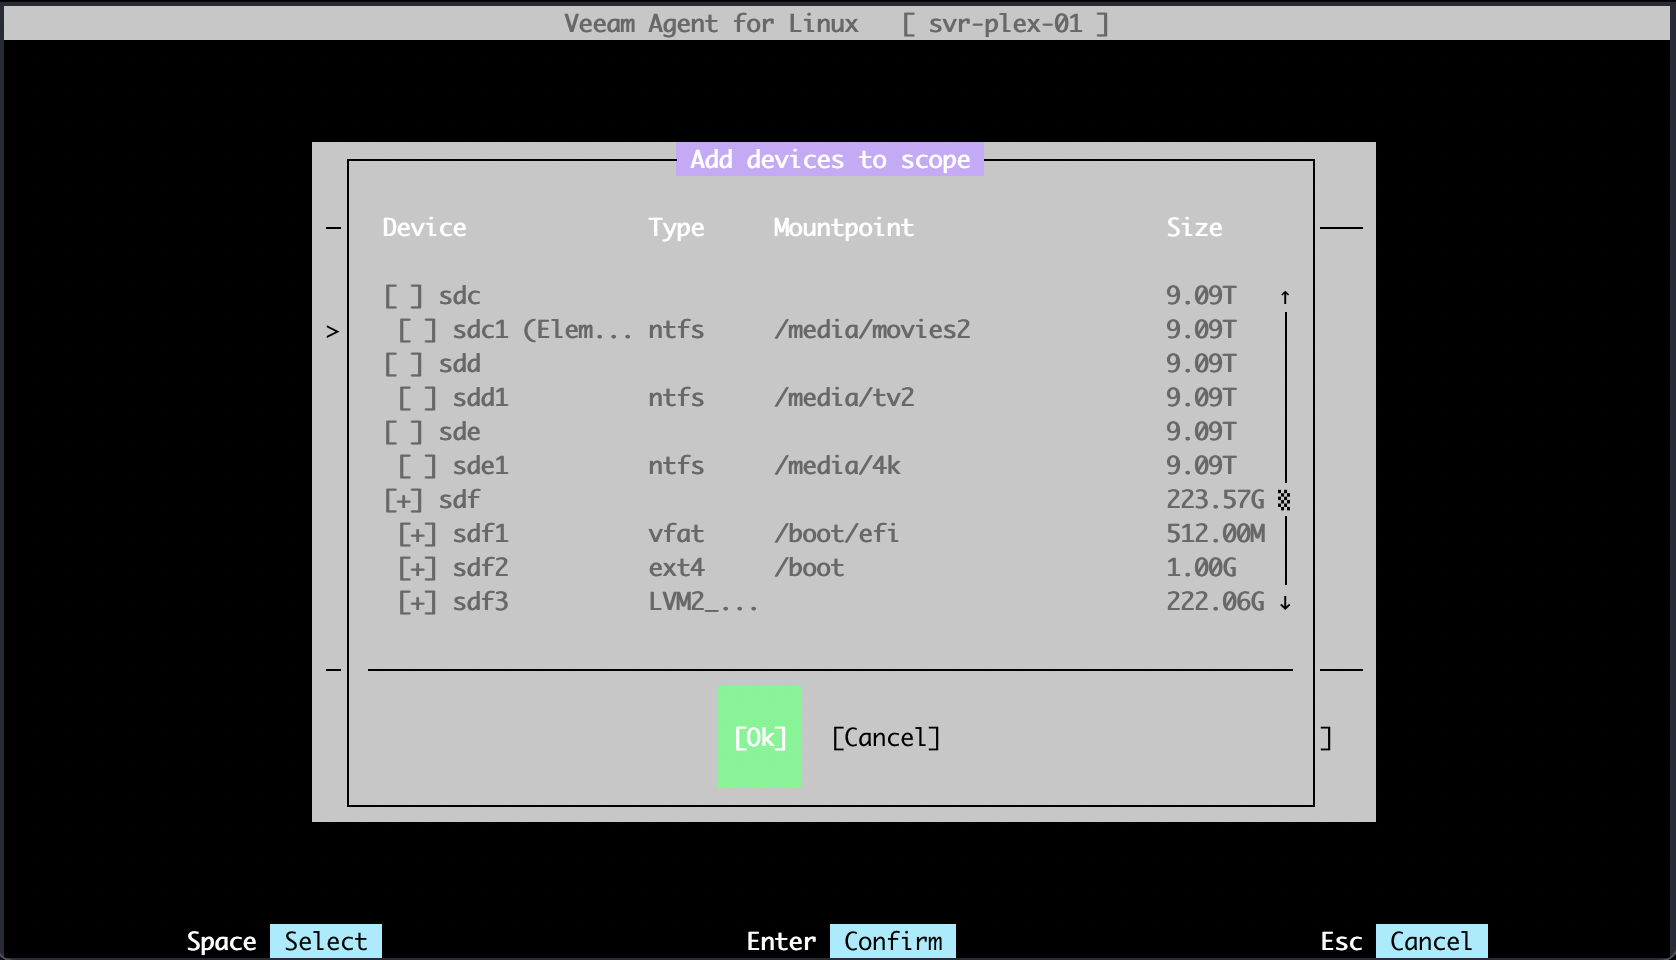
After continuing, I was shown a list of my devices and was able to select the boot drive for backing up.

Once you have selected all of the volumes you'd like to back up, tab over to "Next"
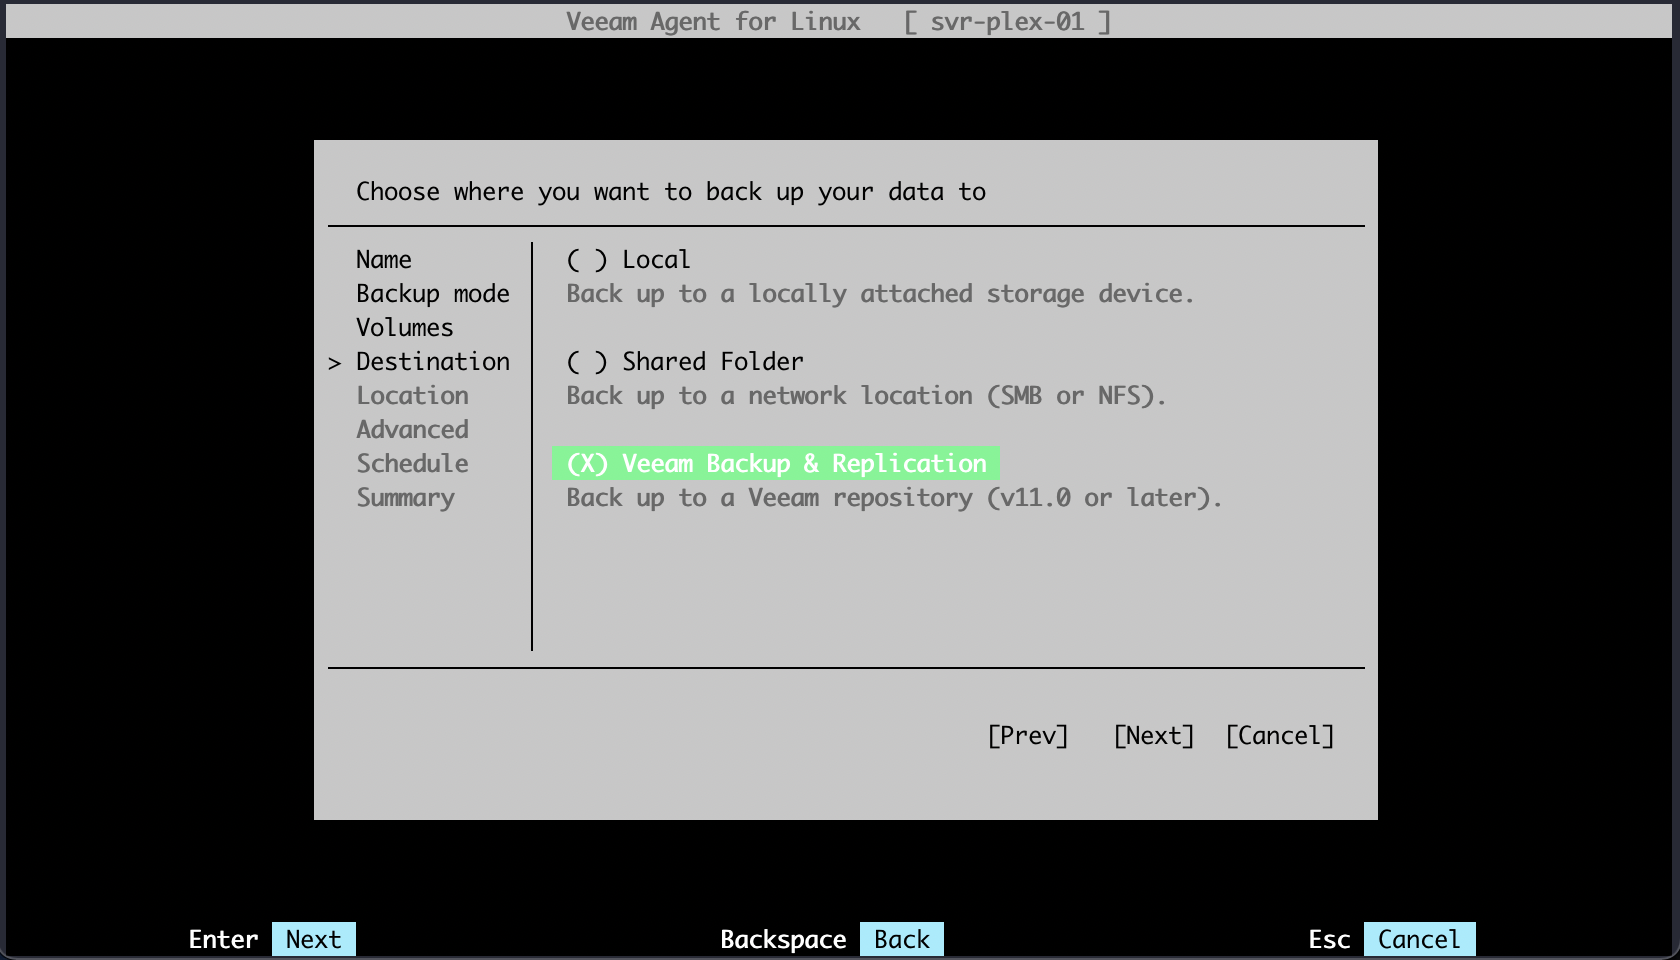
You're now able to choose where you to back up your data. Since I already have a Veeam Backup and Replication Console set up and running, I chose the selection shown above.
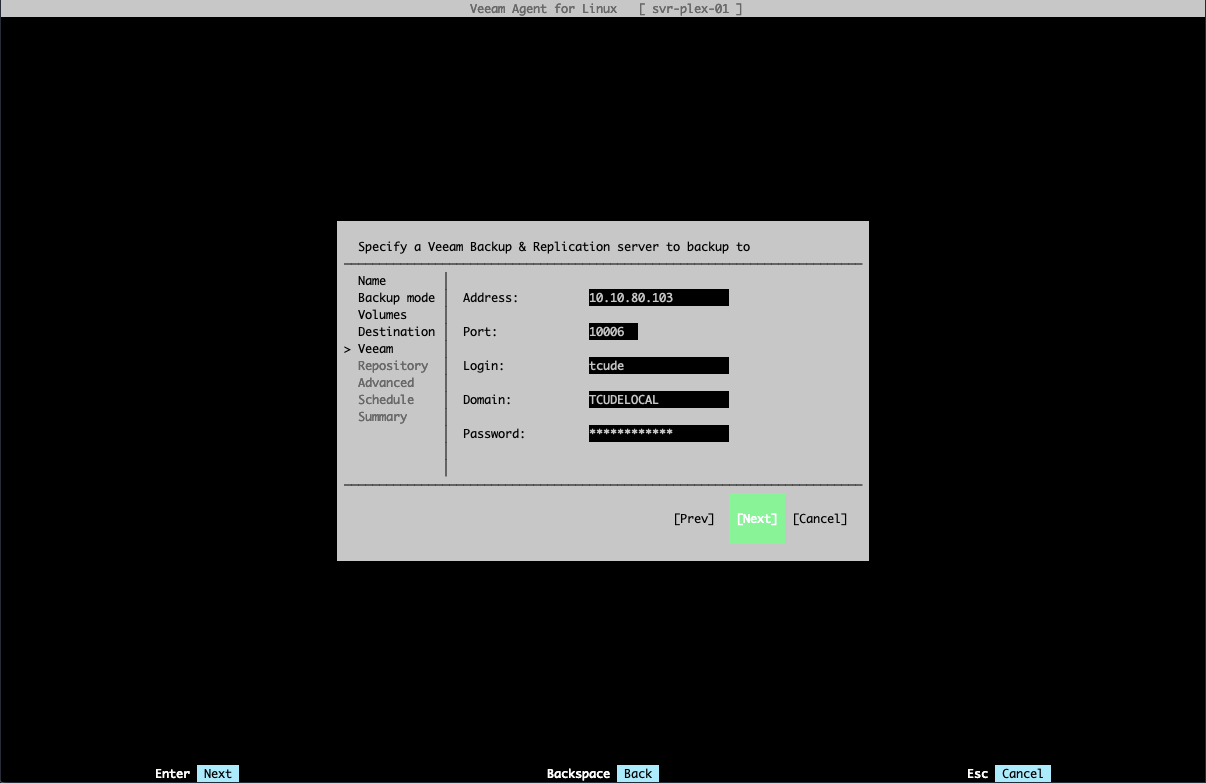
After proceeding, you will now be prompted to enter a bit of information about your Veeam Backup and Replication Console. The port number can likely be kept as the default value but you will need to populate the other fields on your own to their corresponding values.
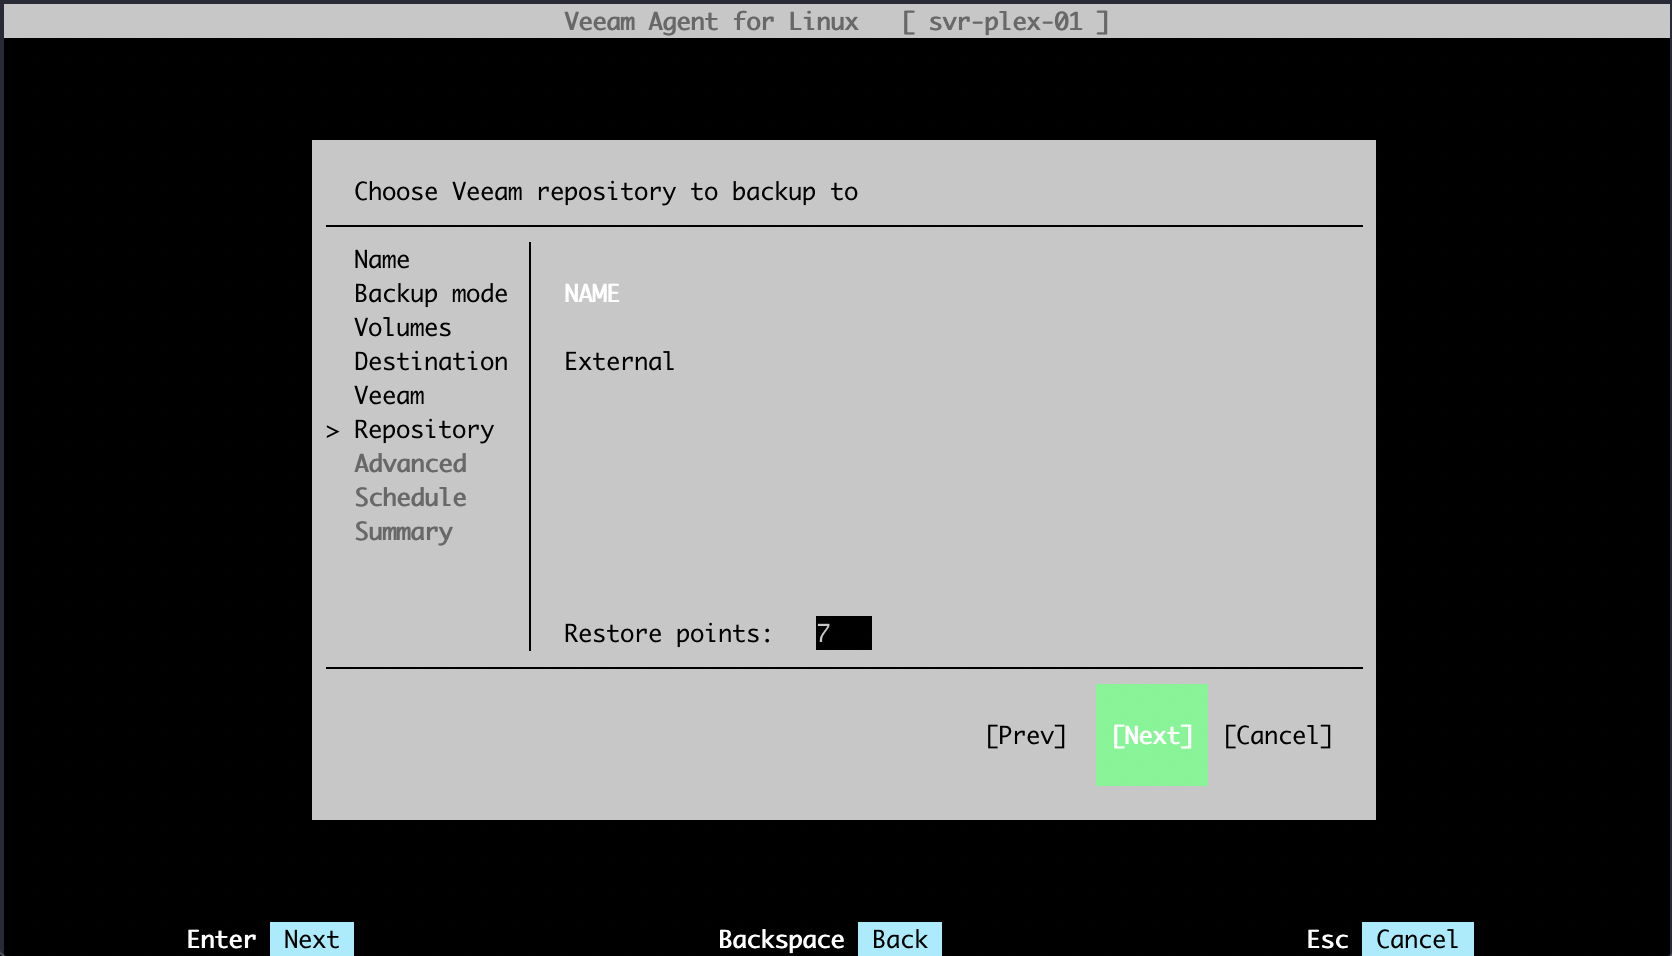
Next, you will be presented with a list of backup repositories available to you.
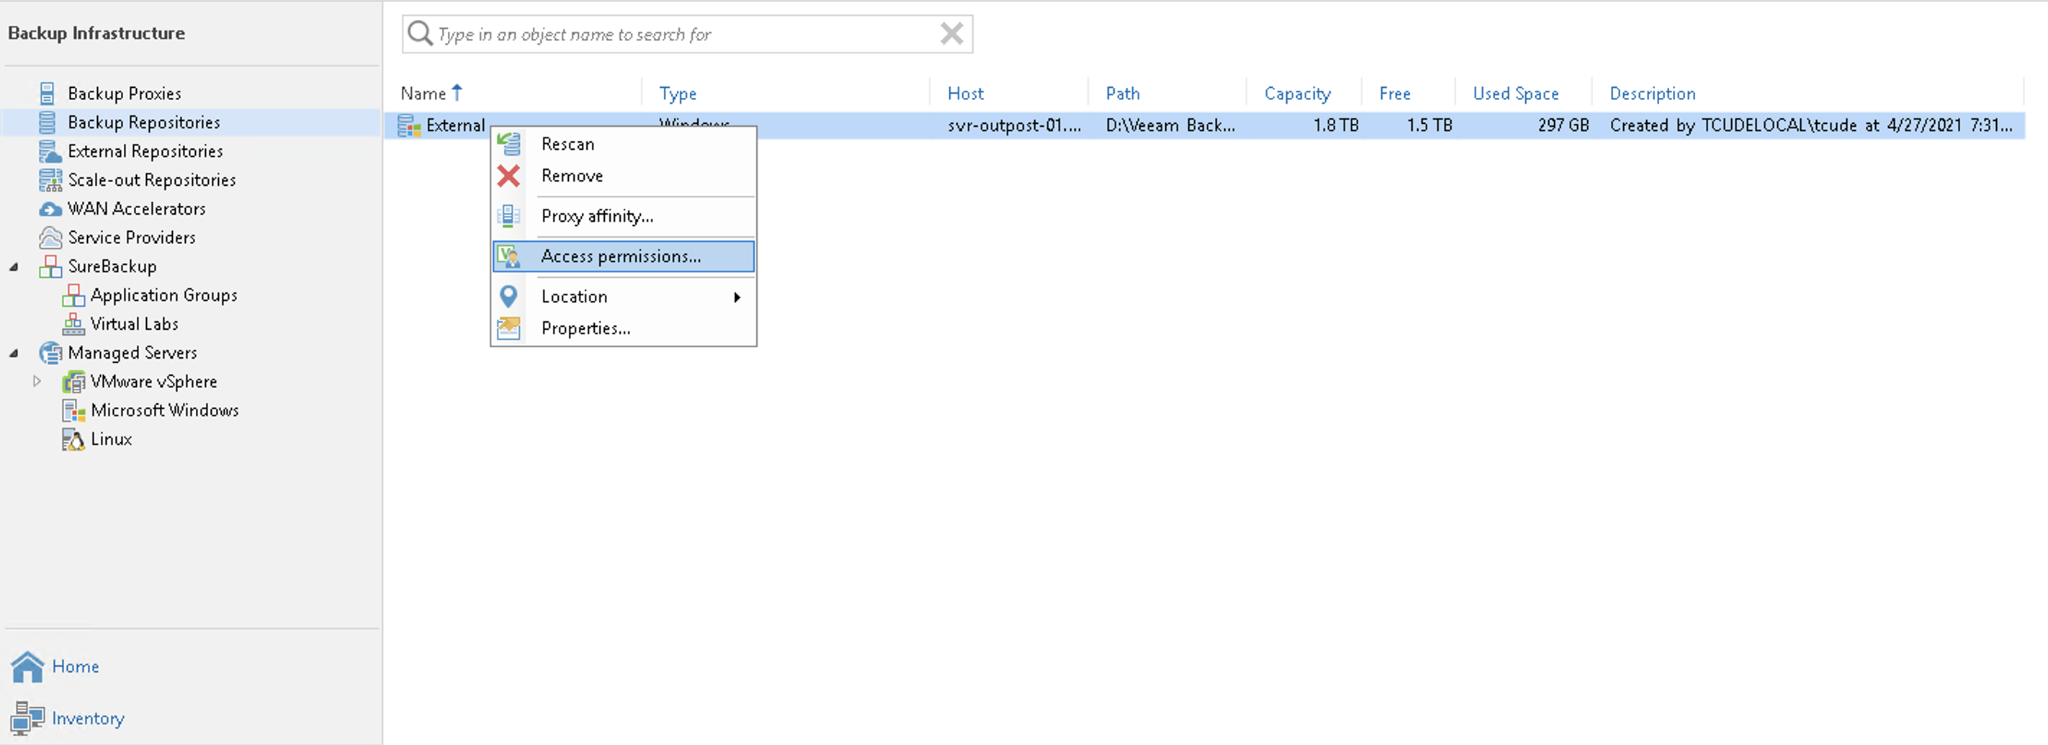
As a side note, if you find that your backup repository is not showing up on this step, you will need to ensure your access permissions are configured properly. You can find these settings shown in the screenshot above.
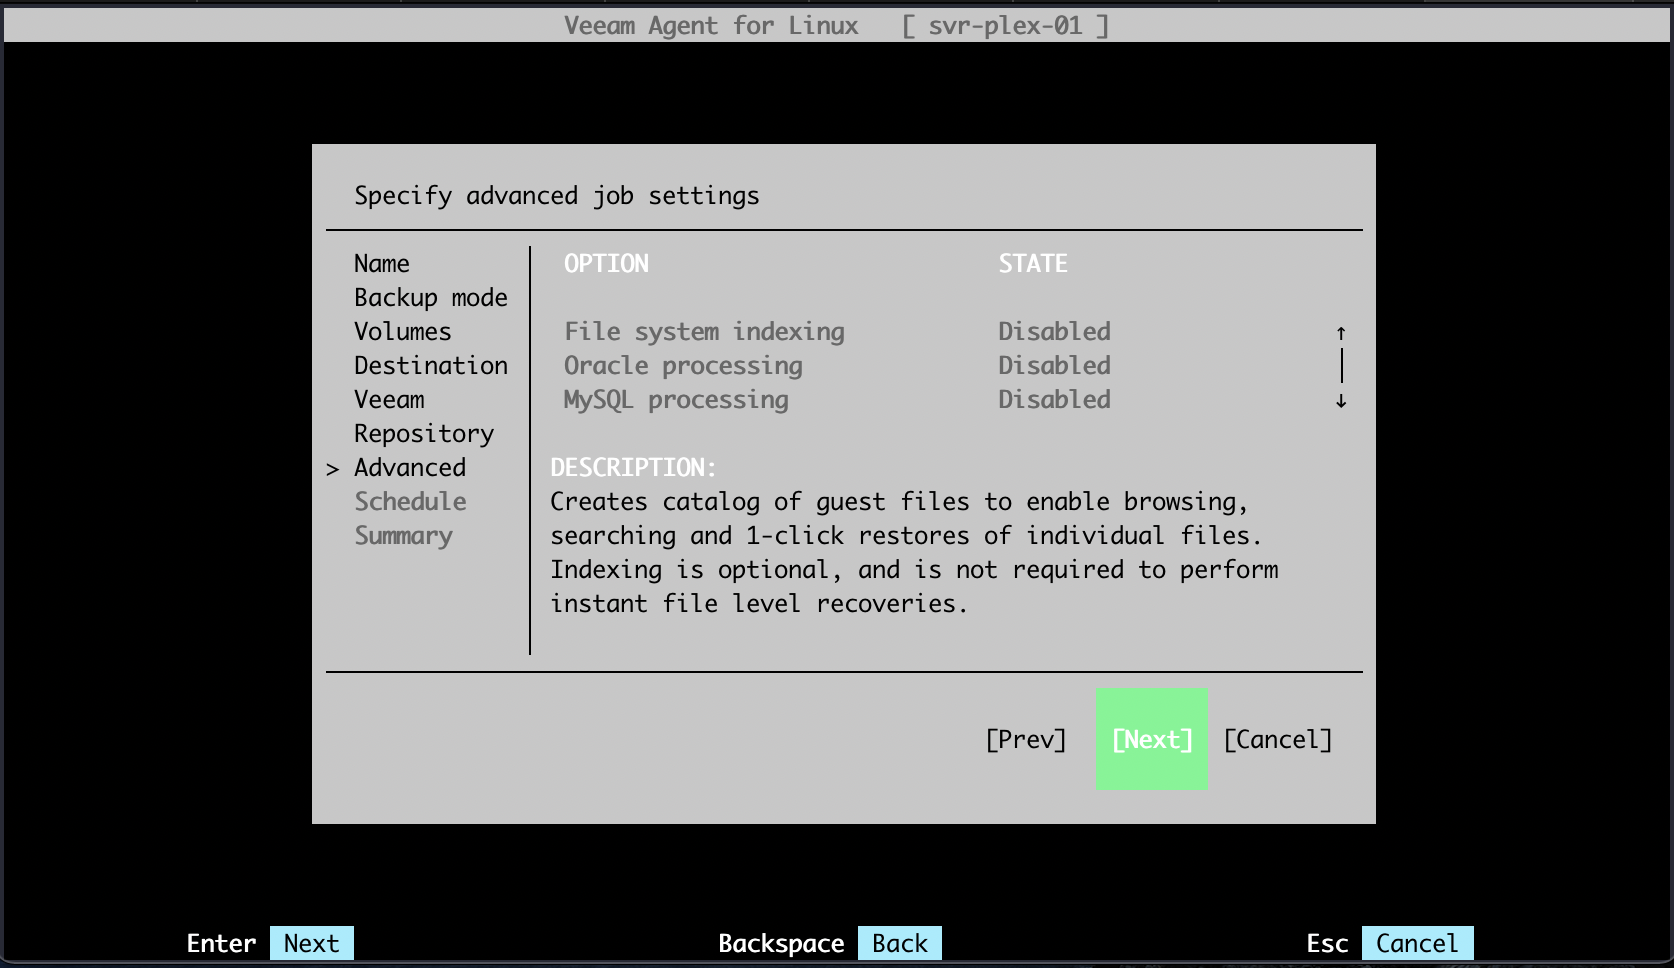
Here, you are able to do a bit of advanced configuration, though I chose to leave the settings at their default values.
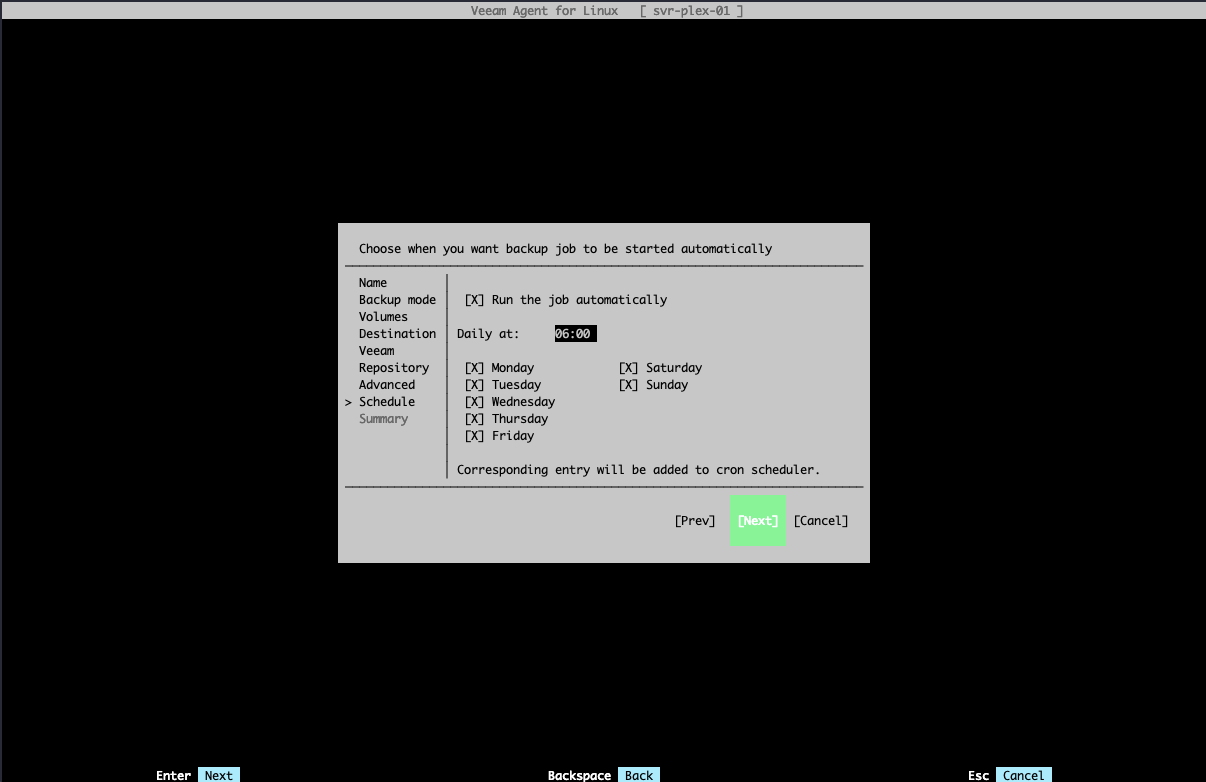
For your last configuration step, you are now given the ability to choose when you'd like your machine to backup. I chose to run mine on a daily basis.
Conclusion
That's all there is to it! You now will be presented with a summary page and will have the ability to begin the backup process from there.
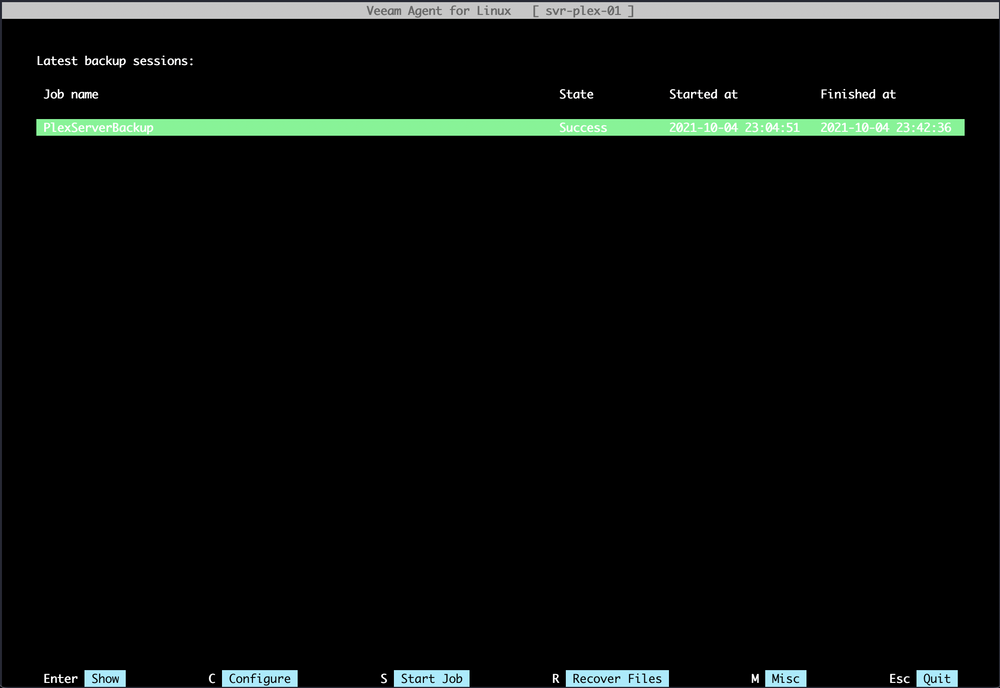
Having your new job configured, you will now have many more options at your disposal, as well as a bit of information about the job.
I find a lot of peace in knowing that I now have everything in my lab backed up. All that remains are my personal computers, which may make for a fun article in the future.
I hope you found this guide helpful. If you did, consider adding my site to your RSS reader using the following URL: