Setting Up Per-Room Cleaning with Roomba and Home Assistant
I have recently started making use of Home Assistant to not only set up automation in the IoT devices within my home, but to also take control of said devices and not have to rely upon poorly made, buggy apps from the manufacturers of my devices.
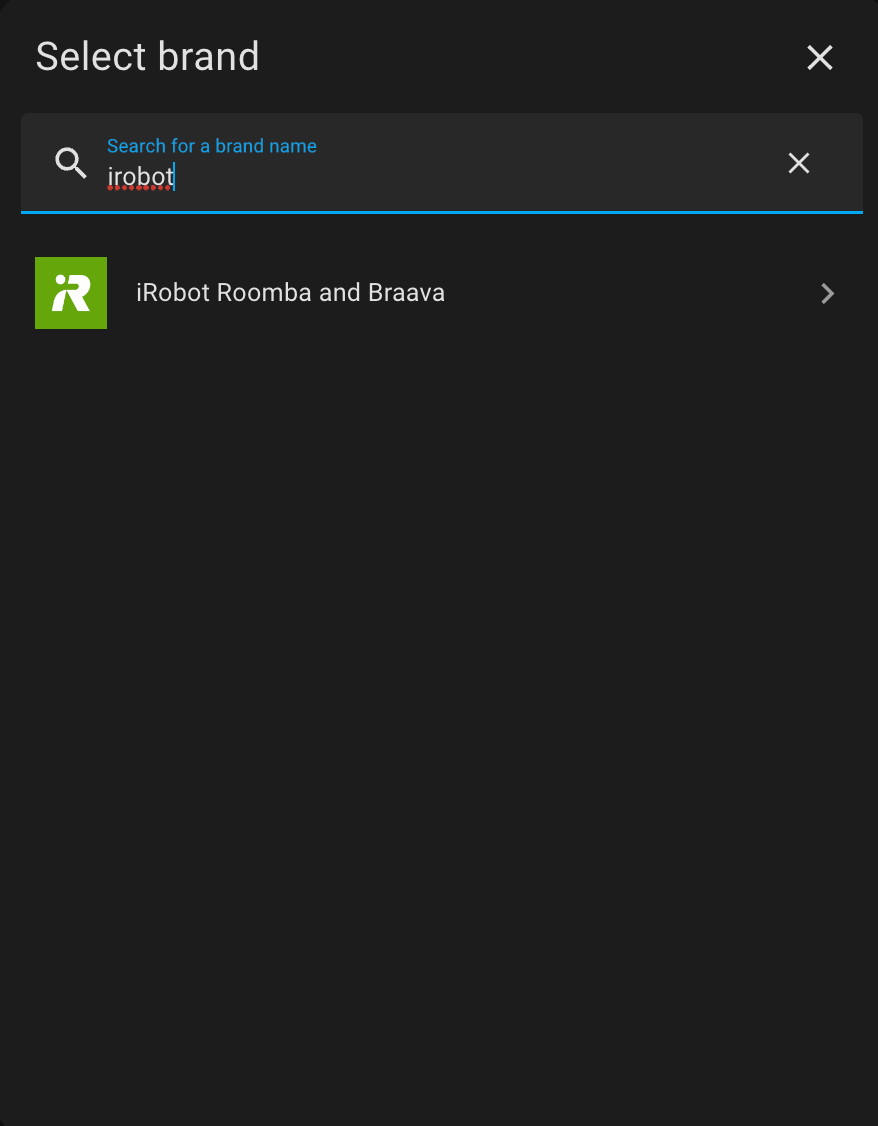
In my search to integrate more of my devices with Home Assistant, integrating my iRobot Roomba i3+ has been of great interest to me. This is primarily due to the companion app being terrible and regularly not working correctly.
Establishing the iRobot Home Assistant Integration
To start, you will need to add the Roomba integration to your Home Assistant instance. You can find more info about the integration here:
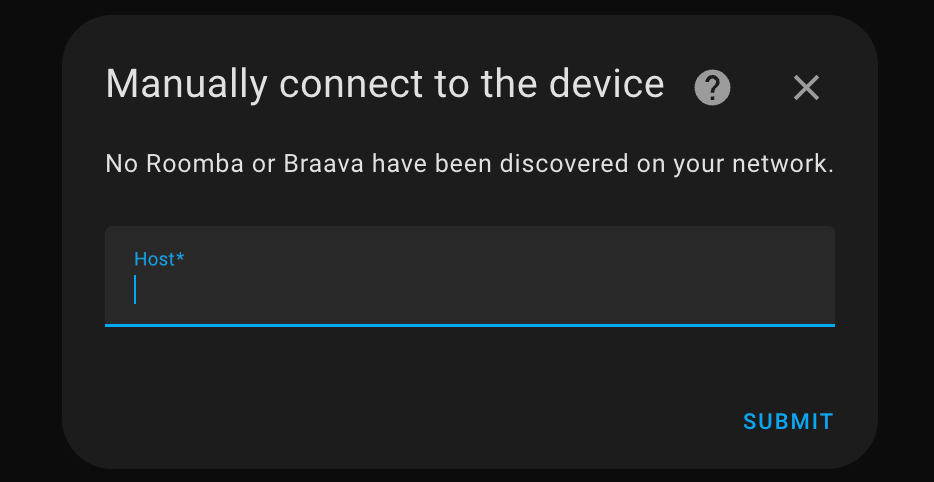
Once selected, Home Assistant will attempt to automatically pair itself with your Roomba. Personally, I found this function to not work properly and was presented with the following prompt asking for the IP of my Roomba to add it directly:
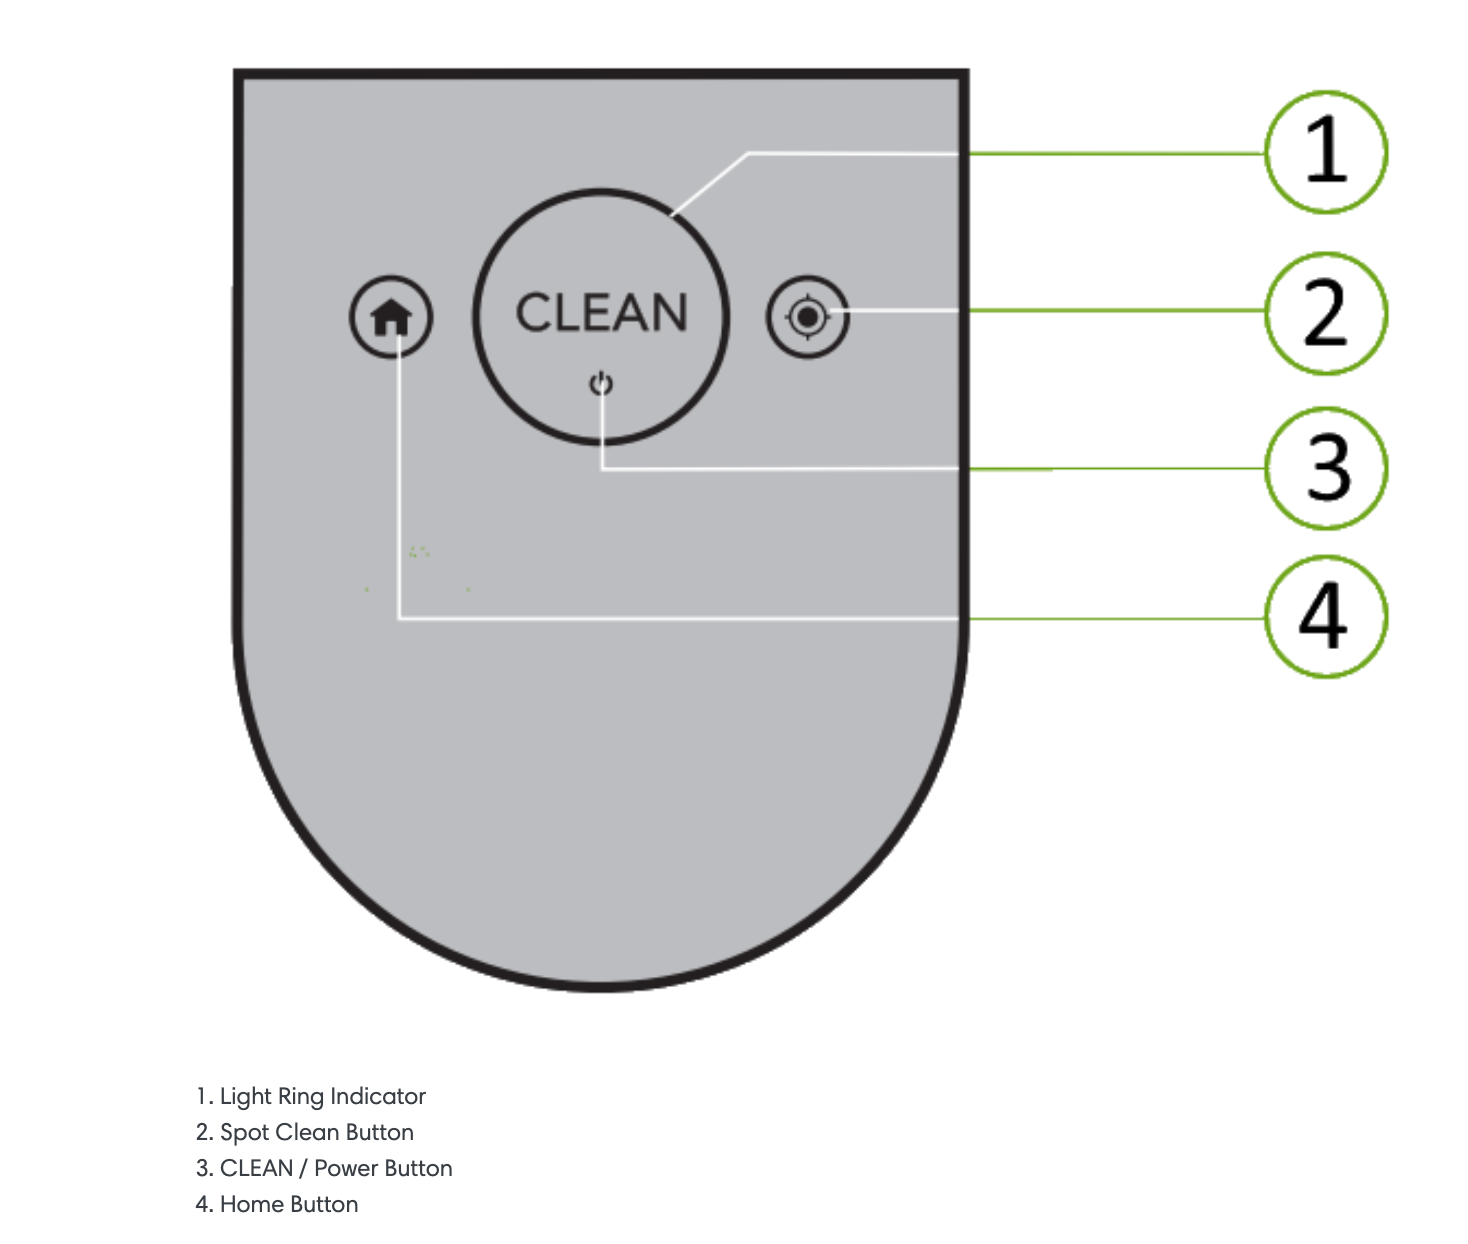
After entering the IP of my Roomba, I was then presented with this prompt:

For my specific model, the Roomba i3+, I had to press and hold the home and spot clean buttons.
After following the instructions and successfully hearing the chime, I was then presented with this screen:
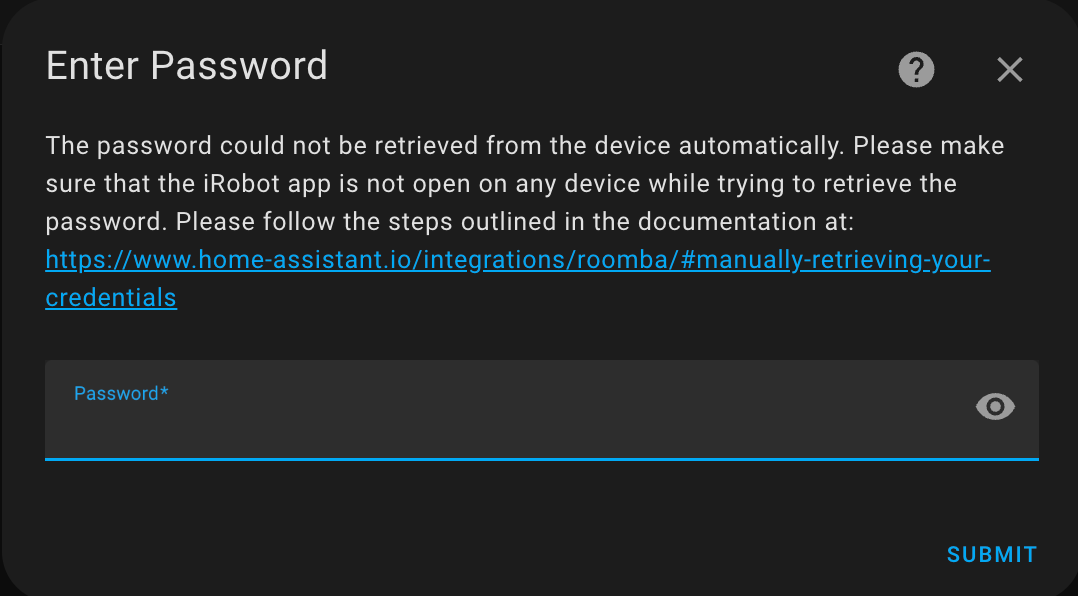
To manually retrieve my password, I ran the three commands provided below
sudo apt install npm

sudo npm install -g dorita980

get-roomba-password-cloud <irobot_acct_email> <irobot_acct_password>
   60  sudo docker run -e BLID='A8852C2612F745DEA27ED8D3D45DC041' -e PASSWORD=':1:1652399081:plWCveOc7PsMG7d5' -e ROBOT_IP='10.10.150.209' -it -w /root node sh -c "npm install --silent --no-progress dorita980 && node -e \"var dorita980 = require('dorita980'); var robot = new dorita980.Local(process.env.BLID, process.env.PASSWORD, process.env.ROBOT_IP); robot.getRobotState(['lastCommand']).then((st)=> { console.log(st.lastCommand); process.exit(0); });\""
Following this, I received an output containing my BLID and Password
Found 1 robot(s)!
Robot "Roomba" (sku: i355020 SoftwareVer: daredevil+2.4.7+daredevil-release+150):
BLID=> A8SKLJ892KS2Kl21041
Password=> :1:12345677:abcdefgh <= Yes, all this string.After that, I simply pasted the Password value within the "Enter Password" prompt displayed within Home Assistant and my Roomba was then successfully paired.
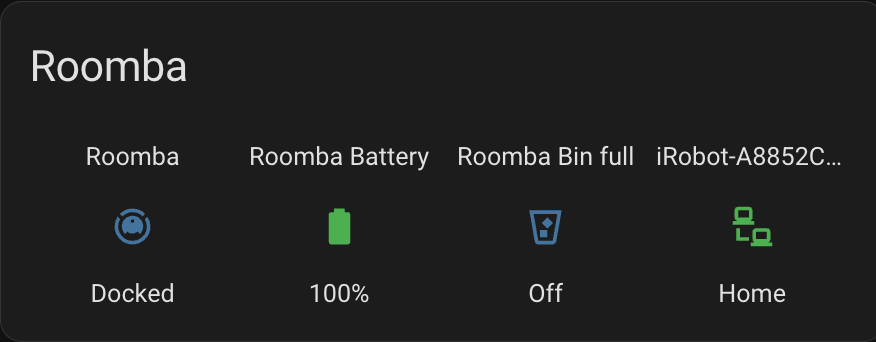
As a last step in this process, I then created a Glance card for my Home Assistant dashboard to test the integration's functionality:
show_name: true
show_icon: true
show_state: true
type: glance
entities:
  - entity: vacuum.roomba
  - entity: sensor.roomba_battery_level
  - entity: binary_sensor.roomba_bin_full
  - entity: device_tracker.irobot_a8852c2612f745dea27ed8d3d45dc041
title: Roomba
The end result is simple but effective
Setting Up Per Room Cleaning
To begin the process of setting up per room cleaning, you will need to first ensure you have already successfully completed a mapping run and you have defined your rooms within your smart map in the iRobot app.
Once rooms and areas have been defined within your Roomba's smart map, they will be stored as a rid for room IDs or zid for zone ID. For my purposes, I was only needing to find the rid values for each of my rooms.
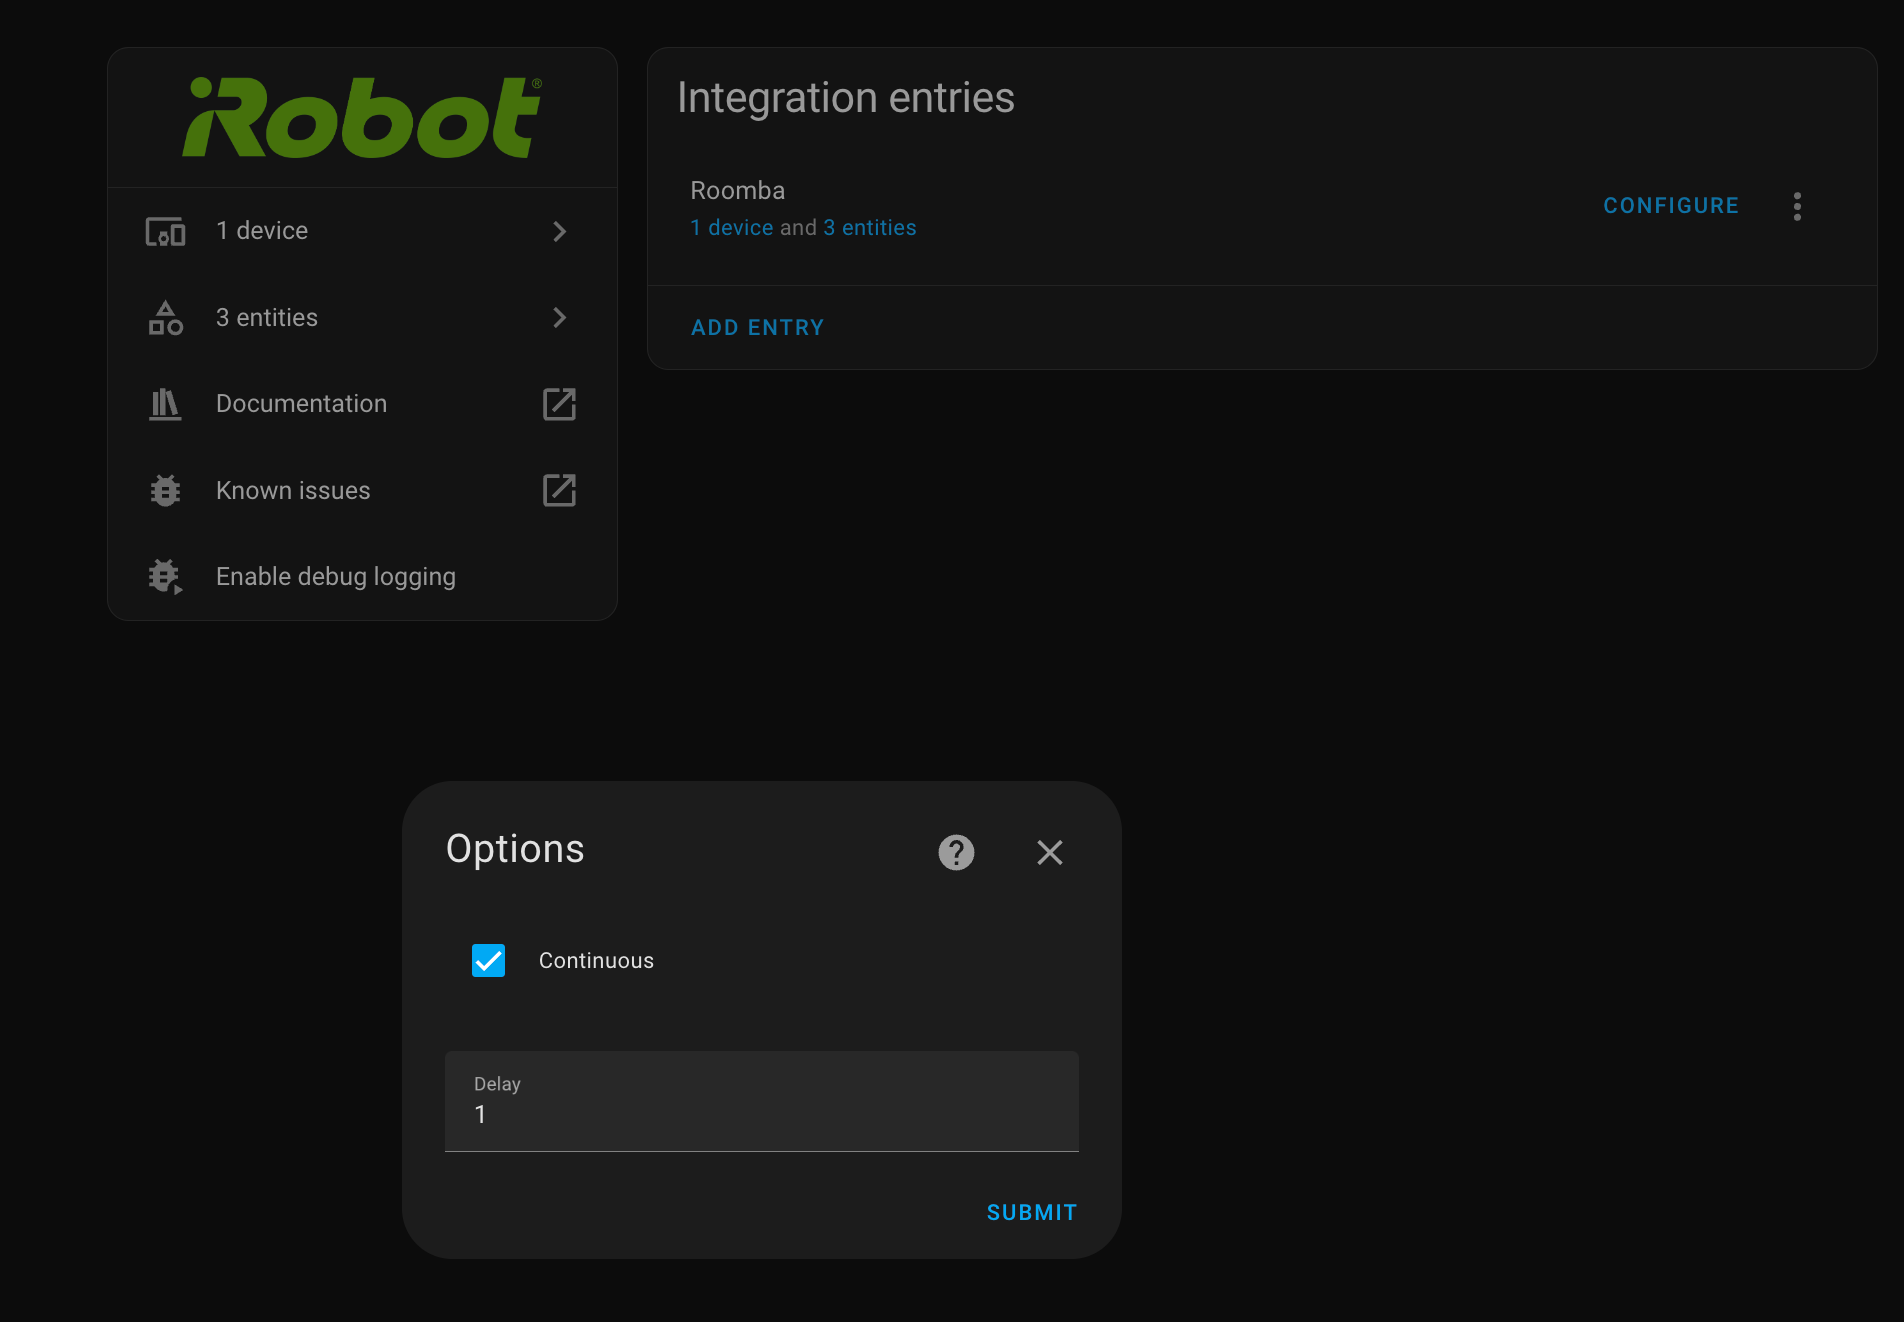
To retrieve these values, you will need to make use of the Dorita980 SDK. This process involves running a docker container with Dorita980 to retrieve and display the last cleaning command sent to the Roomba. Before starting, you will need to ensure that both Home Assistant and the iRobot app are not actively connected to the Roomba. To do this for the app, simply close out of it on your mobile device. I will discuss how to disable connectivity from Home Assistant in a later step. Once done, complete the following steps:
 koalazak
Step One:
Within the iRobot integration in Home Assistant, select Configure and uncheck the Continuous box to temporarily prevent your Home Assistant instance from communicating with your Roomba
Step Two:
Open the iRobot app on your mobile device. Within it, create a new cleaning job and select the first room in your list of available rooms to clean. Once the job has started, close out of the iRobot app to disconnect it from the Roomba.
Step Three:
Using the previously mentioned Dorita980 SDK, run the following command to retrieve your rid or zid. You will need to reference your BLID and Password from the previous section and also have your devices IP address handy.
$ sudo docker run -e BLID='A8SKLJ892KS2Kl21041' -e PASSWORD=':1:12345677:abcdefgh' -e ROBOT_IP='10.10.150.209' -it -w /root node sh -c "npm install --silent --no-progress dorita980 && node -e \"var dorita980 = require('dorita980'); var robot = new dorita980.Local(process.env.BLID, process.env.PASSWORD, process.env.ROBOT_IP); robot.getRobotState(['lastCommand']).then((st)=> { console.log(st.lastCommand); process.exit(0); });\""
[sudo] password for tcude:
npm notice
npm notice New patch version of npm available! 9.8.0 -> 9.8.1
npm notice Changelog: https://github.com/npm/cli/releases/tag/v9.8.1
npm notice Run npm install -g [email protected] to update!
npm notice
{
  command: 'start',
  time: 1692580155,
  initiator: 'localApp',
  pmap_id: 'noPOW9P1SHGHYNozROGR1Q',
  regions: [ { region_id: '1', type: 'rid' } ],
  ordered: 1,
  user_pmapv_id: '5310780T200121'
}
Here we can see that my first room has a rid of 1. Note that these seem to be randomly assigned and your first room is likely to have a different value than mine.
Step Four:
It is also possible to queue up all of your rooms in the iRobot app, start the cleaning job, and then re-run the same command from the previous step to spit out all of your room/zone IDs. The console output will provide IDs in the order that you selected them in the app. You can see an example of this here:
$ sudo docker run -e BLID='A8SKLJ892KS2Kl21041' -e PASSWORD=':1:12345677:abcdefgh' -e ROBOT_IP='10.10.150.209' -it -w /root node sh -c "npm install --silent --no-progress dorita980 && node -e \"var dorita980 = require('dorita980'); var robot = new dorita980.Local(process.env.BLID, process.env.PASSWORD, process.env.ROBOT_IP); robot.getRobotState(['lastCommand']).then((st)=> { console.log(st.lastCommand); process.exit(0); });\""
npm notice
npm notice New patch version of npm available! 9.8.0 -> 9.8.1
npm notice Changelog: https://github.com/npm/cli/releases/tag/v9.8.1
npm notice Run npm install -g [email protected] to update!
npm notice
{
  command: 'start',
  initiator: 'localApp',
  time: 1691037454,
  ordered: 1,
  pmap_id: 'noPOW9P1SHGHYNozROGR1Q',
  regions: [
    { region_id: '1', type: 'rid' },
    { region_id: '9', type: 'rid' },
    { region_id: '10', type: 'rid' },
    { region_id: '17', type: 'rid' },
    { region_id: '22', type: 'rid' },
    { region_id: '24', type: 'rid' },
    { region_id: '25', type: 'rid' },
    { region_id: '28', type: 'rid' },
    { region_id: '29', type: 'rid' },
    { region_id: '30', type: 'rid' },
    { region_id: '32', type: 'rid' },
    { region_id: '26', type: 'rid' },
    { region_id: '27', type: 'rid' },
    { region_id: '31', type: 'rid' }
  ],
  user_pmapv_id: '5310780T200121',
  params: null
}
Simply make note the order of the rooms/areas listed in your iRobot app and tie them to their corresponding rid or zid in a notes app of your choosing so that you can reference them later.
Creating a Room Cleaning Button
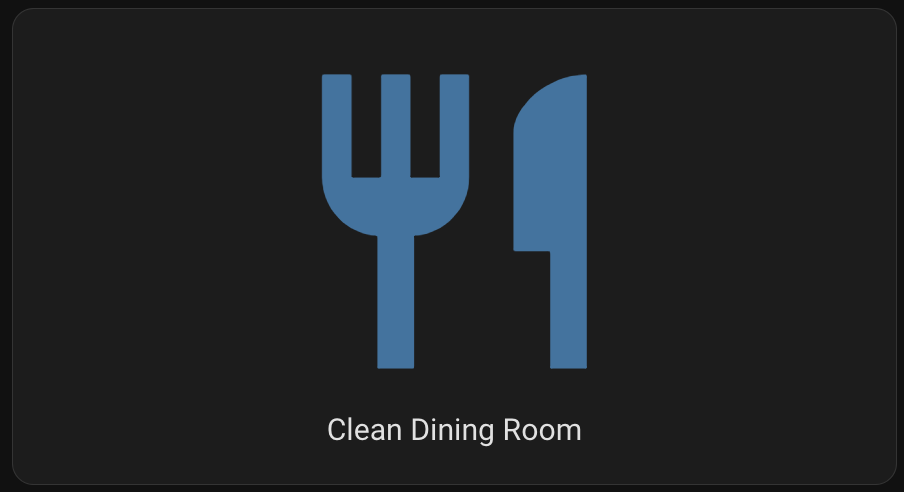
To create a button on your dashboard that initiates the cleaning of a specific room, you can use something similar to what I have set up:
show_name: true
show_icon: true
type: button
tap_action:
  action: call-service
  service: vacuum.send_command
  data:
    command: start
    params:
      pmap_id: noPOW9P1SHGHYNozROGR1Q
      regions:
        - region_id: '24'
  target:
    entity_id: vacuum.roomba
name: Clean Dining Room
icon: mdi:silverware-fork-knife
entity: vacuum.roomba
show_state: falseWhile it's not exactly fancy looking, it works for me:
To create a button that cleans multiple rooms, you can simply stack multiple region_id values:
show_name: true
show_icon: true
type: button
tap_action:
  action: call-service
  service: vacuum.send_command
  data:
    command: start
    params:
      pmap_id: noPOW9P1SHGHYNozROGR1Q
      regions:
        - region_id: '1'
          type: rid
        - region_id: '26'
          type: rid
  target:
    entity_id: vacuum.roomba
name: Clean Living Room / Breakfast Room
icon: mdi:sofa
entity: vacuum.roomba
show_state: false
Conclusion
In this guide, we covered how to extract your BLID and Password, how to set up the iRobot integration in the Home Assistant app, how to extract your zid and rid values, and how to create a simple button to initiate the cleaning of a specific room or rooms.
I hope you found this guide useful. If you did, consider subscribing to my site or following my RSS feed.