Converting a Proxmox VM for use in Hyper-V

Introduction:
While Proxmox has been my hypervisor of choice for the last year or so, I recently realized that I have an abundance of unused hardware within my workstation/gaming rig. Currently running Windows 10, the machine is capable of running virtual machines by making use of Hyper-V. With a Ryzen 9 5900x and 64GB of RAM sitting idle most of the time since I don't game much these days, I felt it would be a fun project to attempt to offload some of my VMs that would be able to take advantage of the significantly better single threaded performance that the Ryzen processor has to offer over the E5-2680 v4's residing in my Dell R730.
While Hyper-V is far from being my go-to hypervisor, I've actually been fairly impressed with how this new setup has been working for me.
Today's guide will show you exactly how I managed to make all of this happen.
Prerequisites:
Before you begin, you will need to first get your virtual machine into a state of being more easily manipulated. For my purposes, I used the backup feature within Proxmox to create a file that could then be converted over to something compatible with Hyper-V.
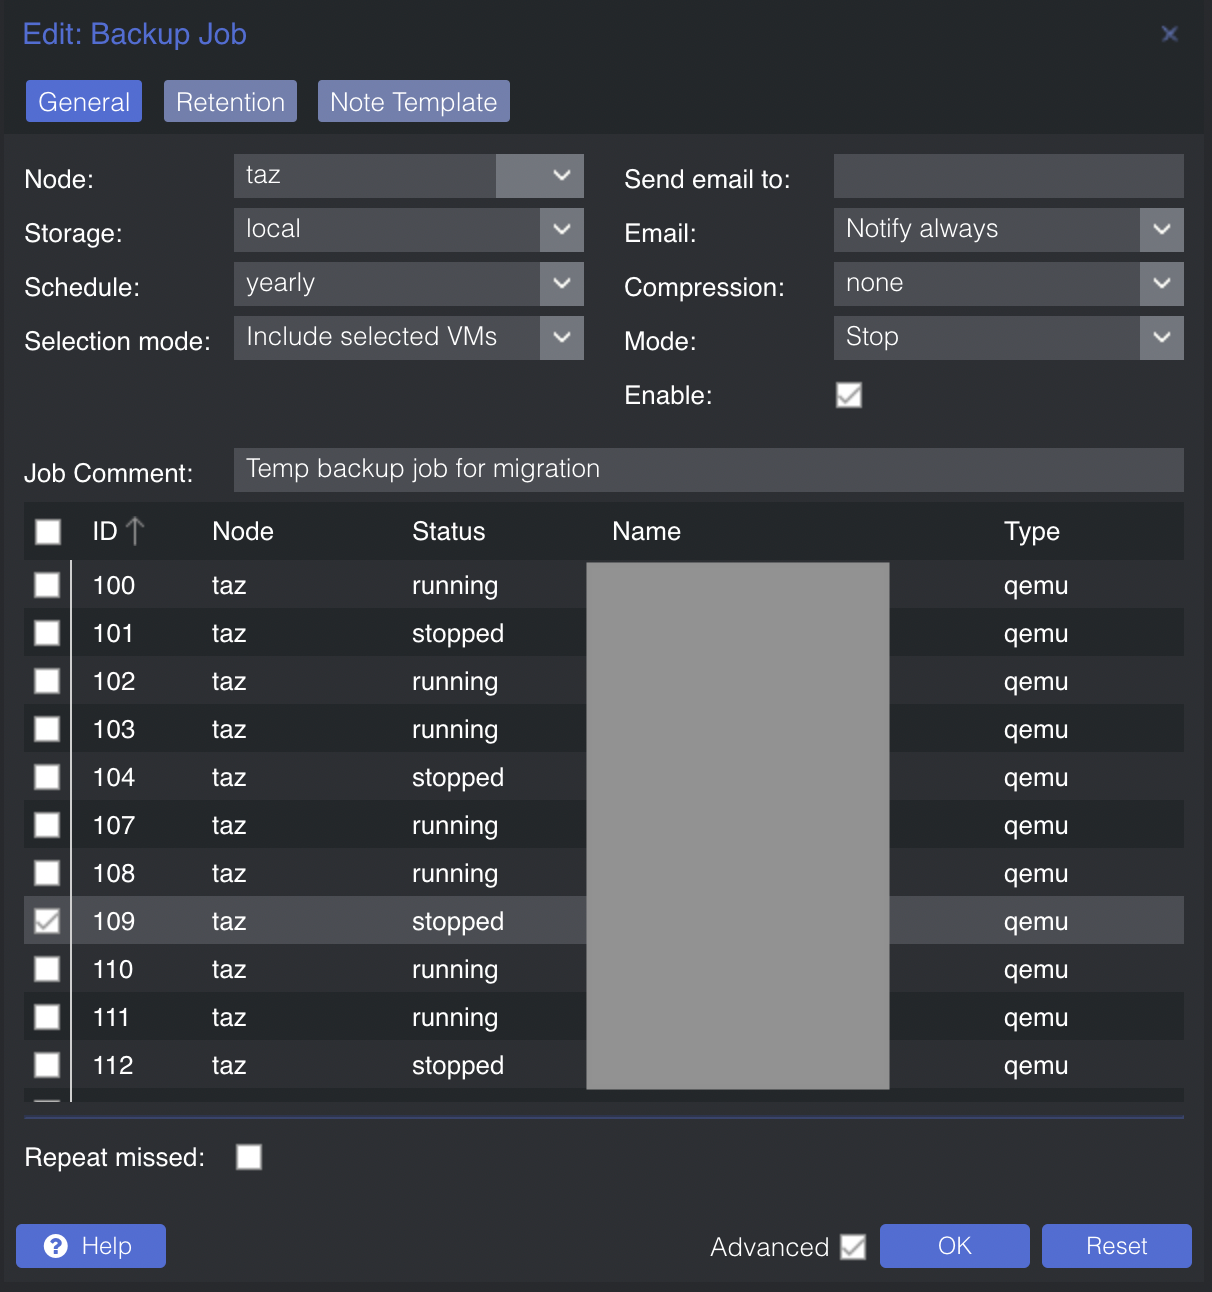
To err on the side of caution, I went ahead and powered my VM down and used the "Stop" mode for backing up, rather than "Snapshot". It is also important that you set "Compression" to "none", as this will simplify the conversion process.
Once completed, SSH to your Proxmox host and navigate to /var/lib/vz/dump.
Here, you should see contents similar to the following:
root@taz:/var/lib/vz/dump# ls -l
total 36956516
-rw-r--r-- 1 root root        7810 Sep 10 22:00 vzdump-qemu-109-2022_09_10-21_55_10.log
-rw-r--r-- 1 root root 37843455488 Sep 10 22:00 vzdump-qemu-109-2022_09_10-21_55_10.vma
-rw-r--r-- 1 root root          17 Sep 10 22:00 vzdump-qemu-109-2022_09_10-21_55_10.vma.notes
We're going to specifically look at the file ending with the extension .vma, as this is what we will use in the conversion process.
Next, extract the RAW image from the VMA file using the following command:
vma extract vzdump-qemu-109-2022_09_10-21_55_10.vma -v ./vm109Doing so will provide you with an additional directory:
# ls -l
total 36956508
drwxr-xr-x 2 root root        4096 Sep 10 22:35 vm109
-rw-r--r-- 1 root root 37843455488 Sep 10 22:00 vzdump-qemu-109-2022_09_10-21_55_10.vma
cd into this directory and you will see that you now have a .conf file, as well as the previously mentioned .raw file.
# ls -l
total 36921508
-rw-r--r-- 1 root root 268435456000 Sep 10 22:34 disk-drive-scsi0.raw
-rw-r--r-- 1 root root          486 Sep 10 22:30 qemu-server.conf
Finally, we must convert the .raw file into something that is able to be utilized by Hyper-V. While Hyper-V can make use of both .vhd and .vhdx files, we are limited to only being able to convert to .vhd files.
To convert the file, simply run the following command:
qemu-img convert -f raw -O vpc disk-drive-scsi0.raw vm_name.vhdOnce processed, you will be provided a .vhd file with the name you set in the previous command.
Importing the Virtual Hard Disk
Now that our VM has successfully been converted, it is simply a matter of configuring a VM in Hyper-V to use the virtual hard disk. I started by migrating over the .vhd file from my Proxmox host to my Hyper-V host and then began the process of creating a new VM.
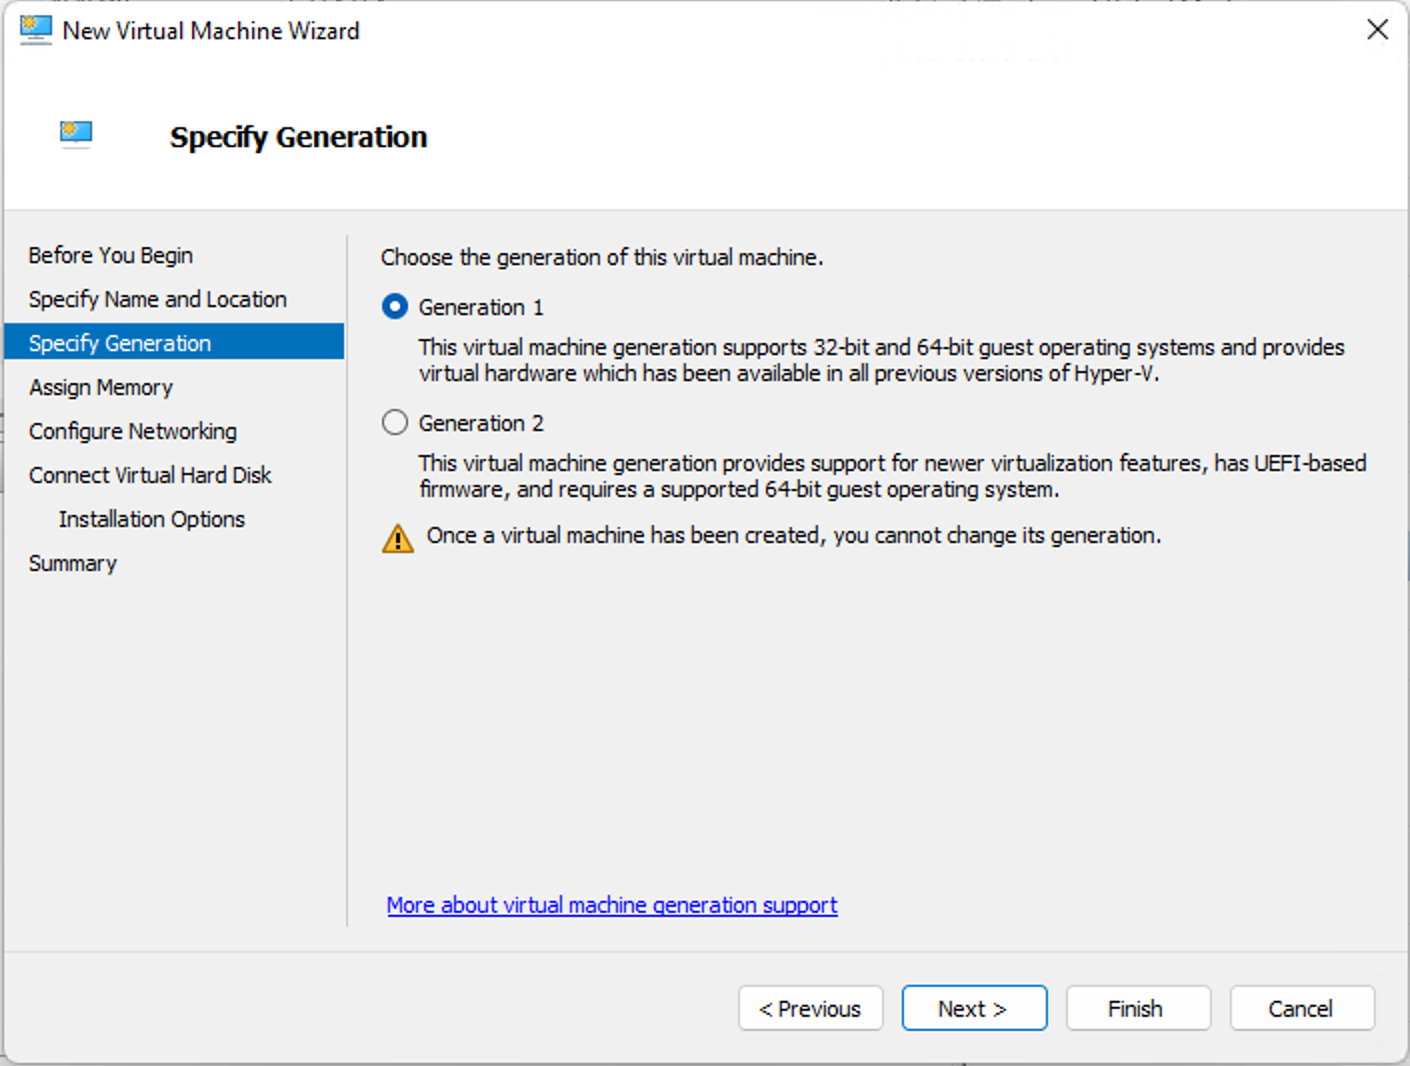
Due to a limitation of the conversion process only being able to convert to .vhd and not .vhdx, you must select Generation 1 at this step. Unfortunately, converted Proxmox VMs are not compatible as a Generation 2 Hyper-V VM. This likely shouldn't be very limiting to most use-cases, as far as I can tell, but you can read up more on it here.
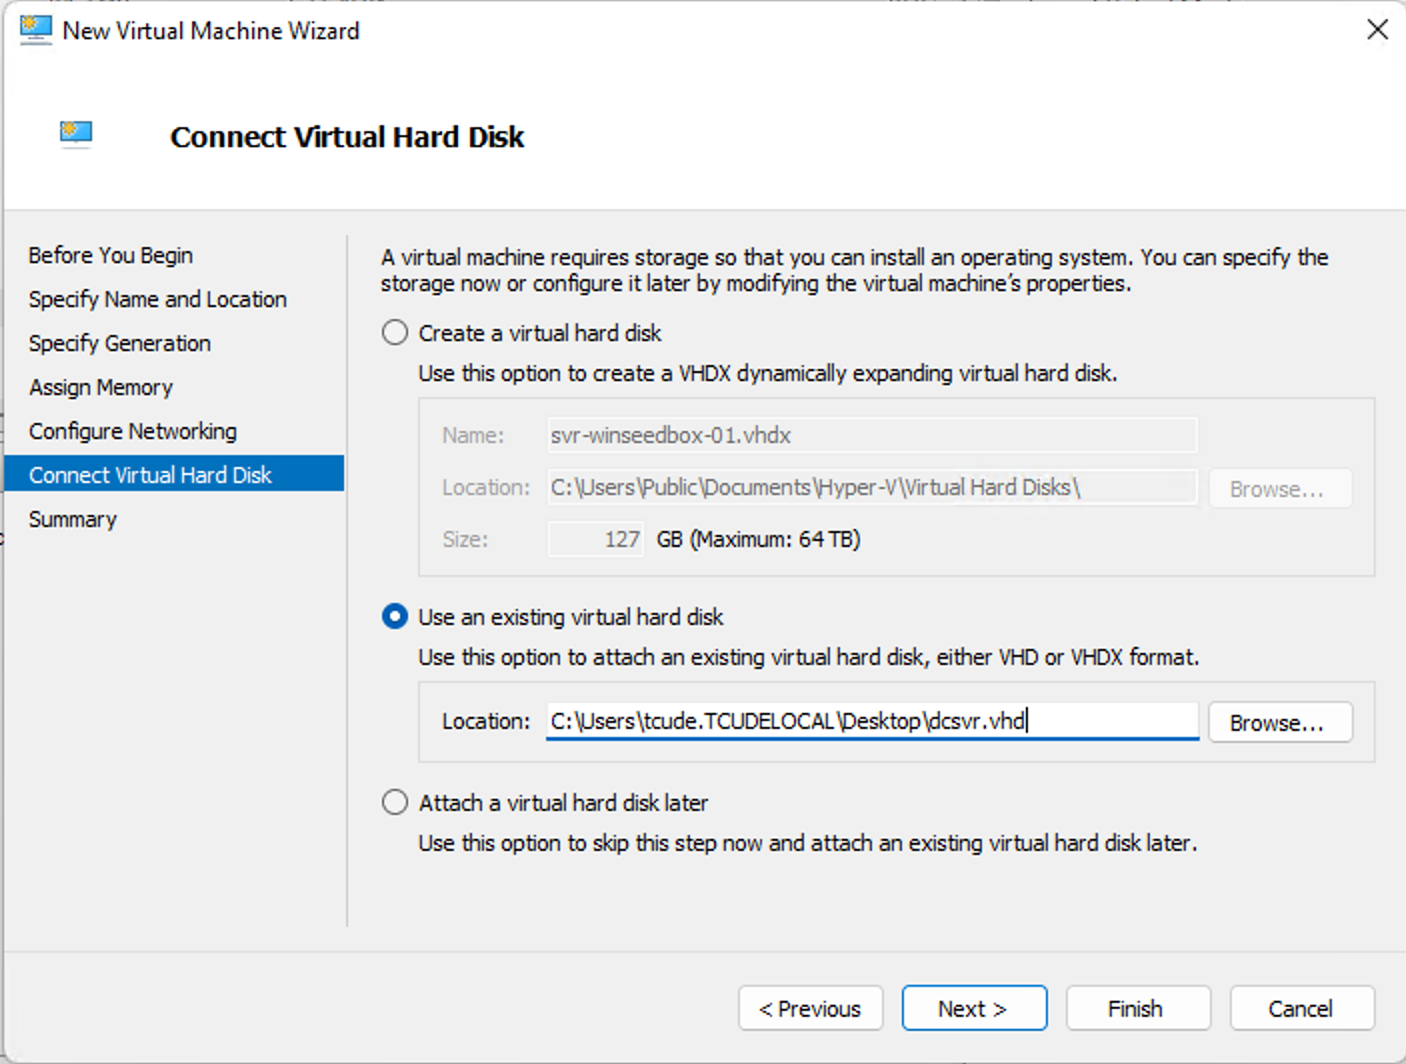
Proceeding to the next step relevant to this guide, instead of creating a new virtual hard disk, you will instead need to select the "Use an existing virtual hard disk" option and choose the .vhd file from your converted VM.
After that, it is simply a matter of powering up your VM!
Conclusion
With that, what was once a Proxmox VM is now a fully running Hyper-V VM. I found this process to be fairly intuitive and was surprised at how quickly I was able to convert the VM.
I hope you found this guide helpful. If you did, consider adding my site to your RSS reader using the following URL: