How to Setup and Configure a vCenter Appliance

Not too long ago, I showed you how to set up a domain controller within ESXi. Other than that, unfortunately, I haven't blogged much about ESXi, or really virtualization in general. That doesn't mean I haven't been learning and making progress in the meantime, though. Today's blog post will cover one VMWare products I recently became a bit more familiar with: vCenter.
After setting up my first hypervisor in ESXi, I had spun up quite the collections of VMs. So many, that I started looking into acquiring another host to act as a second hypervisor for my lab. Fortunately for me, I was able to get my hands on another HP ML350p G8 and purchased a good amount of RAM to go in it. Once getting my second hypervisor set up and running, I figured it would be a good time to look into adding an extra layer to my virtualization environment, the previously mentioned VMWare vCenter.
What is vCenter?
vCenter is an application that allows you to manage your vSphere infrastructure from a single pane of glass. It makes things a lot more convenient when you're working with multiple physical hosts. VMWare makes the process fairly easy to setup, letting you install their vCenter Server Appliance. While the installation and configuration processes aren't terribly difficult, I wanted to do a quick write up on how I went about standing up vCenter within my homelab environment.
Prerequisites
DNS
Before going through the vCenter installation process, I urge you to set up at least one domain controller if you haven't already. I've covered this process in an earlier blog post.
On top of having a domain controller up and running, you'll also want to ensure you have DNS set up in advance. While you can go through the installation process using only IP addresses for your servers, I'd highly suggest setting up A records in advance for your ESXi hosts and your soon to be created vCenter appliance.
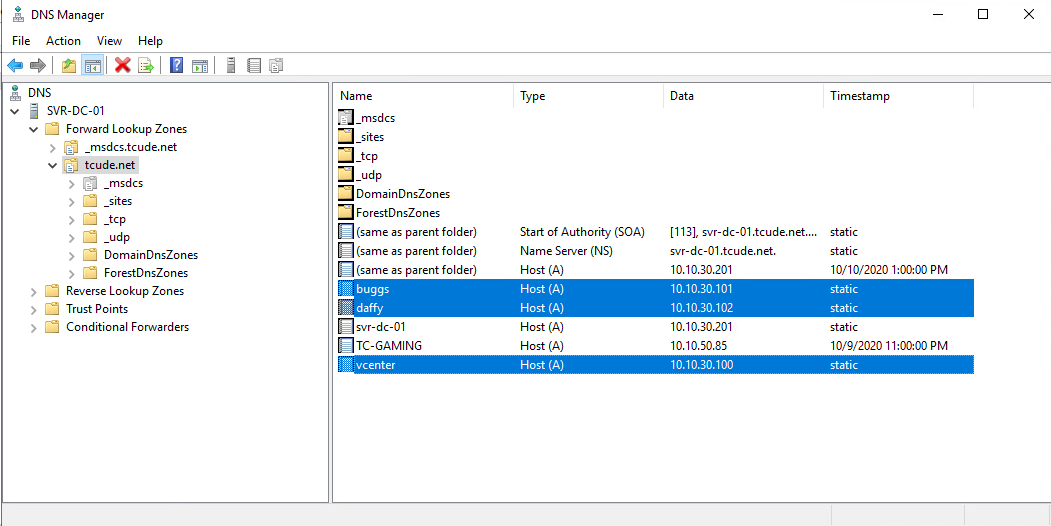
Please note that you'll also need to set up an applicable reverse lookup zone if you haven't already, too.
NTP
One last thing you'll want to do before going through the vCenter installation process is ensuring your your servers are all using the exact same time with NTP, or Network Time Protocol. You can read up more on it here but to summarize, it allows hundreds of millions of computers to synchronize their clocks together.
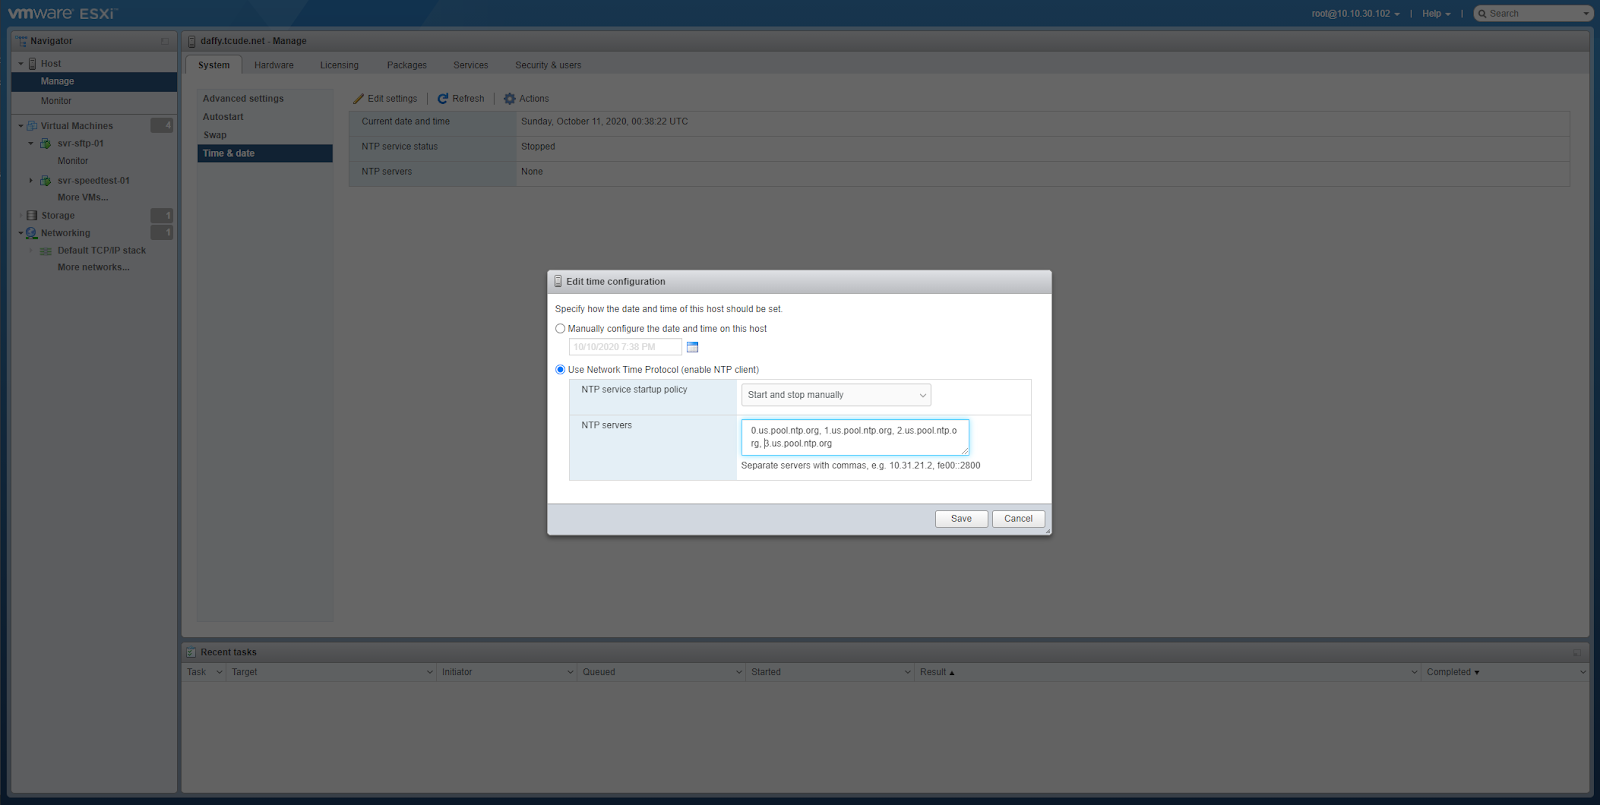
You'll want to configure your ESXi host similar to the screenshot above. You can find the applicable NTP servers for your region here.
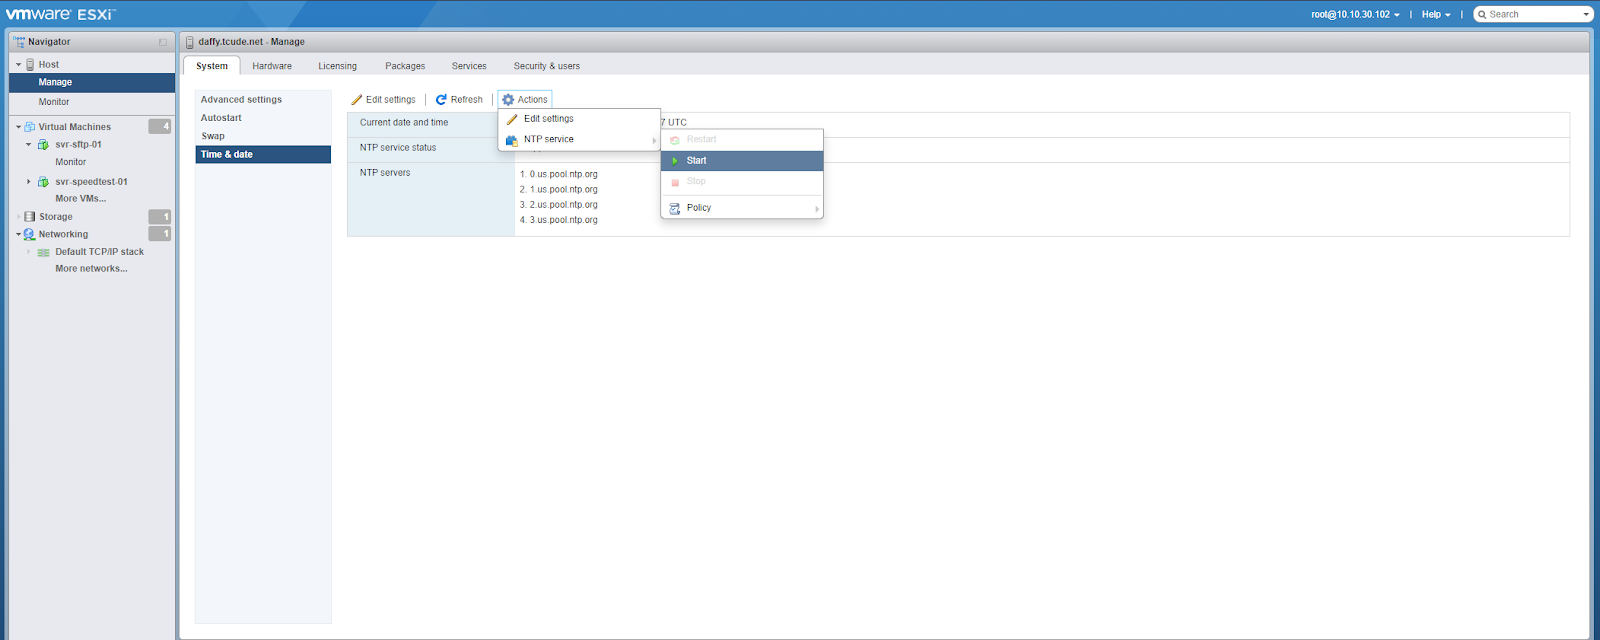
Once you've provided the NTP servers that you'd like to use, you can enable it by following the option showed in the image above.
Failing to setup NTP on your servers before the vCenter installation process may cause issues later down the road so this step is fairly important.
Installation
Step One:
To start you'll want to download a vCenter .iso file. Personally, I acquired my VMWare licensing and software through VMUG,which lets you get VMWare licensing for a very affordable price. I'll cover VMUG more in the near future and even share a discount code I found, giving you the full VMWare suite of software (for one year) for only $180.
Once your ISO is downloaded, you'll want to go ahead and mount it within Windows.

Within the ISO, you should see the "installer" application shown in the image above. You'll want to run this application to start the installation process.
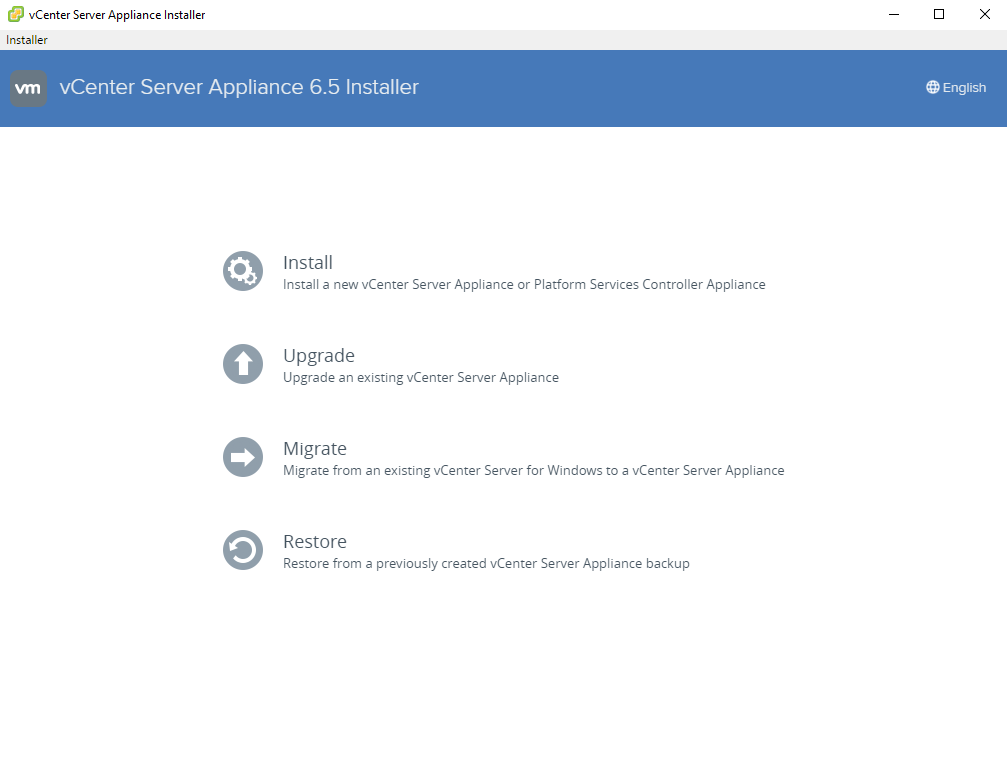
After running the application, we'll be brought to the main menu of the vCenter Server Appliance Installer. While the installer offers three other services, we're going to stick with the "Install" option today.
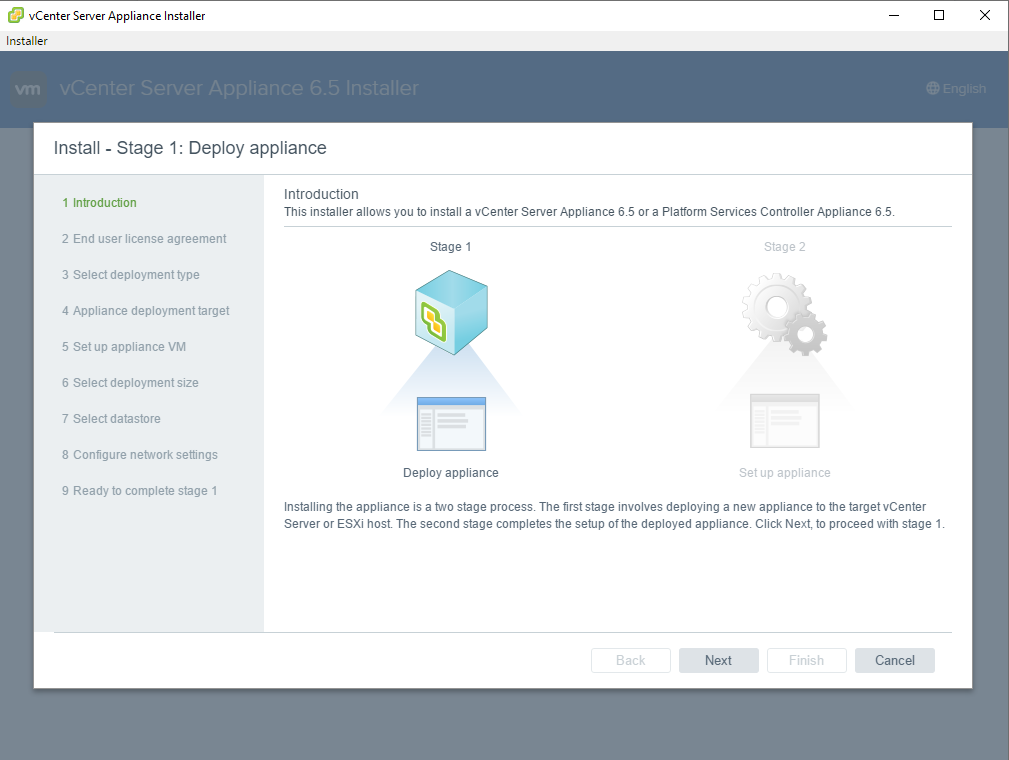
Here we're given an introductory page that shows us how the installation process works. In the first stage, we will be doing the actual deployment of the appliance. In the second stage, we'll be doing more of the configuration of the appliance.
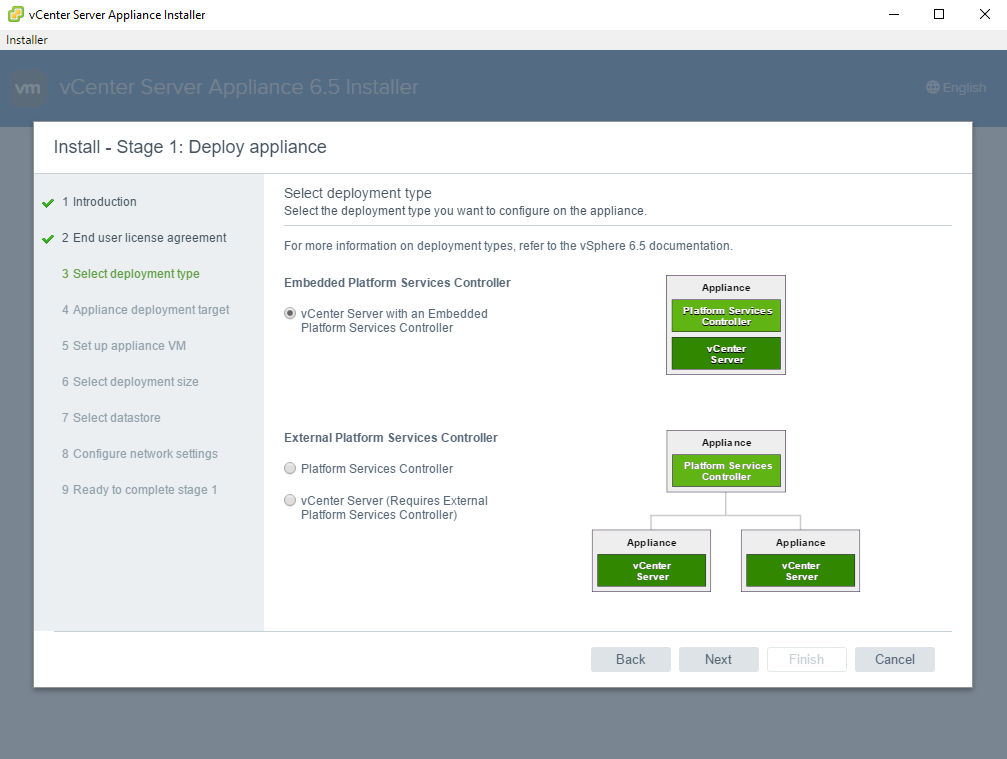
After navigating to the next screen, we'll be given these two options. For our purposes, we're going to keep it simple and go with the default option I have selected above, as we're installing this in a lab environment that isn't large enough to necessitate the options below.
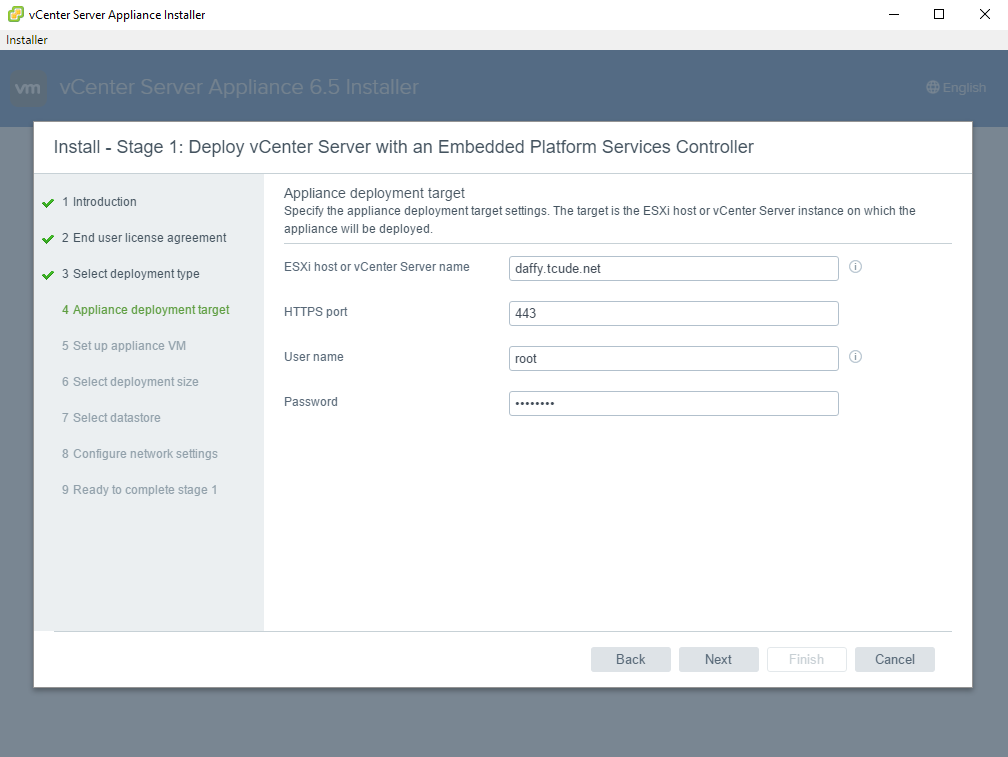
From here, we'll be providing a bit of information about which ESXi host we'd like to install our vCenter appliance on. This is where we're going to leverage the A records we set up earlier in this guide on our domain controller.
Simply provide the hostname of the ESXi host you'd like to install on, as well as credentials for an account with the authority to install the appliance.
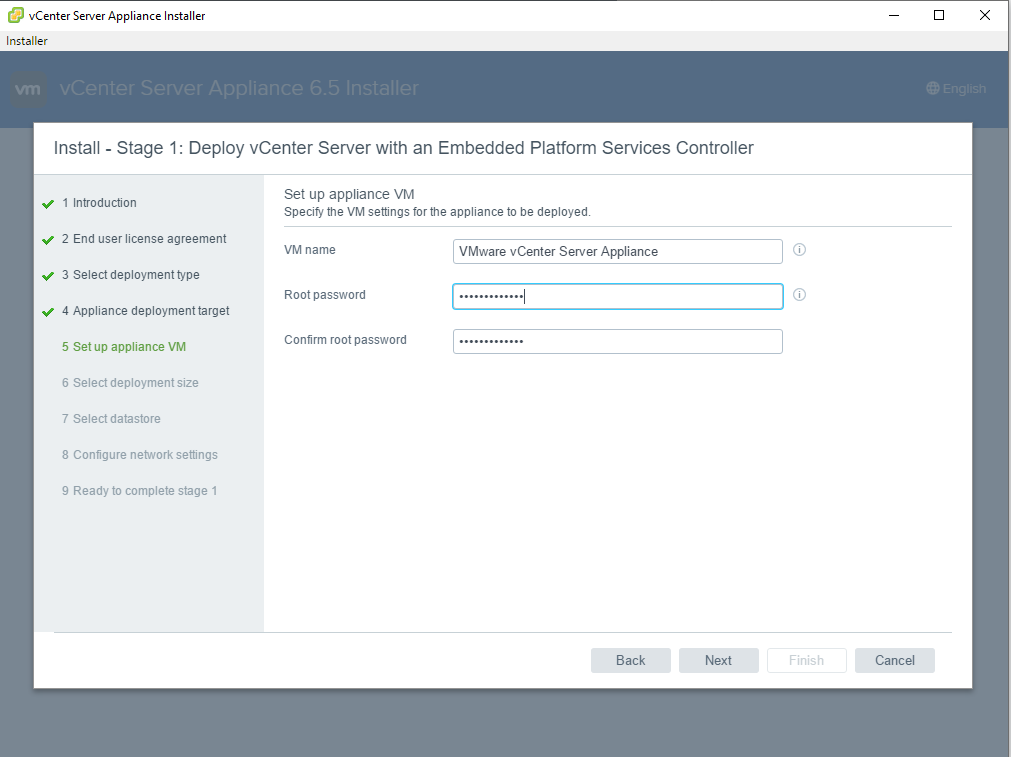
On this step, we'll need to provide a name for our VM, along with a root password. I chose to keep my VM name as the default "VMWare vCenter Server Appliance".
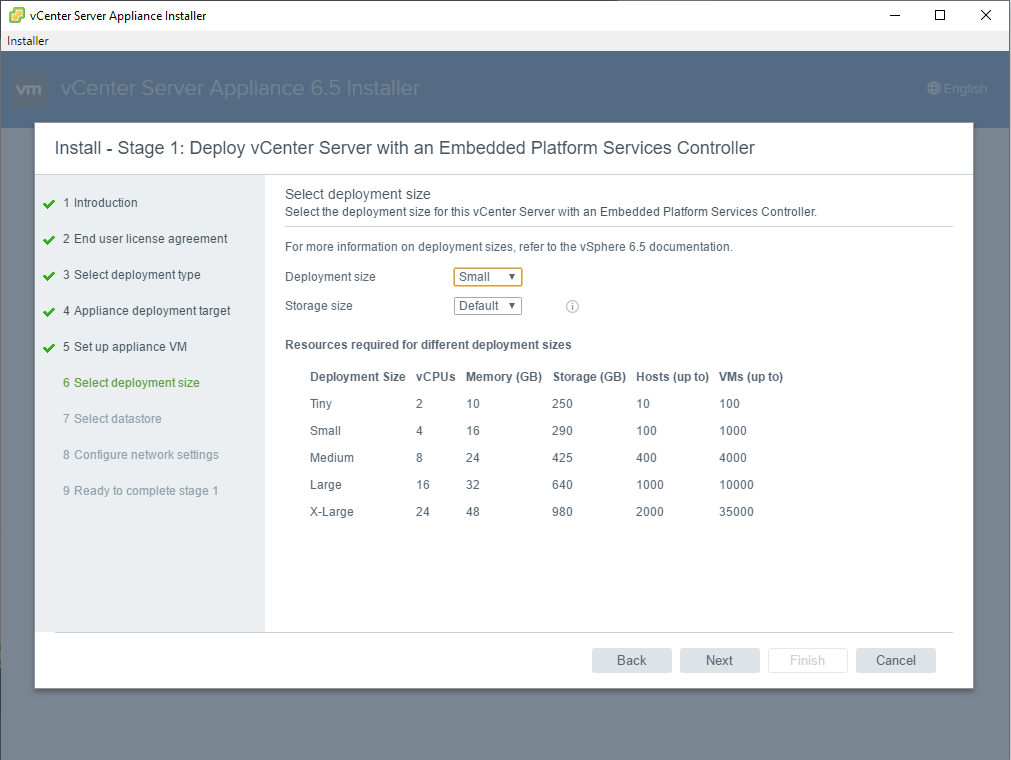
Here, we'll need to decide what we want our deployment size to be. Personally, I don't see myself going above 100 hosts within my vSphere environment but your use case might be different than mine. Simply use the chart shown on this page to pick a size that best fits your use case.
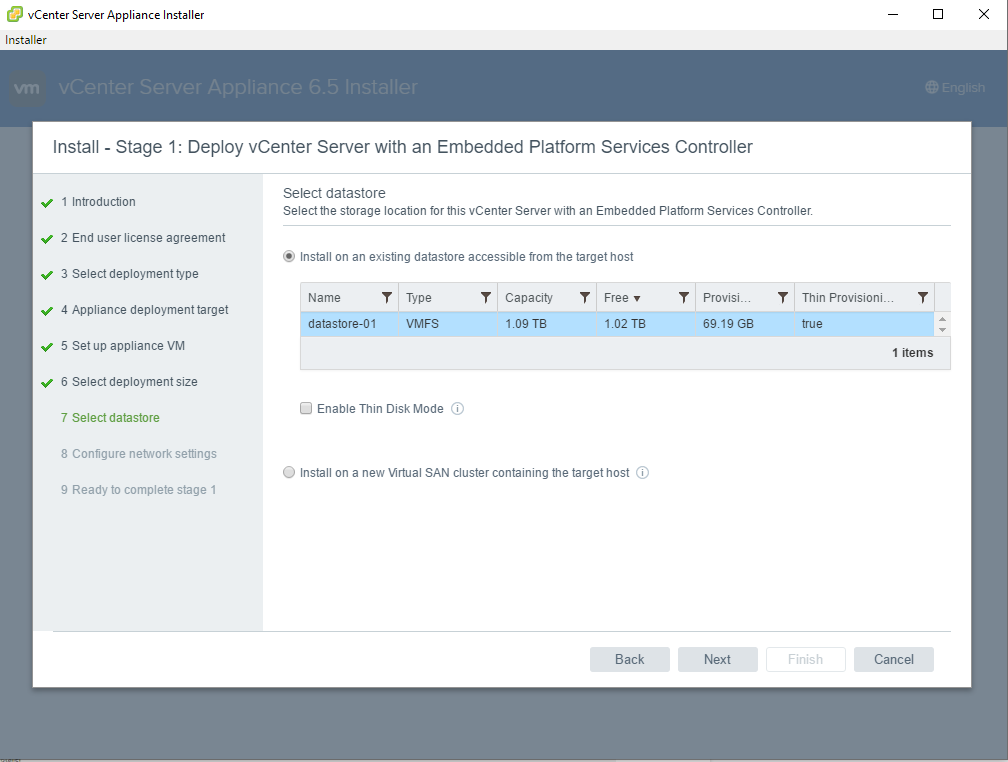
Next, you'll be prompted to select a datastore that you'd like to install your appliance on. Personally, I only have one set up on this machine.
While I'm usually a proponent of using a "Thin Disk Mode" if it's an option in some circumstances, I chose not to on something as critical as a vCenter appliance. I want to ensure that there will always be enough disk space allocated for the appliance to avoid potential headaches in the future.
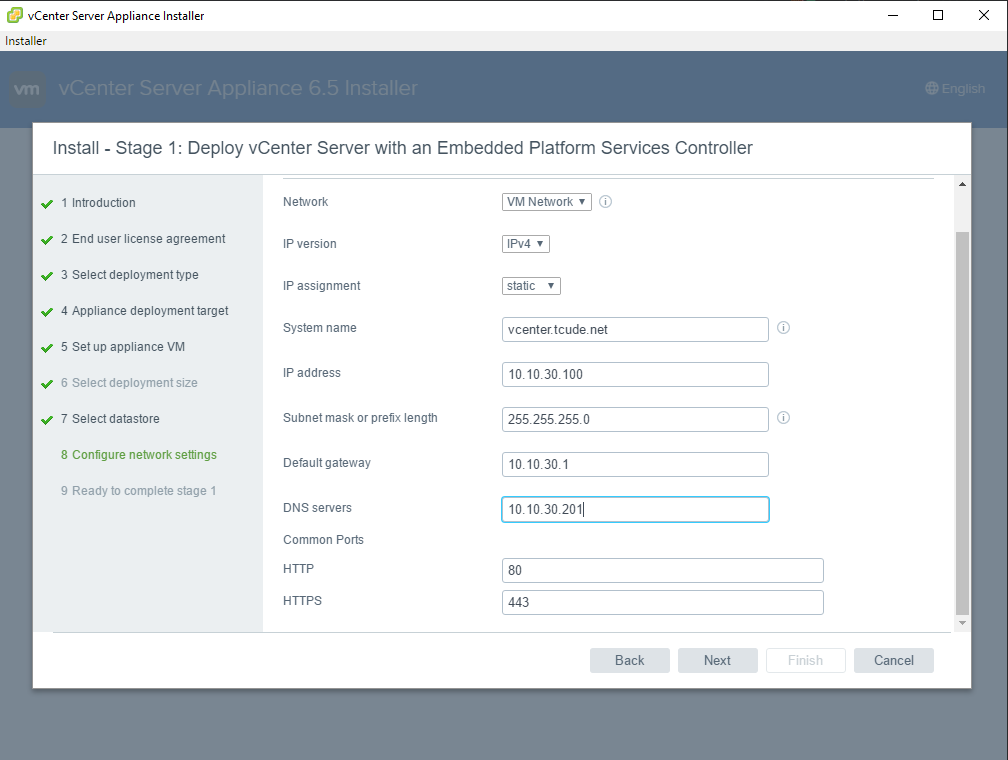
For this page of the install process, we'll be configuring some of the network settings. I'm giving my appliance the system name of "vcenter.tcude.net", which I've already set up in DNS earlier in this post.
The rest of the fields are fairly self explanatory. For the "DNS servers" field, you'll want to provide your domain controller's IP.
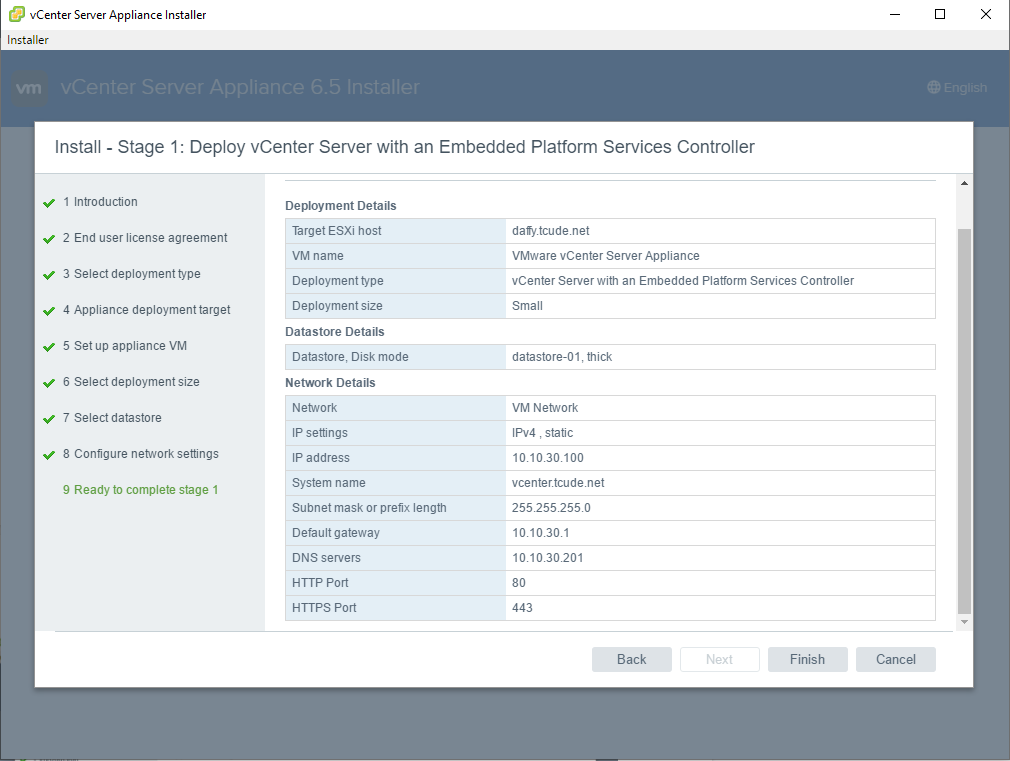
On the last page of the first stage of the installation, you'll be prompted to review your configuration to make sure you don't want to make any last minute changes. If you're happy with how things look, click "Finish".
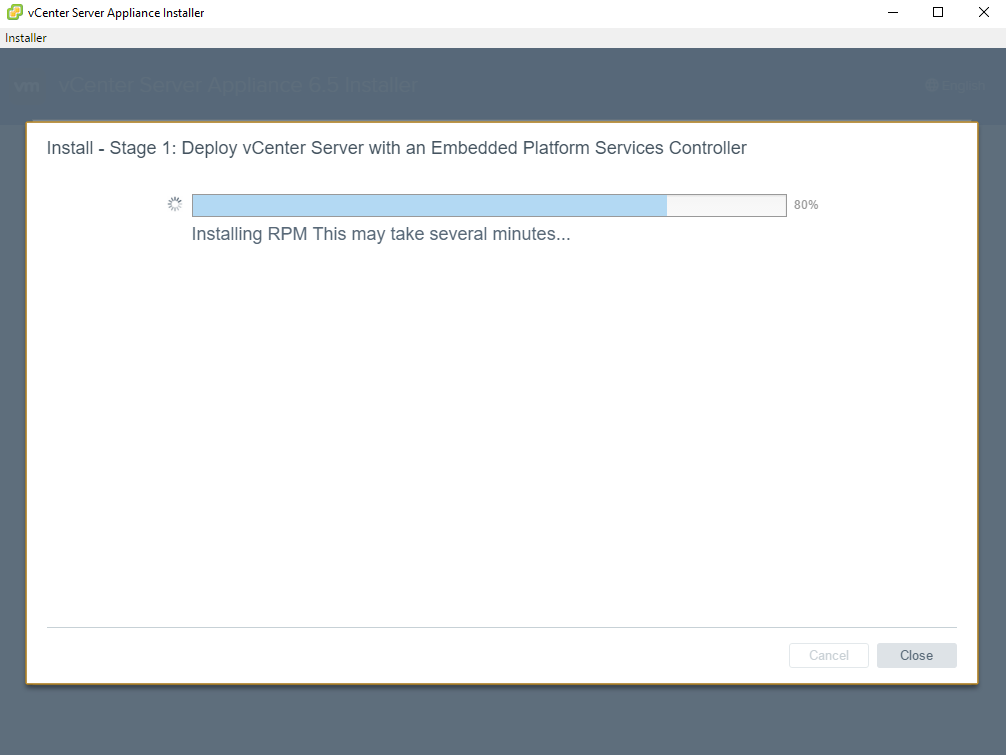
You will now be shown an installation progress bar. As it states in the picture above, once it gets to the ~80% mark, things might slow down a bit. Be patient and it'll finish the installation process after a few minutes.
After this part completes, you'll be moved on to the second stage of the installation process.
Stage Two
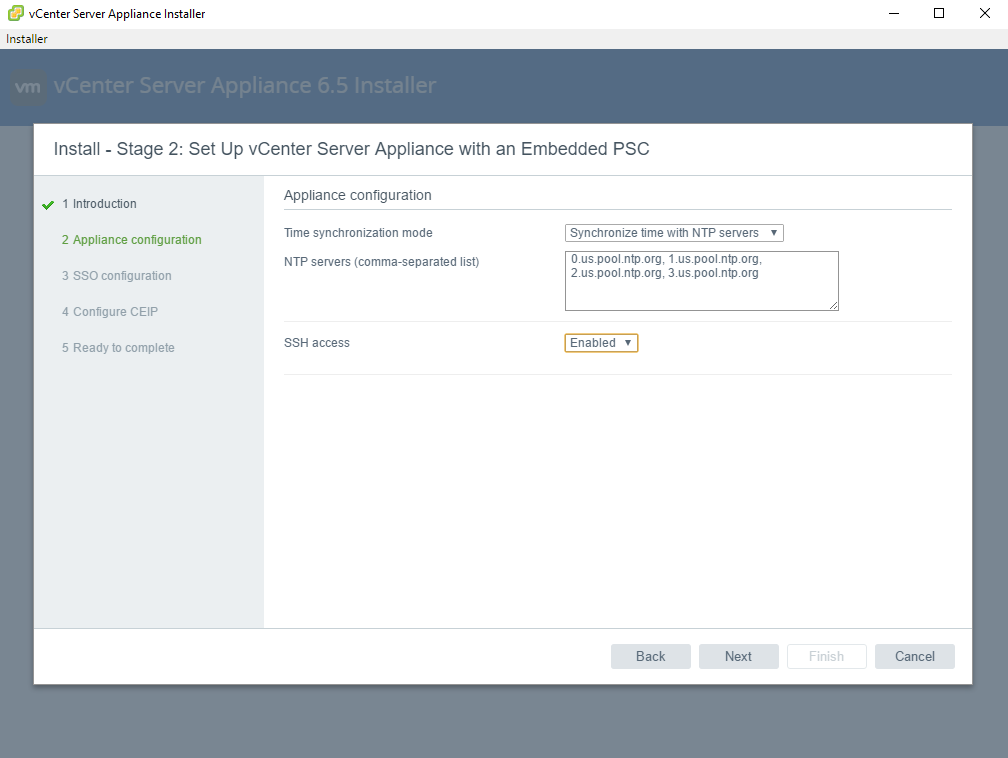
Now that we're in the second stage of the installation process, we'll be given options on how we want to synchronize our time across our various machines. I've chosen to go the NTP server route and used NTP servers found here. Obviously yours might differ slightly from mine if you're not in the United States.
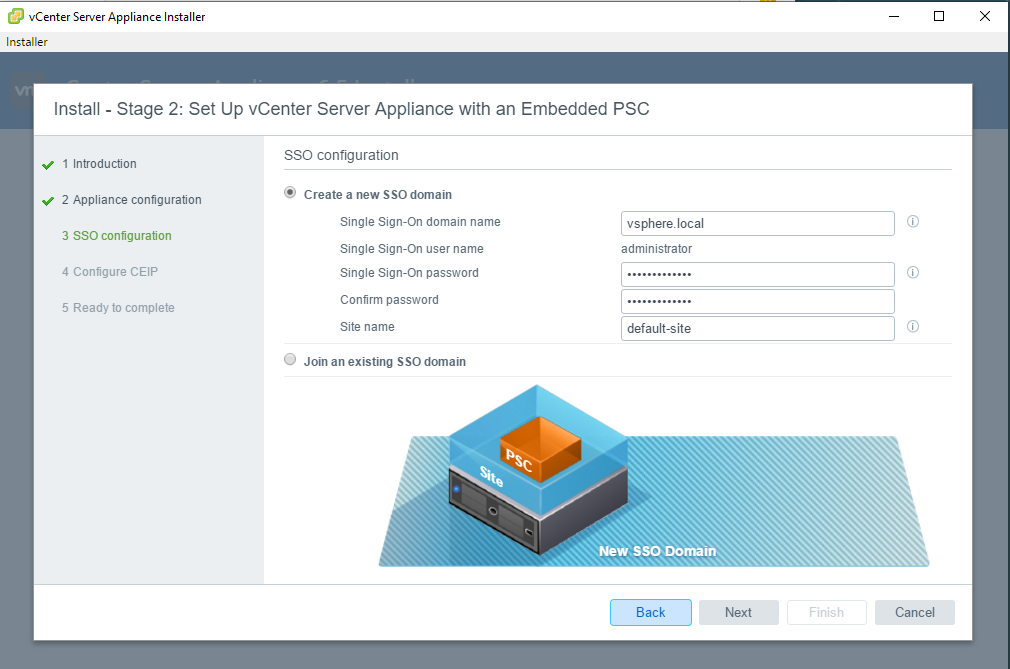
On this page, you'll be configuring a new SSO domain, assuming you don't already have one. I chose to keep my domain name and site name as the default values shown above.

Here you'll be able to choose whether you'd like to join the CEIP.
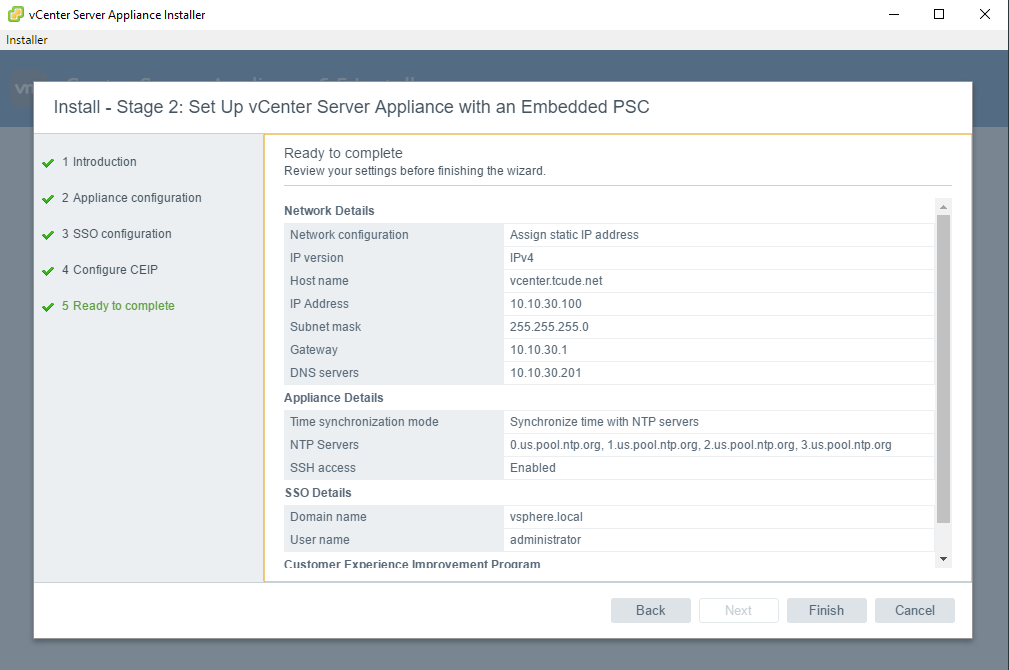
From here, you'll be able to review the settings you've configured for your appliance in the second stage of the installation process. If you're ready to install, click "Finish". You will not be able to pause or stop the installation process after clicking "Finish", so ensure these are the settings you'd like to use.
After hitting "Finish" your installation should complete and you'll now be able to visit your vSphere page at the address you configured previously. It will prompt you to create a datacenter that your ESXi hosts will be housed in and walk you through the steps to do so.
Adding a Host
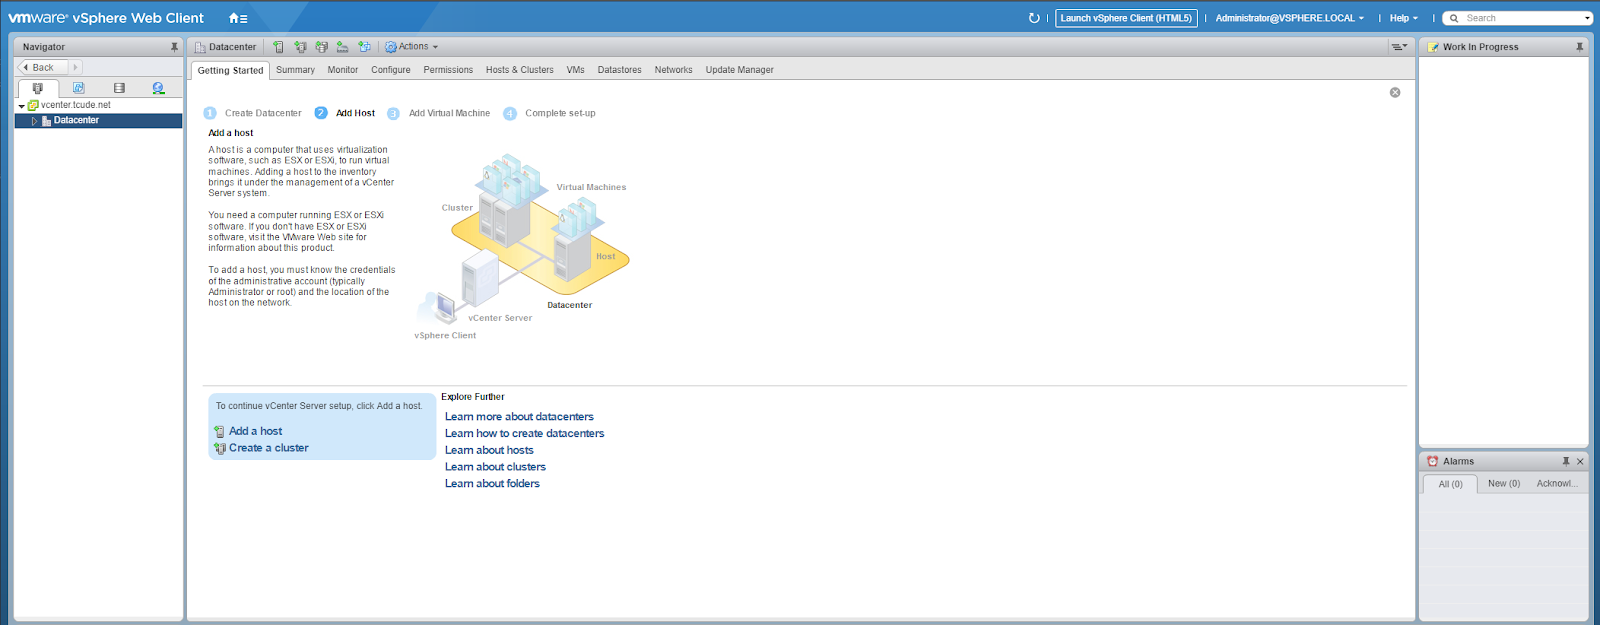
Once your datacenter is created, you can now import your ESXi hosts into the datacenter by clicking "Add a host".
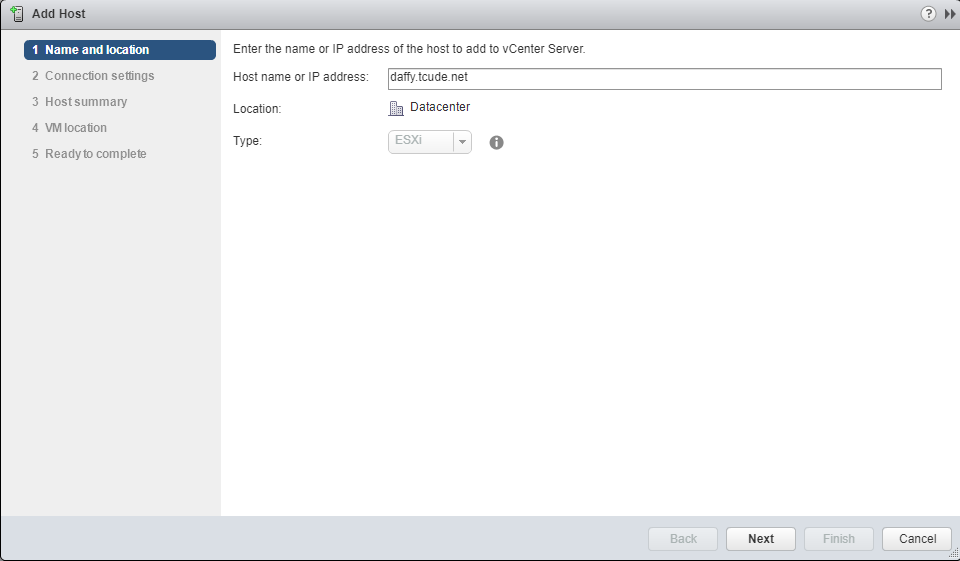
From here, you'll enter the hostname of an ESXi host you'd like to add to your datacenter.
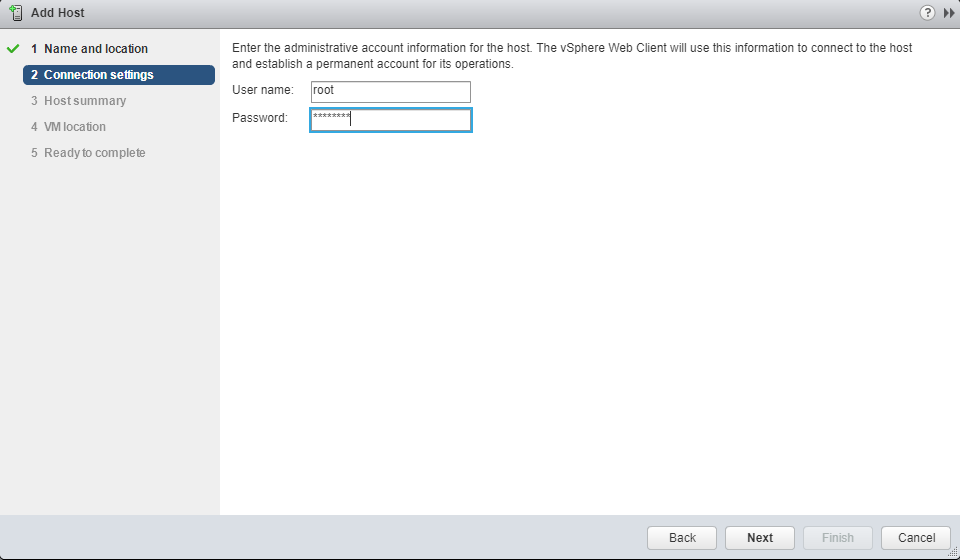
You'll now provide the credentials of an account for your ESXi host that has the authority to add the host to vCenter.
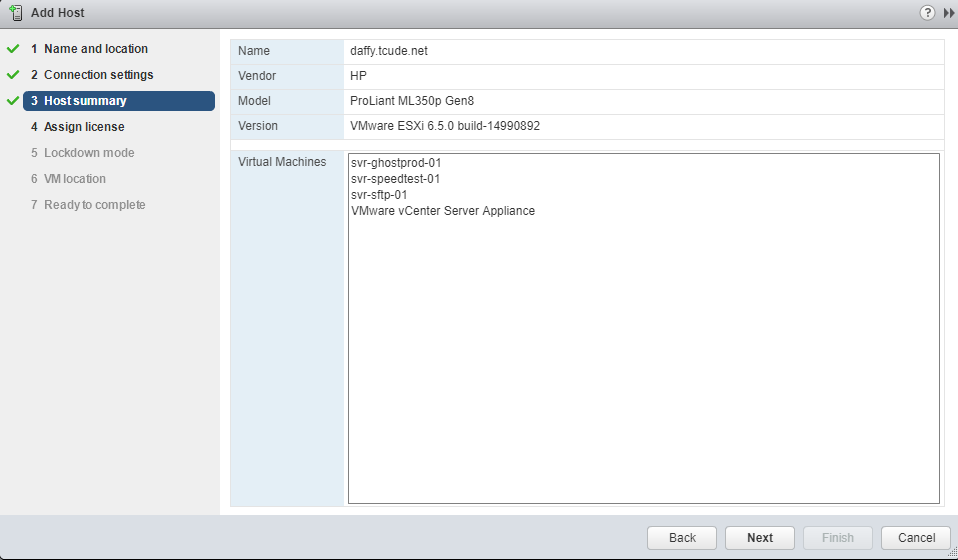
This page will show a summary of the host you're adding.
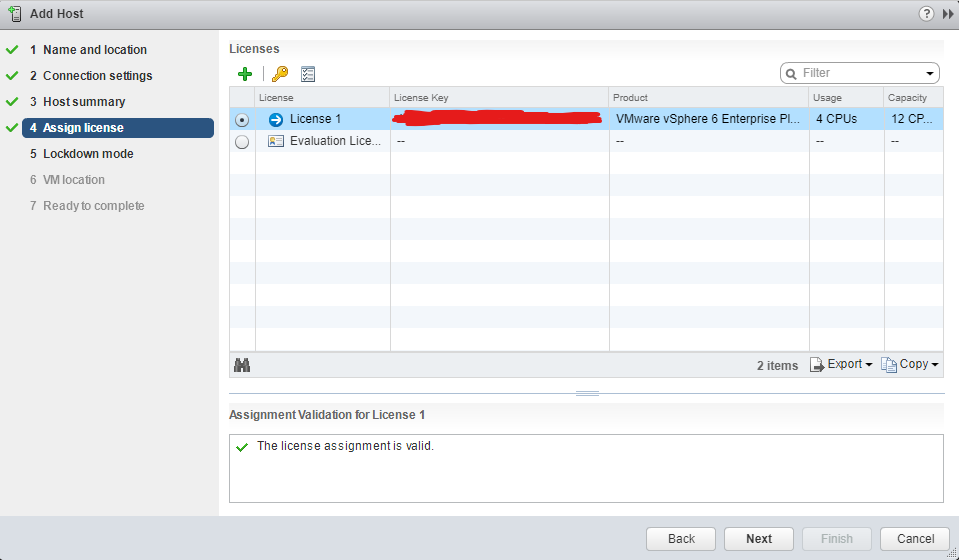
Next, you'll be prompted to provide a license key. As stated previously, I acquired my licensing from VMUG.
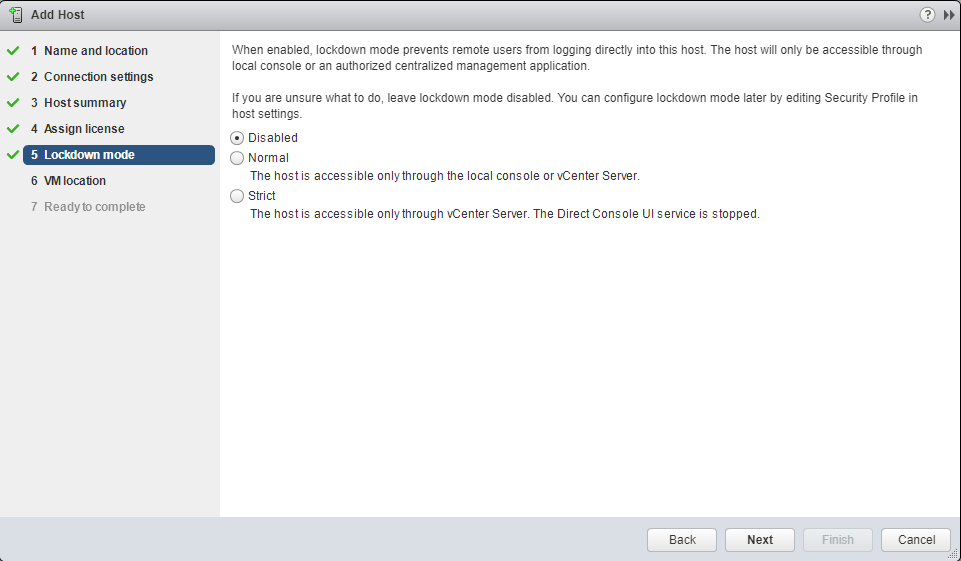
For this step, it'ts a matter of preference. I've gone ahead and left it at "Disabled" for now but this can be changed later on in the Security Profile of the host settings.
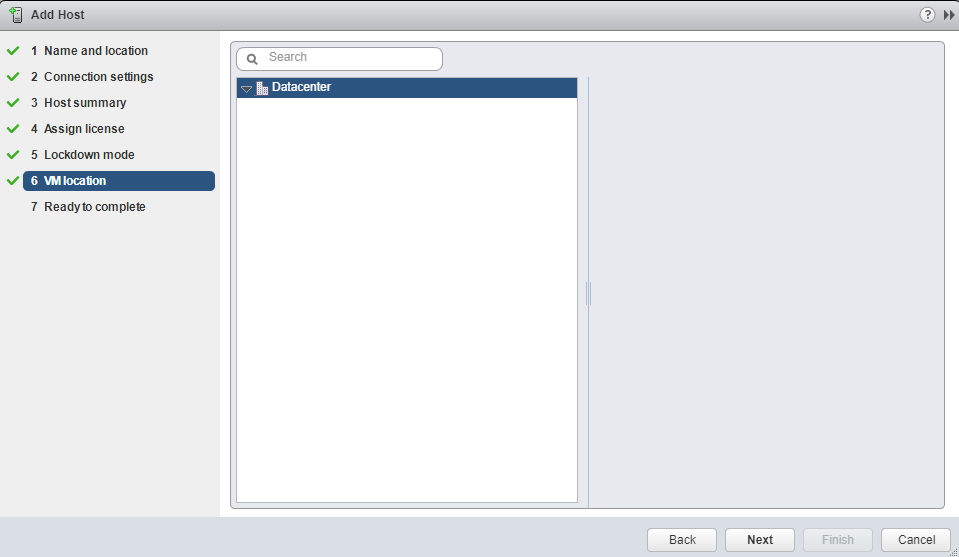
Next, we'll be given the option to select where we'd like to add the host. Since we only have one datacenter, it will look like the image above.
Conclusion
Lastly, click "Next" and then "Finish" and you should now have your ESXi host within your vSphere environment and managed by your newly created vCenter appliance!
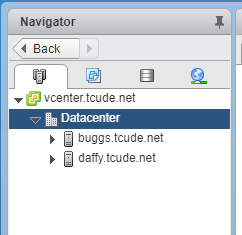
Here's an example of what my datacenter looks like with my two ESXi hosts. You can now easily manage all of your ESXi hosts, along with all of the VMs they contain, from a single site. This makes things much more manageable and convenient.
As a final side note, you might have noticed that my ESXi versions and vCenter versions are all 6.5, which is quite old at this point. In a later post, I'll show you how you can upgrade to version 6.7, which deprecates the flash player that 6.5 partially relies on. Look forward to a new post on that soon!