Storage Overhaul (Now with ZFS!)

I figured it's time to join the current decade and explore software defined storage options, particularly ZFS. Until now, my storage stack has consisted entirely of hardware raid arrays, or, better yet, no array or redundancy at all in the case of my Plex media server.
ZFS, in particular, interested me due to the features, flexibility, and stability it has to offer. Contrary to how the typical hardware array operates, which acts as an abstraction layer between the file system and the physical disks, ZFS operates as the file system and the "RAID" system all in one.
As previously mentioned, ZFS offers a ton of features for you to have at your disposal. For the purposes of this blog post, I will simply be showing how I was able to get it up and running in my lab environment. I have since added to and refined my setup but those changes go beyond the scope of this post.
Selecting Hardware
Before I could really start sinking my teeth into ZFS, I had to start by deciding how I was going to run the filesystem within my lab.
I was initially tempted to install it on my already existing whitebox Plex server – running on an i5-8600k and 32GB of non-ECC memory. Now, here is where we reach a point of contention within the ZFS/TruNAS community: Whether the use of ECC memory is necessary or not
While ZFS is able to operate on non-ECC memory just fine, with one of its creators even saying "There's nothing special about ZFS that requires/encourages the use of ECC RAM more so than any other filesystem.", ZFS strives to assure data integrity within the file system. ECC memory is able to further assure data integrity and helps prevent situations such as bit flipping, which would negate any data integrity that ZFS, itself, has to offer.
In all honesty, running ZFS on the previously mentioned whitebox server with non-ECC memory would have almost certainly been fine but, with an aging R720xd and plenty of DDR3 ECC memory at my disposal, I figured I would go ahead and take advantage of the resources I had at my disposal. Since running a ZFS storage server doesn't require much in terms of compute, I pulled the dual 2690 v2's that were already in the sockets and replaced them with less energy guzzling E5-2620 v2's. Accompanying these processors is 128GB of ECC memory. While this sounds like a lot of memory for a simple storage server, ZFS loves to have plenty of RAM at its disposal.

I now had to figure out how to get my PERC raid controller to simply pass through the drives for ZFS to then be able to take hold of them. Traditionally, the built in controllers you might find in something like an R720, such as the H710 mini, only operate with the capability of creating a traditional RAID array. Luckily, resources such as this page demonstrate how to flash LSI firmware onto your controller in order to simply use it in what is commonly referred to as "IT Mode", which simply passes the drives through to the OS on the device.
Choosing an Operating System
Now that I had the hardware picked out and ready to go, I had to decide what operating system to install.
TrueNAS Core is a very popular solution for getting a ZFS based storage server/NAS up and running. For my purposes, however, I wanted to avoid the "plug and play" type setup and really get hands on with ZFS. Ultimately, I chose to simply install a stack consisting of Ubuntu 20.04 + ZFS + NFS for my storage server/NAS setup.
Installing ZFS
After flashing my PERC controller, installing Ubuntu, and seating all of the new drives in my server, I was finally ready to install ZFS. To do so, I simply ran:
apt install zfsutils-linuxOnce done, I ensured it had installed successfully with:
$ zfs --version
zfs-0.8.3-1ubuntu12.13
zfs-kmod-0.8.3-1ubuntu12.13
Configuring ZFS
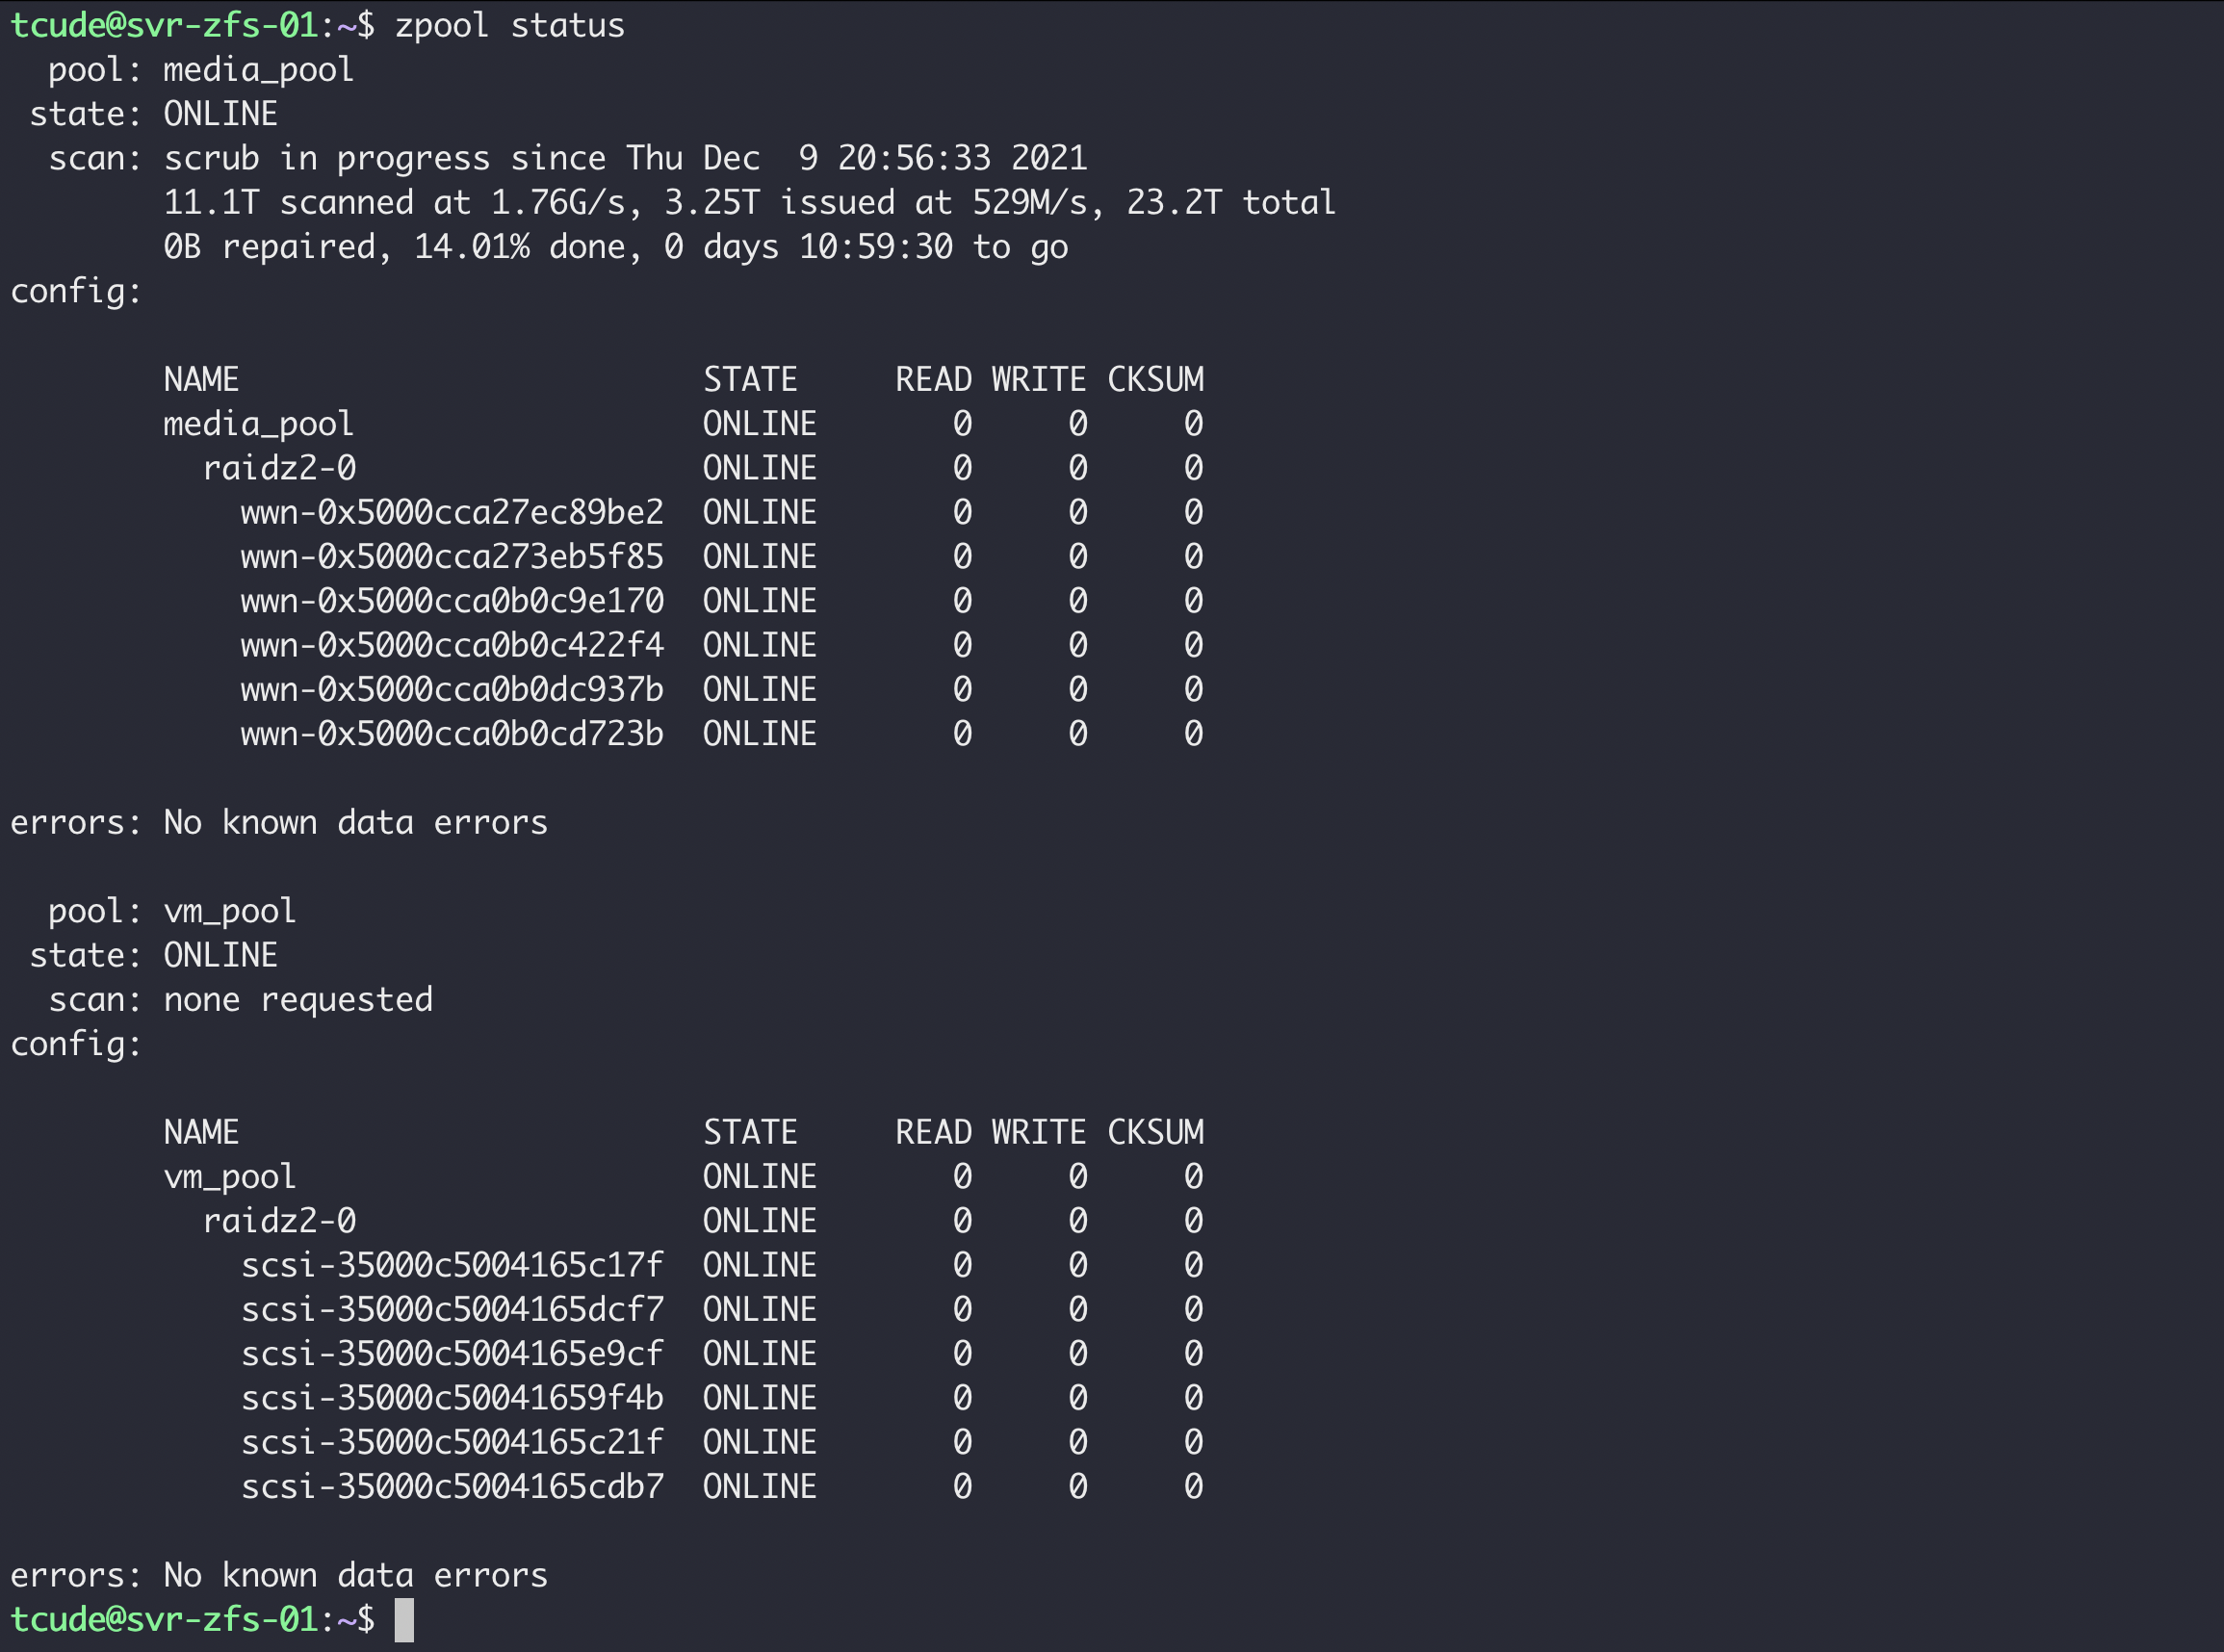
Now that ZFS was installed, it was time to configure my first zpool. Ultimately, I created two separate zpools – one consisting of 6x10TB drives for media storage and another consisting of 6x3TB drives for VM storage.
To create my zpool, I chose to have ZFS recognize the drives by ID, rather than the traditional bus-based labels, such as /dev/sda1, /dev/sdb1, etc.
My reasoning in going this route can be summarized by this excerpt from the Debian wiki:
If you have more than one disk controller (IDE or especially SCSI/SATA), or even if you just have variable numbers of removable USB/firewire storage devices attached from day to day, the order in which they are detected may not be deterministic. The result is that device names like /dev/sda1 and /dev/sdb1 may switch around randomly on each boot. Persistent naming allows you not to worry about this at all.To get the list of disk ID's on my machine, I ran ls -l /dev/disk/by-id/, which gave me an output that looked similar to this:
lrwxrwxrwx 1 root root 10 Dec  4 23:45 scsi-SATA_WDC_WD101EMAZ-11_VCG932XN-part9 -> ../../sdl9
lrwxrwxrwx 1 root root  9 Dec  4 23:45 scsi-SATA_WDC_WD101EMAZ-11_VCGPRU8P -> ../../sdk
lrwxrwxrwx 1 root root 10 Dec  4 23:45 scsi-SATA_WDC_WD101EMAZ-11_VCGPRU8P-part1 -> ../../sdk1
lrwxrwxrwx 1 root root 10 Dec  4 23:45 scsi-SATA_WDC_WD101EMAZ-11_VCGPRU8P-part9 -> ../../sdk9
lrwxrwxrwx 1 root root  9 Dec  4 23:45 scsi-SATA_WDC_WD101EMAZ-11_VCGYKZ5P -> ../../sdn
lrwxrwxrwx 1 root root 10 Dec  4 23:45 scsi-SATA_WDC_WD101EMAZ-11_VCGYKZ5P-part1 -> ../../sdn1
lrwxrwxrwx 1 root root 10 Dec 4 23:45 scsi-SATA_WDC_WD101EMAZ-11_VCGYKZ5P-part9 -> ../../sdn9After grabbing a list of disk IDs, I was finally ready to create my first zpool. I chose to use RAID-Z2 in the creation of my zpool to provide additional parity for my array. You can read more about the various parity options for ZFS here.
To create my pool, I ran the following command:
sudo zpool create media_pool -f raidz2 /dev/disk/by-id/wwn-0x5000cca27ec89be2 /dev/disk/by-id/wwn-0x5000cca273eb5f85 /dev/disk/by-id/wwn-0x5000cca0b0c9e170 /dev/disk/by-id/wwn-0x5000cca0b0c422f4 /dev/disk/by-id/wwn-0x5000cca0b0dc937b /dev/disk/by-id/wwn-0x5000cca0b0cd723bNow that I had my pool created an accessible, I was able to access it by navigating to the newly created directory called media_pool in the root of my file structure.
Final Touches
Now that my server was set up and running ZFS, it was time to truly make it a NAS by utilizing NFS. NFS allows me share these new pools of storage with other servers and devices within my home over my LAN.
Getting started with setting up NFS was very simple. I install it by running:
apt install nfs-kernel-serverOnce installed, I had to specify the directories I wanted NFS to share with my other devices. This is all configured within /etc/exports. I encourage you to read more about setting up and configuring NFS exports here, as there are loads of configuration options to choose from, but for the purposes of this post, my config looks like this:
# /etc/exports: the access control list for filesystems which may be exported
#               to NFS clients.  See exports(5).
#
# Example for NFSv2 and NFSv3:
# /srv/homes       hostname1(rw,sync,no_subtree_check) hostname2(ro,sync,no_subtree_check)
#
# Example for NFSv4:
# /srv/nfs4        gss/krb5i(rw,sync,fsid=0,crossmnt,no_subtree_check)
# /srv/nfs4/homes  gss/krb5i(rw,sync,no_subtree_check)

/media_pool/  10.10.2.101(rw,sync,no_root_squash,no_subtree_check)
/vm_pool/general_storage *(rw,sync)
As you can see, I set my media_pool to only be accessible by my Plex server residing on 10.10.2.101, while I have general_storage accessible from any IP on my LAN, using the *.
Once configured, it was simply a matter of restarting nfs with systemctl restart nfs-kernel-server.
Conclusion
I am now a few days into running ZFS and have absolutely loved it. Having a central pool, much less parity, for my Plex data has been fantastic. I am continuing to learn how to maintain my ZFS storage to make the most of it and look forward to updating you all on how it ends up working out for me.
I hope you found this guide helpful. If you did, consider adding my site to your RSS reader using the following URL: