Upgrading vCenter Appliance from 6.5 to 7.0

With the imminent deprecation of Adobe Flash, I thought this weekend would be a great time for me to look into upgrading my version 6.5 vCenter appliance, since it relies on Flash Player for the full functionality. The process was fairly straightforward but I figured I'd document it along the way! Avanced warning that there will be a lot of steps in this guide.
To start, you'll need to obtain an installer for vCenter 7.0. I get my VMWare software through VMUG so I downloaded it here.
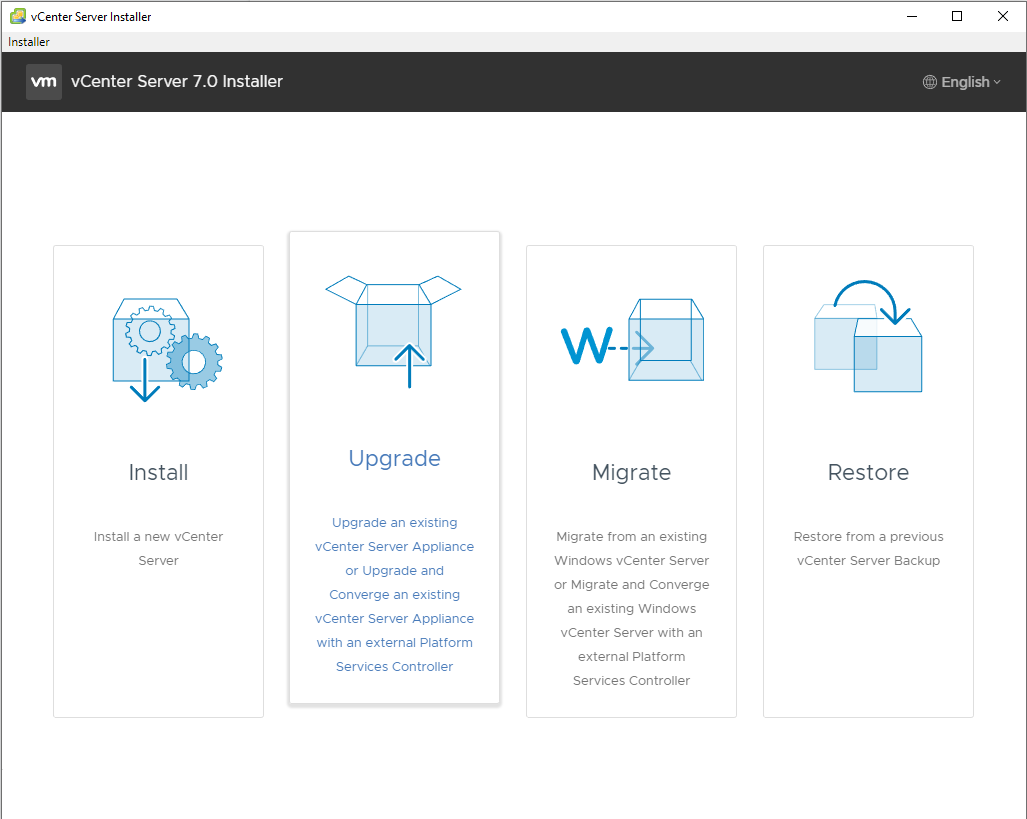
Once you've got your installer up and running, you'll be given the following options. For our purposes, we'll obviously be selecting the "Migrate" option.
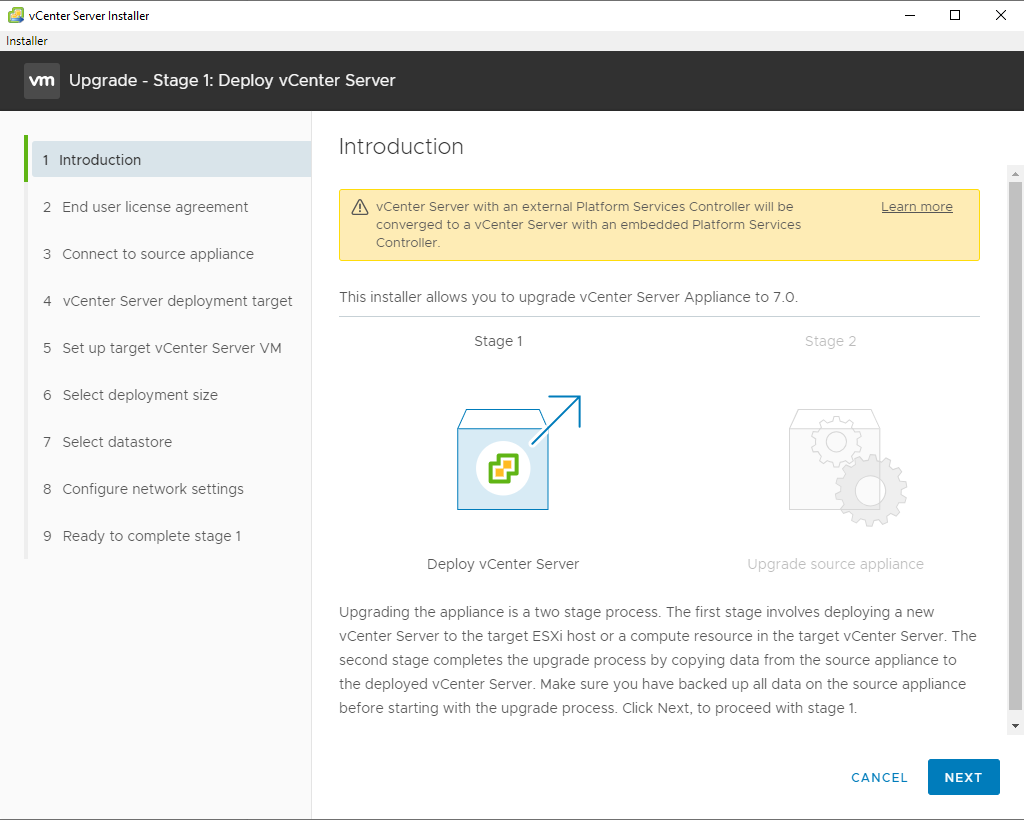
We're now greeted with an introduction page, covering how the installation process will occur in two phases. This is similar to our initial 6.5 install, covered in a previous blog post.
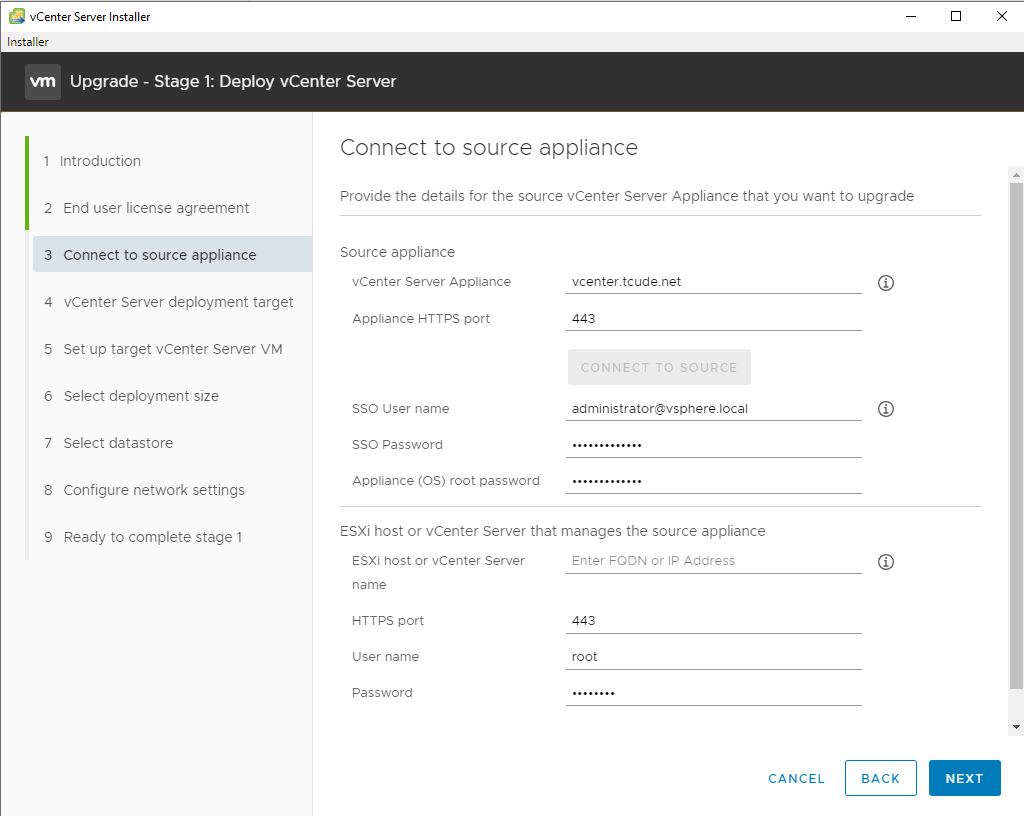
After agreeing to the EULA in step 2, we're asked to connect to a source appliance. From here, we'll need to provide the hostname and credentials for our existing vCenter appliance, along with the host that our appliance uses.
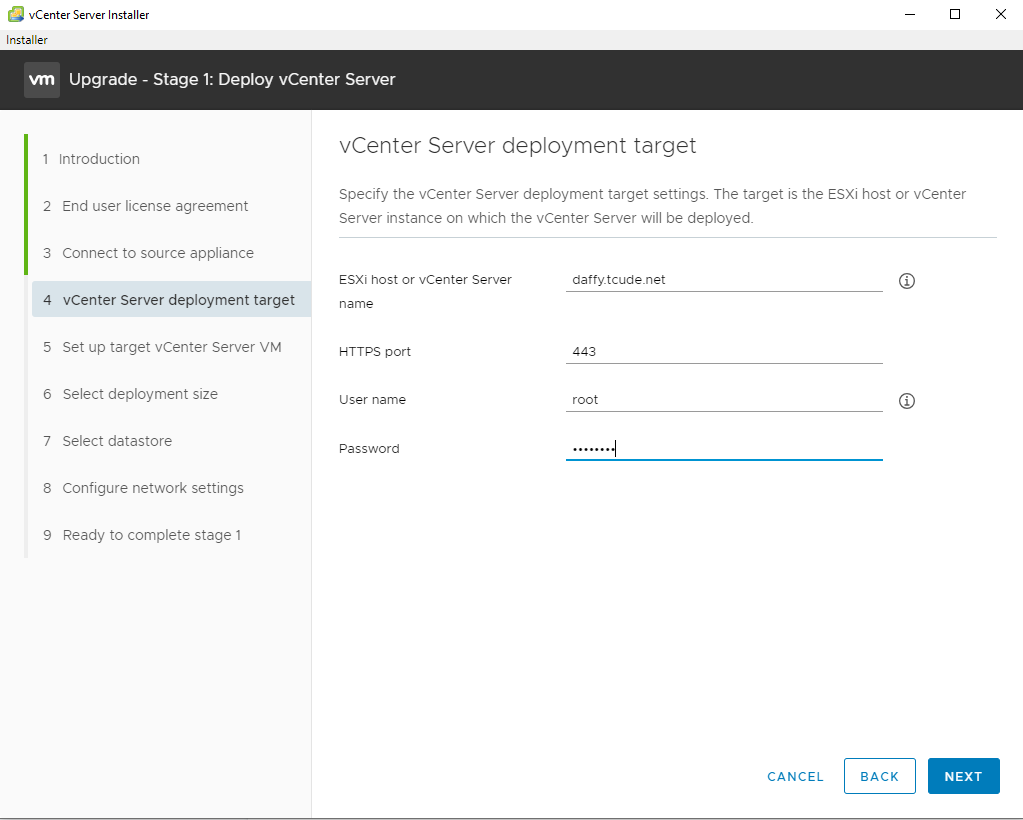
On this page, we'll want to specify which host we'd like to install the upgraded appliance on, along with the credentials for it.
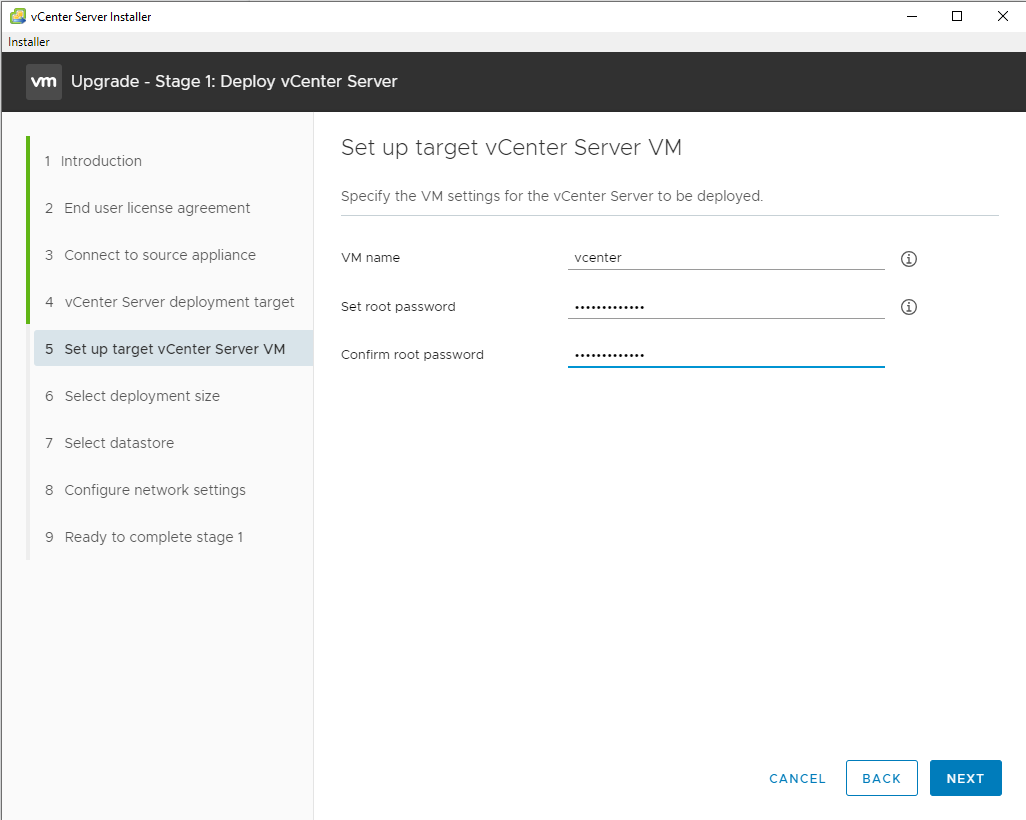
On step 5, we'll be prompted to set up our new vCenter VM. I've simply named mine "vcenter".
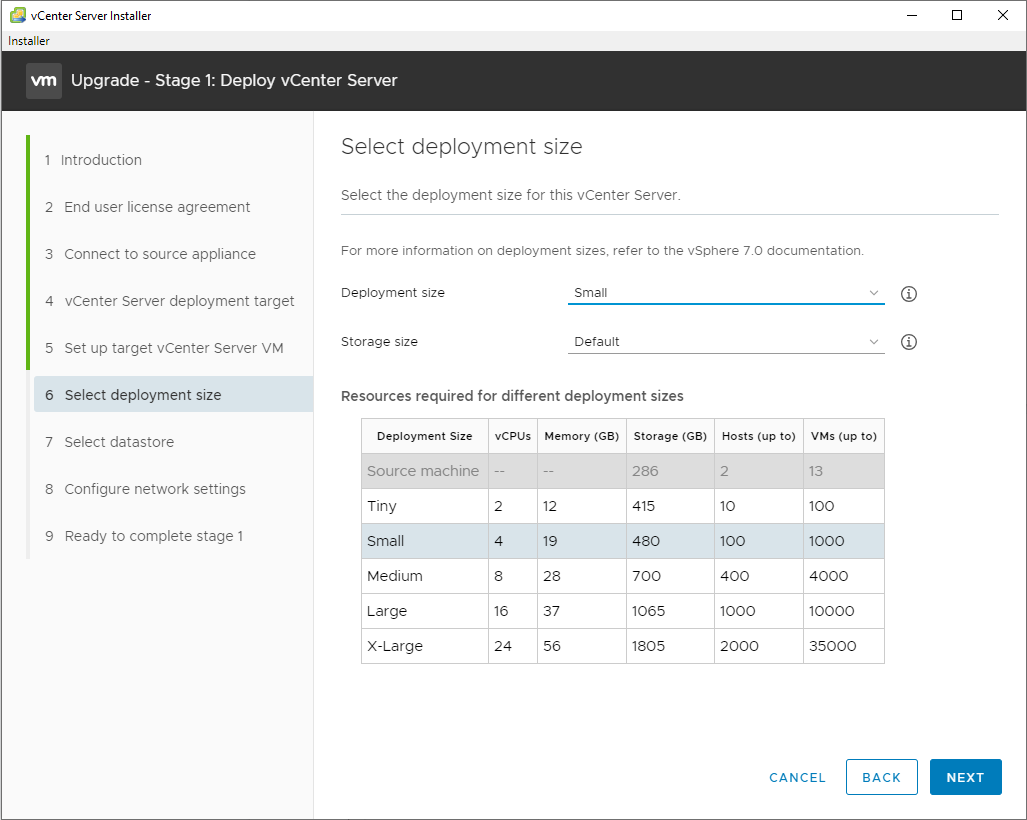
We'll now want to decide on a deployment size. While I don't see myself ever hitting the 100 VM limit of the "Tiny" deployment size option, I figured I'd give myself plenty of breathing room by going with the "Small" deployment size.
I don't have a screenshot for step 7, where you'll select a datastore, but it's fairly self explanatory. You'll simply want to select the datastore you'd like your appliance to reside in.
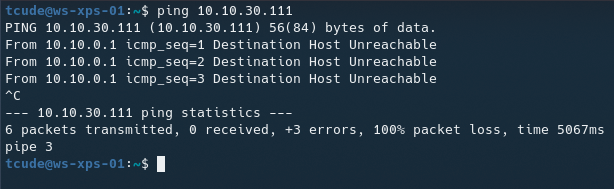
Before starting step 8, we'll want to find an unused IP address to temporarily use for the installation process. This can easily be done by pinging a valid IP and ensuring it doesn't ping back.
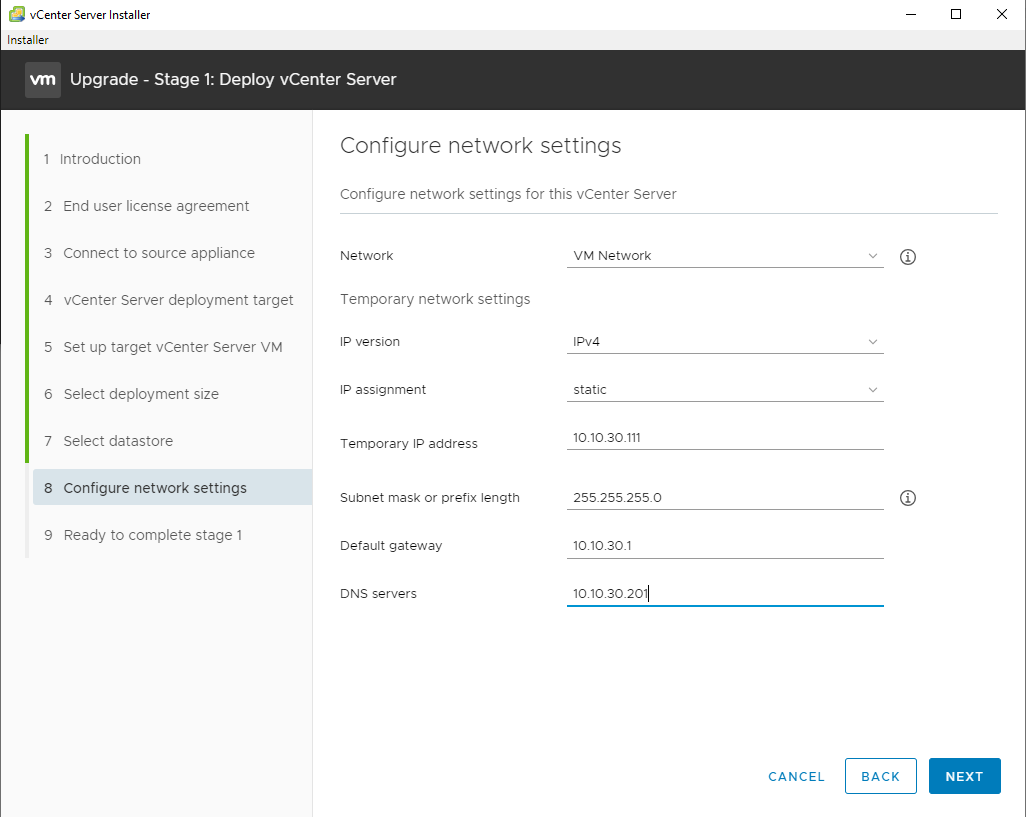
On step 8, we'll be configuring the network settings for our upgrade. We'll use the temporary IP we just found, along with the other values shown above. For the DNS server field, I'll be using the IP address for my domain controller, which runs DNS for my network.
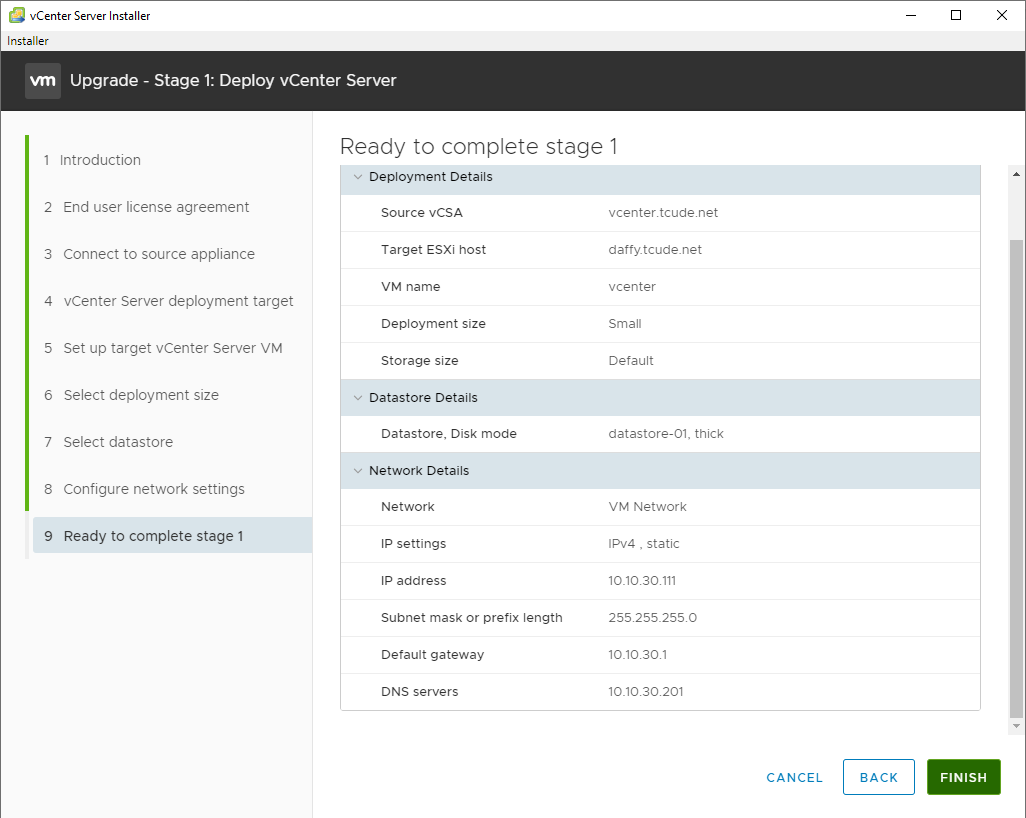
Finally, we'll review everything we've configured so far and click "Finish" if it's configured how we'd like it.
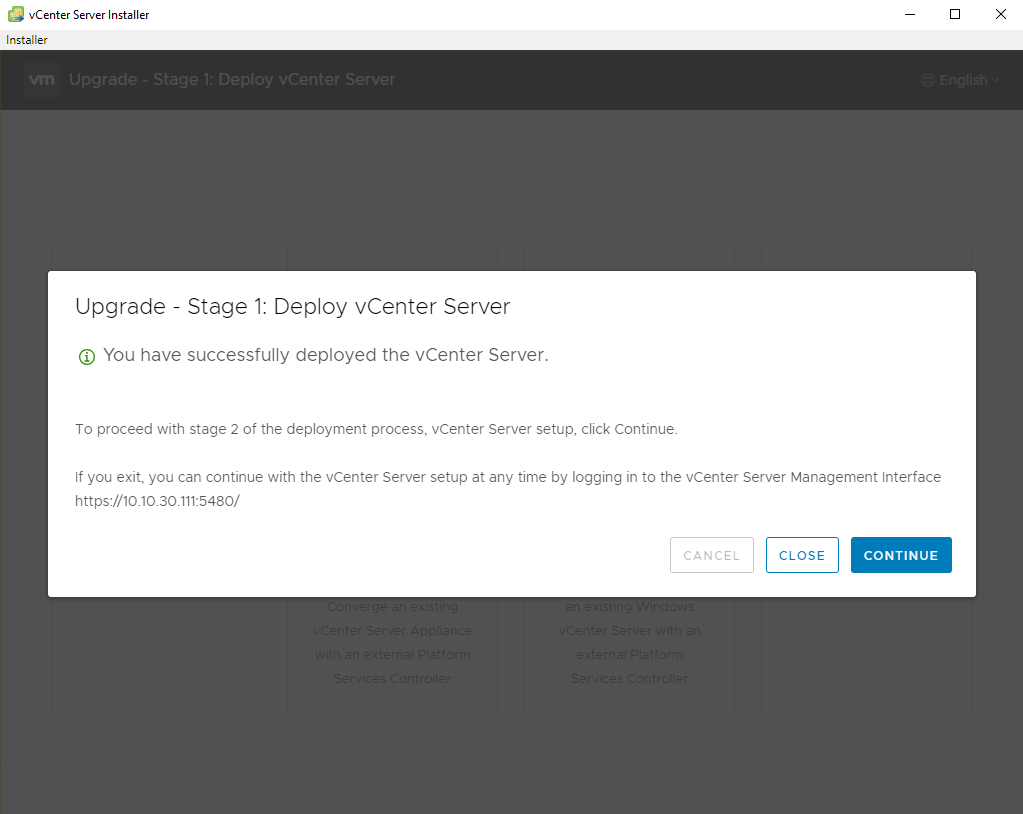
After several minutes, the deployment process will complete and we'll be prompted to continue on to the second stage of the installation process.
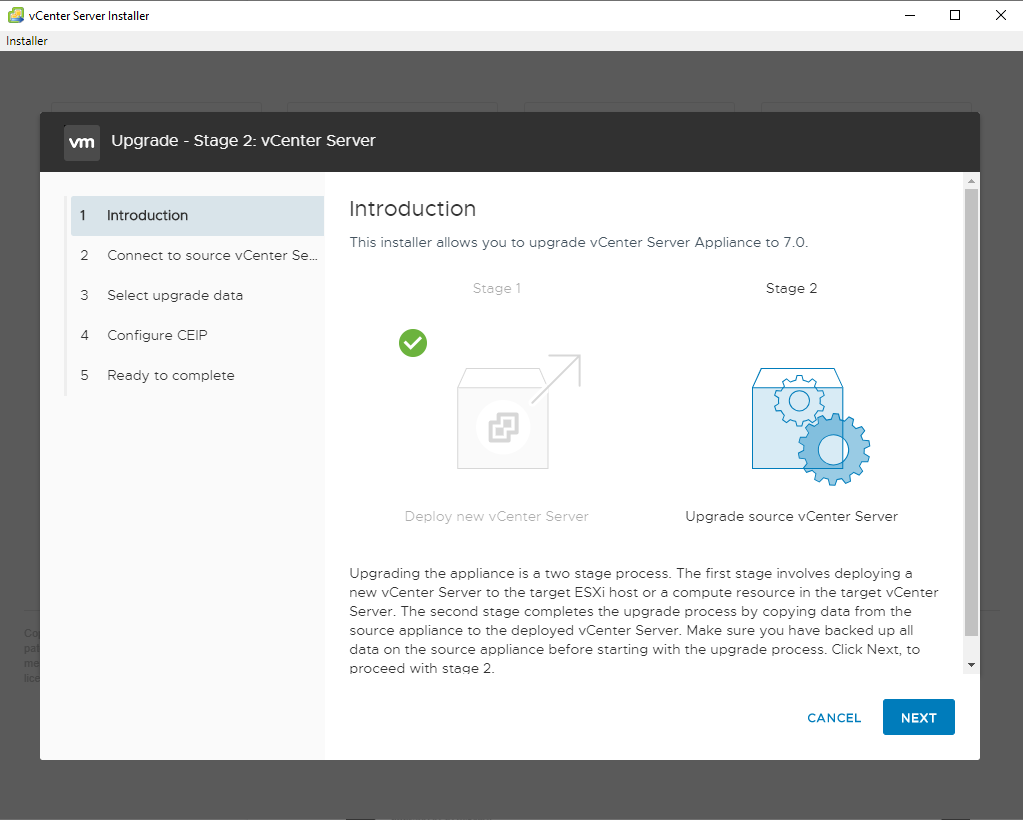
After clicking "continue", we'll be given another introductory page.
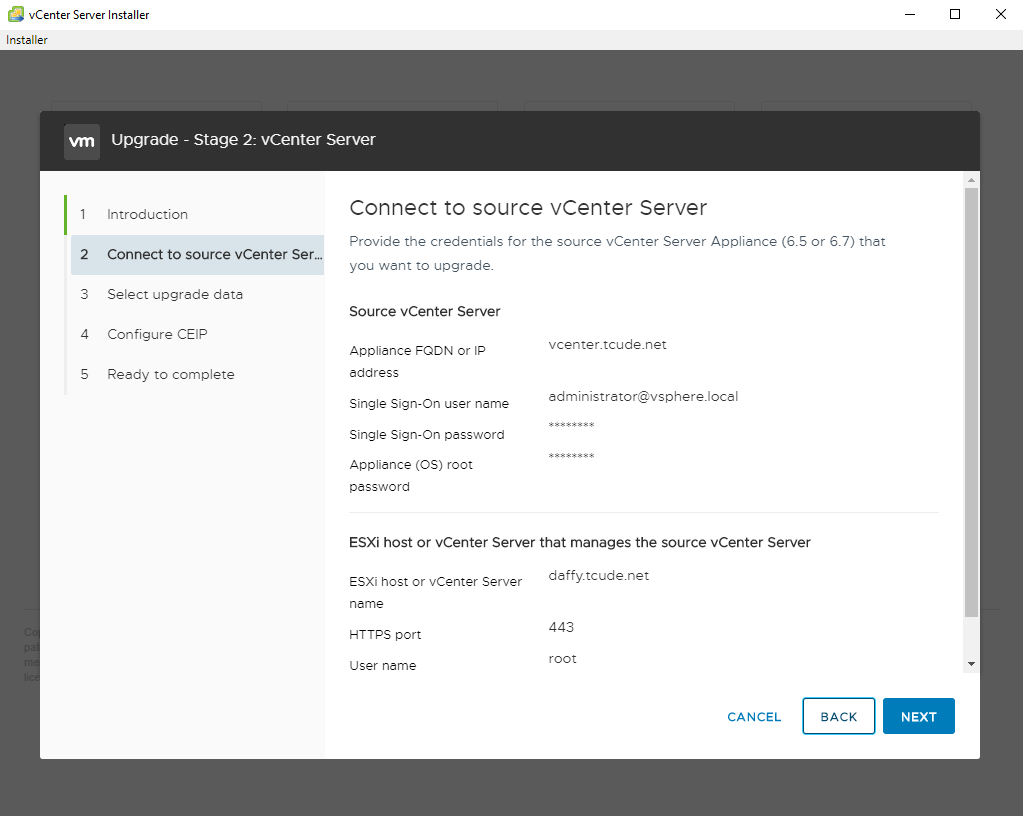
This step will be very similar to one of the earlier steps we took, where we'll need to provide the credentials for the appliance that we'd like to upgrade.
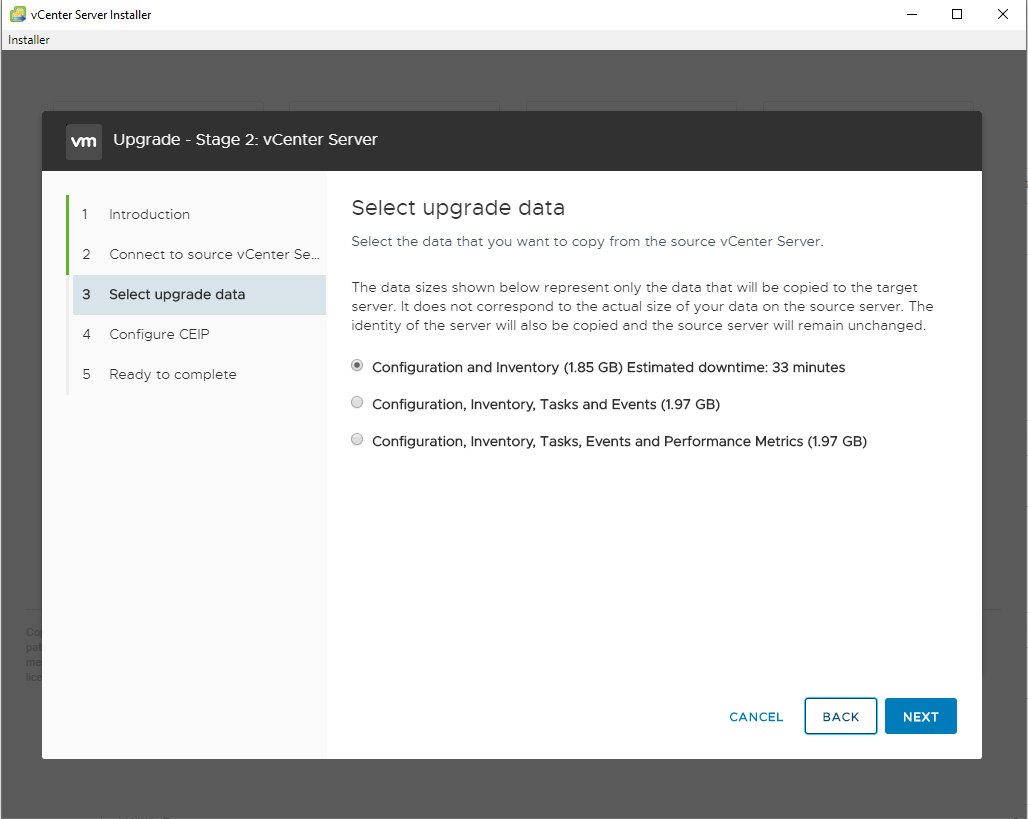
On this step, we'll be given the option to select what data we'd like to carry over from our current vCenter appliance to the new one we're upgrading to. I chose to go with the bottom option and carry over everything from my previous vCenter setup.
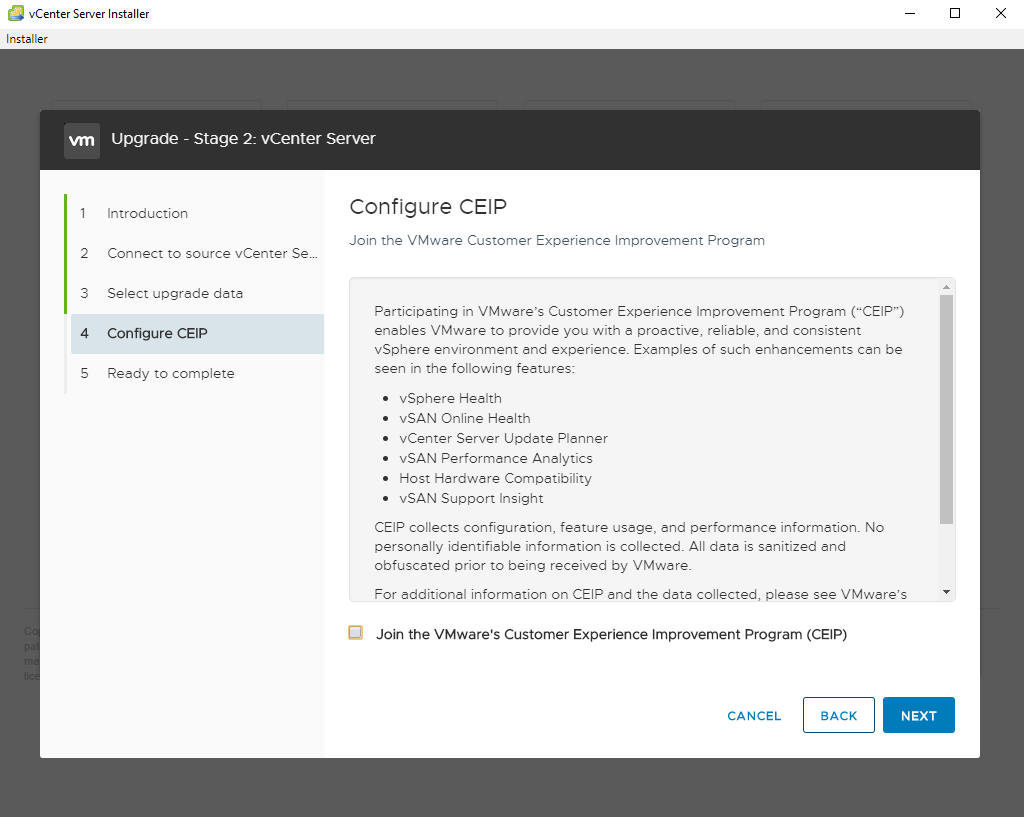
We're now prompted with the option to join the VMWare CEIP. I chose not to.
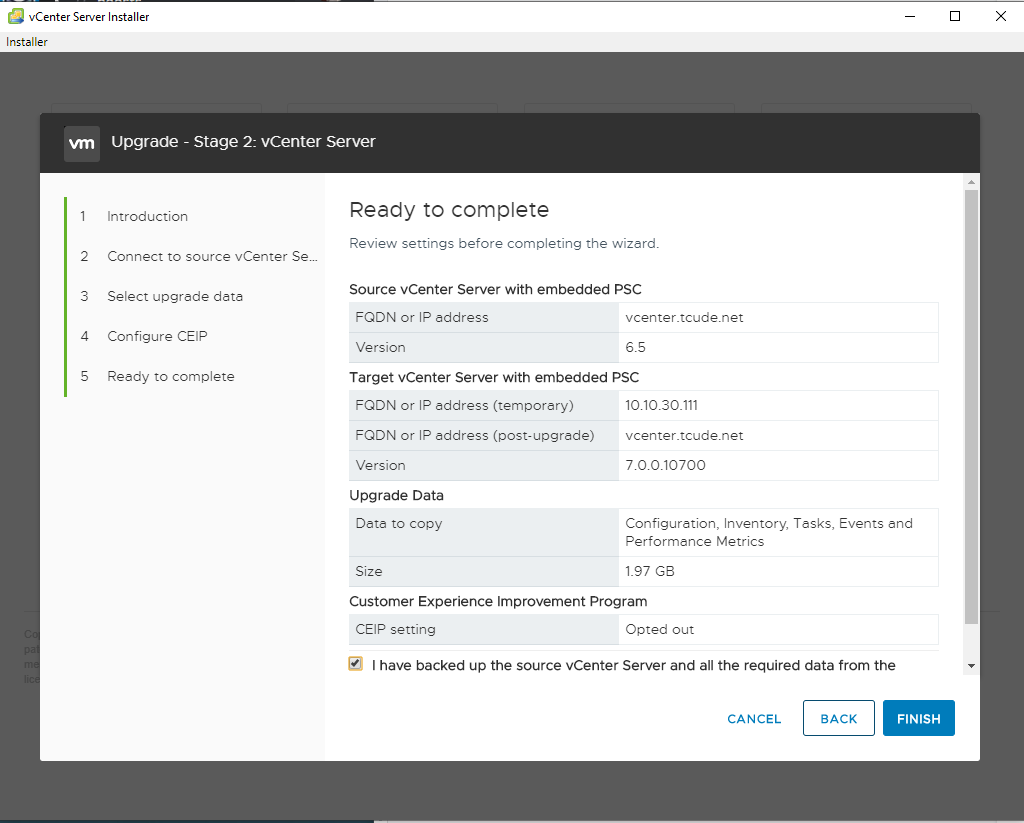
It's now time to review our configuration before finalizing the installation process.
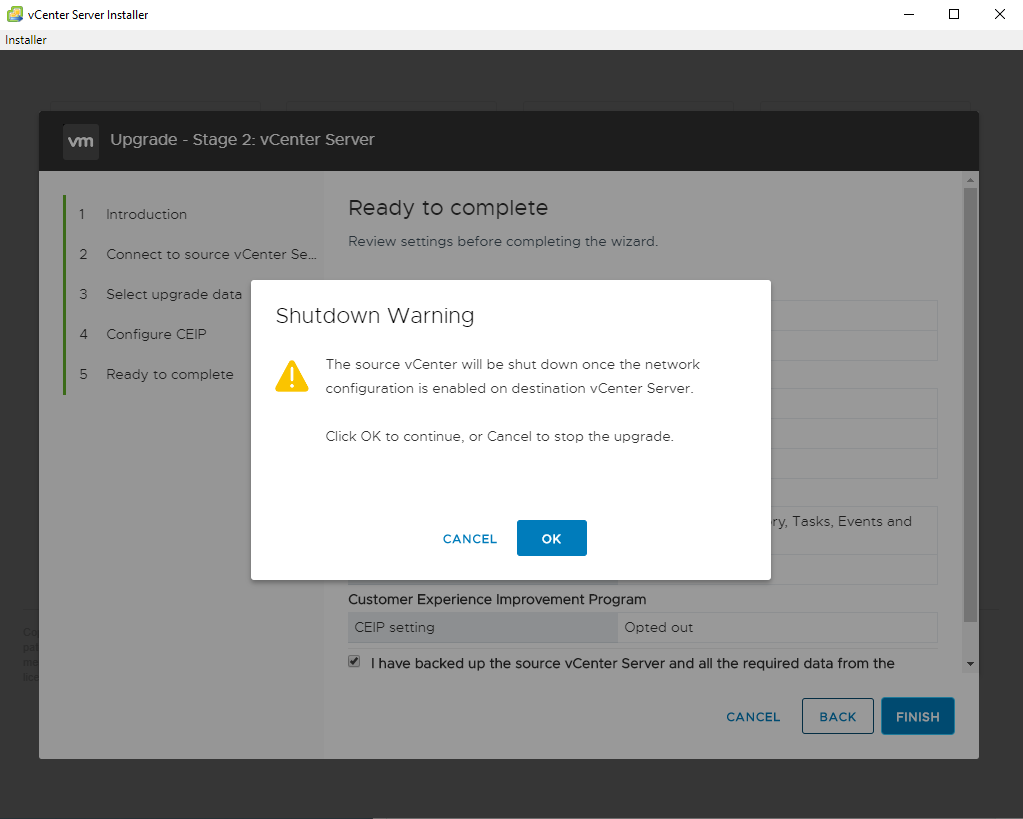
We'll now be informed that our vCenter appliance will be powered down to complete the second phase of the installation process.
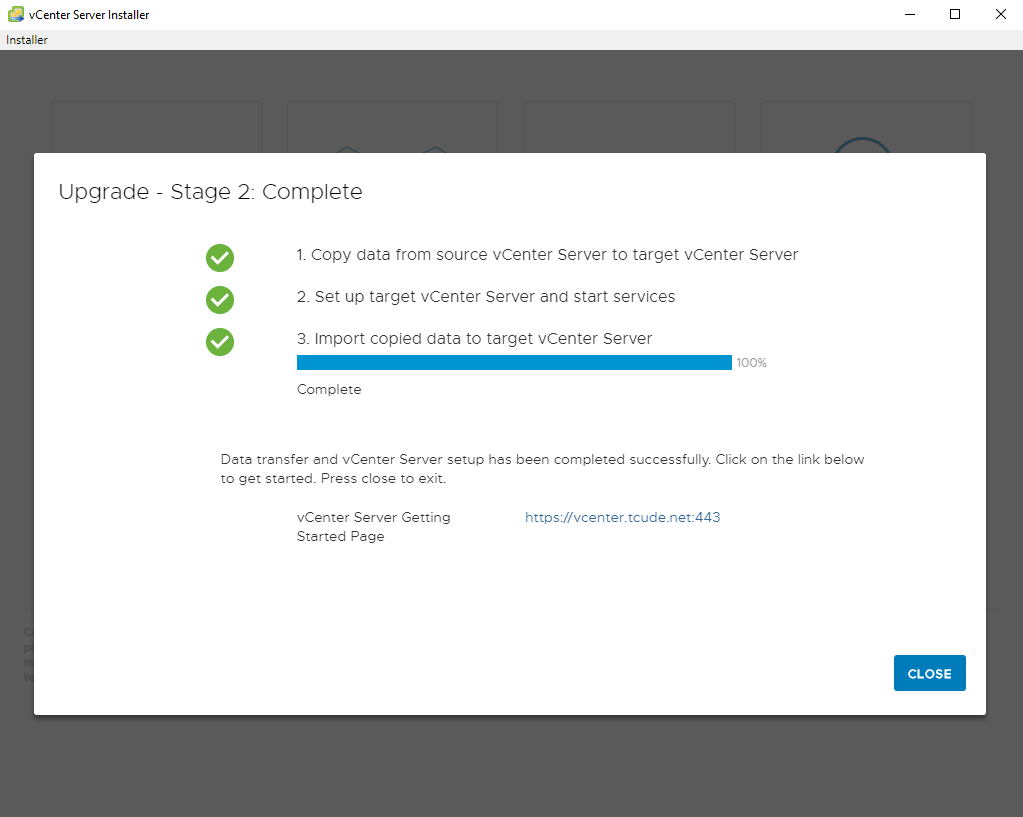
Once the upgrade process is complete, we'll be given the link to our new vCenter Appliance.
After navigating to the URL we were provided, we can see the new and improved vCenter 7.0 UI, which has a much more modern UI. I definitely prefer the look of the UI and enjoy not having to deal with flash player to get the full functionality out of my vSphere environment.
While this guide was fairly lengthy, I hope you found it helpful in answering any questions you might have on the upgrade process for vCenter. In future guides, I'll be covering how to create clusters within vSphere, along with how to upgrade versions of ESXi.