Migrating Plex to Docker

Introduction
Plex has been a staple of my homelab from the beginning. The appeal of having my own media server is what initially pushed me to build my very first home server utilizing spare gaming PC parts that I had lying around.
Since then, my lab has changed dramatically and my methods of handling my apps and services have, too. Gone are the days of installing a .deb packages for everything and managing all sorts of dependencies. Generally, I now try to containerize any service I can due to the simple and portable nature of running containerized workloads.
That being said, containerizing my Plex instance was long overdue and, upon looking for documentation on the process, I found that there wasn't really much that exists in terms of documentation to follow. Today's write up will quickly cover the steps I took to migrate my existing Plex installation on Ubuntu 20.04 into a Docker container. With minor tweaks, this migration guide will also be relevant to many other methods or operating systems you might have used to originally install Plex, such as on a Synology device.
Migration Steps
Before you begin the process of migrating your Plex instance, it is important to ensure you complete a couple of quick steps in preparation.
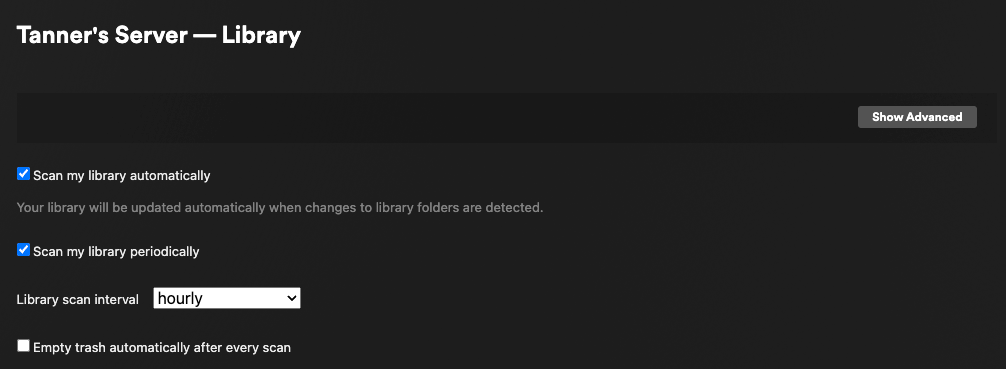
First, on the source instance, uncheck "Empty trash automatically after every scan"
Now, under Settings -> General, sign out of your server.
Next, shutdown your Plex instance in whatever manner is appropriate for your setup. For my instance that I installed using a .deb package on Ubuntu, I used systemd and issued the following command: systemctl stop plexmediaserver.service. To ensure your instance has stopped, you can then run systemctl status plexmediaserver.service.
Migrating Your Plex Data
Once your source server has been stopped, you will now need to create a copy of your Library directory. This is where all of your Plex data lives and we will simply copy it over to the new location where Docker container will reside.
For this example, we will use the path of /home/<your_user_here>/docker/plex/config. While you can really run the docker container anywhere, your Library file needs to live within a directory called config that the docker-compose file will ultimately end up looking for.
To copy the data, I issued the command cp -R /var/lib/plexmediaserver/Library /home/tcude/docker/plex/config. After issuing this command, you will likely have to wait a bit as the large directory is copied over. Mine ended up being about 24 gigabytes in size.
Once done, my setup looked something like this:
tcude@amarillo:~/docker/plex$ ls -l
total 4
drwxr-xr-x 3 tcude tcude 4096 Feb  7 02:15 config
tcude@amarillo:~/docker/plex$ ls -l config/
total 4
drwxr-xr-x 3 tcude tcude 4096 Feb  7 02:15 Library
Creating the Container
Now that you have migrated your Plex data to the new container directory, it is time to create the container, itself.
To do this, I utilized Docker Compose, and created a file called docker-compose.yml in /home/tcude/docker/plex that contains the following:
version: "2.1"
services:
  plex:
    image: lscr.io/linuxserver/plex:latest
    #image: plexinc/pms-docker
    container_name: plex
    network_mode: host
    environment:
      - PUID=1000
      - PGID=1000
      - VERSION=docker
      - PLEX_CLAIM=paste_your_claim_code_here
    volumes:
      - ./config:/config
      - /mnt/library/tv:/tv
      - /mnt/library/movies:/movies
    devices:
     - /dev/dri:/dev/dri
    restart: unless-stopped
If you are using Intel QuickSync, you can pass through your device in the devices section, shown above. If this is not relevant to you, you can simply comment out or delete this section
Starting up the Container
As a final step before running docker compose up -d to bring your container up, I suggest visiting https://plex.tv/claim to get a claim code. This claim code can then be placed in your docker-compose file in the appropriate section, shown above. It is worth noting that they are only valid for a few minutes.
You are now able to proceed with starting up Plex within Docker. To do this, simply run docker compose up -d.
Once done navigate to the Plex web interface for your new instance which can be found on https://your_device_ip:32400/web
From here, you will go through some setup steps. At this point, you might notice that Plex is showing that you have two servers under your account, with one of them being offline. This is normal and Plex will remove your old server pretty quickly on its own.
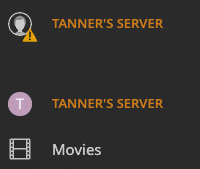
Here is an example of what I ran into.
Final Touches
Now that your new container is up and running, there are a few important steps remaining.
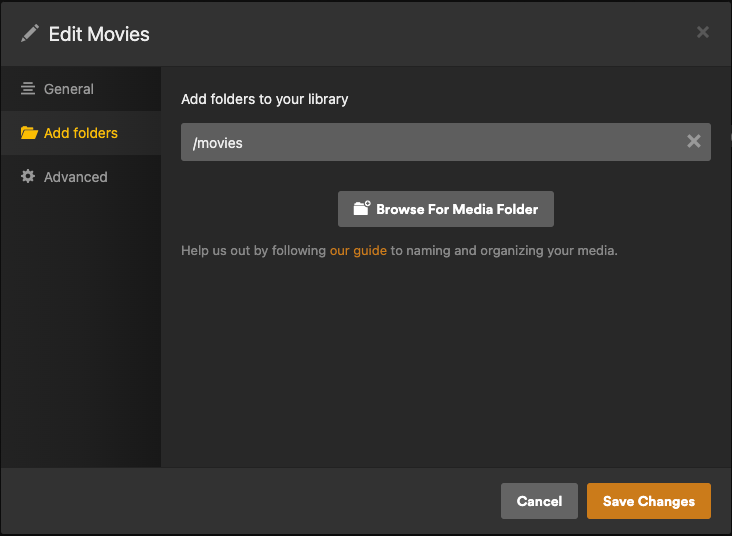
First, within the web interface, start by going to Settings -> Manage -> Libraries and update the paths to your media. If you followed my docker compose file, these will simply be /tv and /movies for their respective libraries.
Next, re-enable Empty trash automatically after every scan, that you previously disabled in an earlier step.
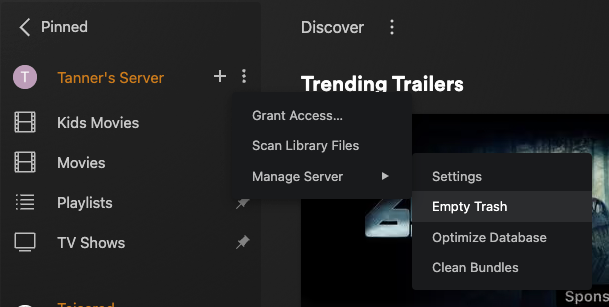
Finally, as the last steps, you will need to Empty Trash, Clean Bundles, and Optimize Databases, as shown below. It is worth noting that it is likely best to wait a few minutes between clicking on each of these.
Conclusion
With that, you should now have successfully migrated your Plex installation into a Docker container and are able to take advantage of the many benefits that a containerized workload has to offer.
While you're here, you might find this related article helpful:
Please consider checking out my other articles and subscribing to my site and/or RSS feed to see future posts: